If somebody shows you a ‘solid-wood’ acoustic guitar, what they mean to say is that the top of the guitar, its back and its sides are made of single pieces of wood.
In comparison, a ‘laminate-wood’ acoustic guitar – as the name suggests – is made up of thin layers of different woods stuck/pressed together. So, the top may have a thin slice of spruce/cedar and layers of ordinary wood underneath. Likewise, the back and sides may have a thin layer of rosewood/mahogany/walnut on the very outside and thin layers of other woods underneath.
So, what is the difference? The difference, my friends, lies in the quality of sound that each instrument produces.
Let me explain. Homogeneity and heterogeneity are paramount when sound and its transmission are being considered. Sound will travel through a single piece with ease and without any loss of energy, and yet, through different pieces – no matter how well they are stuck – there will certainly be loss in amplitude, sustain and overall sound quality.
Workmanship aside, why do you suppose the top end Martin and Taylor acoustic guitars cost so much? Because one VERY BIG factor influencing sound is the wood used. Top end models of these brands use only solid wood and they ring true.
In the US, an acoustic guitar with a solid top and laminated back and sides costs somewhere around $600-$700 (Rs 42,000 – Rs 49,000). A solid-wood guitar could cost $1300 – $1500 (Rs 91,000 – Rs 1,05,000).
In India, you can lay your hands on a six-string contraption for as little as Rs 1,500. I leave it to your imagination what wood manufacturers may be using in such instruments and what these instruments would be sounding like. And for those who wish to give the cheap-labour counterargument, how cheap is the labour in India that a decent instrument costs Rs 42,000 in the US and Rs 1,500-2,000 in the country?
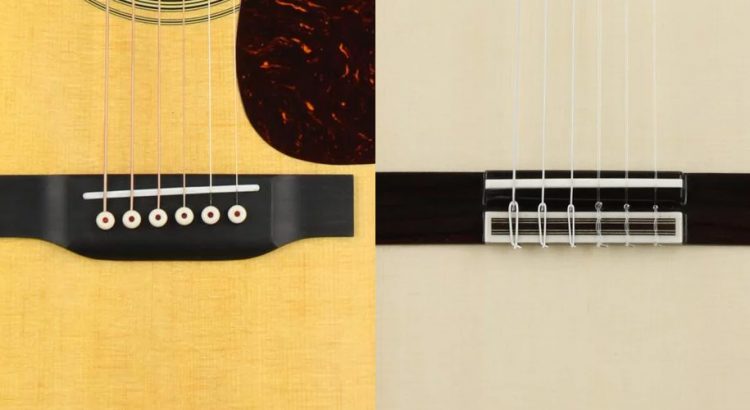
Checking for solid/laminate wood
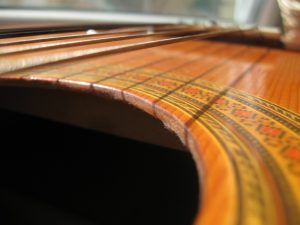

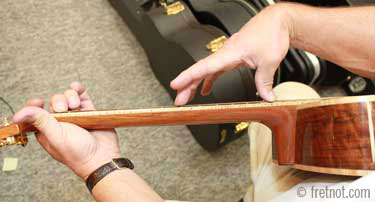
On the right is an instrument with solid-wood top and on the left, a laminate-wood topped instrument. How can I say that? By looking at the wood along the soundholes of the two guitars. The grain of wood (the pattern that wood forms) runs right through the wood and the side of the soundhole shows it too.
In contrast, the soundhole on the left, clearly shows that different woods have been used to make the top of the instrument.
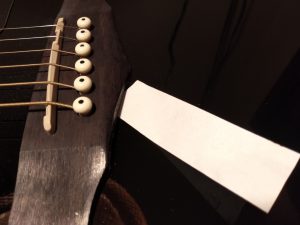
While looking at a guitar, if for some reason you are unable to make out from the soundhole of an instrument whether it is a solid or laminate, shine a torch through the soundhole of your instrument. If you see a wood grain you are assured 50% that it is a solid-wood instrument. However, if you can match the pattern inside with the one directly outside, you can rest assured that it is a solid-wood instrument.

But then why did I say that seeing wood grain on the inside of a guitar makes you just 50% safe? That’s because people are smart. They use a thin veneer (slice) of rosewood/mahogany/walnut on the inside and on the outside, making up the thickness with ordinary wood in between!
The maintenance of both
Despite being a high-dollar guitar, the solid-wood instrument is the one that requires a lot of care though not too much of maintenance. Weather fluctuations and climate changes affect the homogeneous wood immensely. However, in the absence of that care, things can go awfully wrong, rectifying which can rip a huge hole in your pocket.
In contrast, the laminated acoustic guitar is a much more sturdy instrument, standing up to the vagaries of nature stoutly. The warping, bending so characteristic of the solid-wood instrument is not seen here. But then the quality of wood used takes a lot out of the sound that it produces.
So, which one should you buy?
The guitar made from laminated wood is (usually) like a contented child, not giving much trouble ever, but the solid-wood guitar is like that pampered brat who demands attention all the time, and is pricey to boot.
But once you play a solid-wood instrument for some time, no other guitar will match up to the quality of sound it produces and its projection. If you can stand the tantrums of this baby, there is no better.
In India, you can get a ‘proper’ guitar upwards of Rs 6,500 – Rs 7,000 which would have a solid top and some fairly decent tuning machines on it. A solid-wood guitar will cost upwards of Rs 18-20k.
But should you shell out that much? The cards are on the table, you decide!