Just a quick one this Sunday to keep all you loyal readers of this blog in good humour. But I promise you there is big one coming.
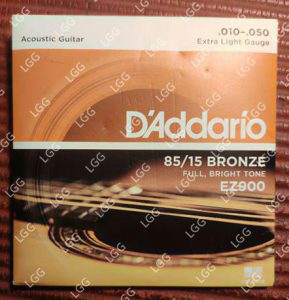
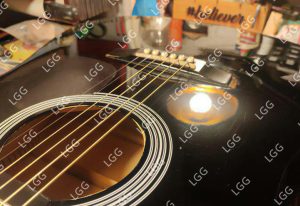
This Hertz came to my work table with a simple request of a change of strings and the regular cleaning and oiling.
Assessing the instrument, I am happy to report – as I did to the owner – that it wasn’t a bad instrument by any stretch of imagination. I have seen some very average instruments carrying some very big brand names.
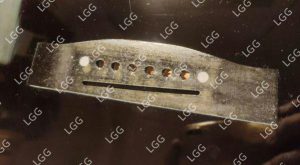
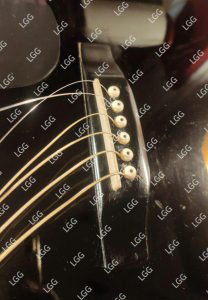
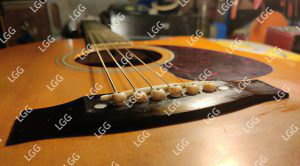
I suggested to the owner that he swap the factory-fitted plastic saddle and nut for bone elements for a much improved volume and sound quality. He agreed.
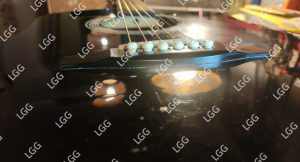
Another reason for the change was prompted by the original saddle being a couple of millimeters smaller than the slot cut for it. Look carefully in the photograph above and maybe you’ll be able to make out.
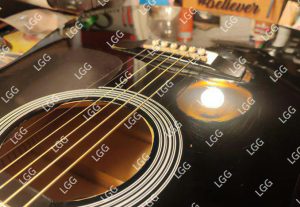
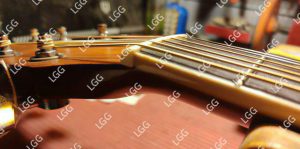
Otherwise the fretboard and bridge were very dry from months of neglect.
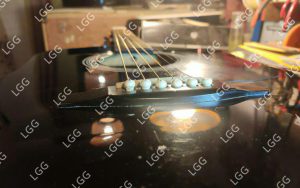
And if you wanted more proof of the neglect,
Oh, whatever! No big deal.
I just went about my work and cleaned up everything the best I could.
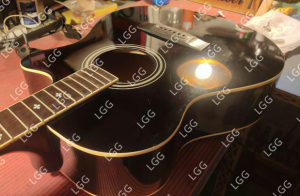
The guitar was a whole new instrument – or so it seemed – once I got through with it.
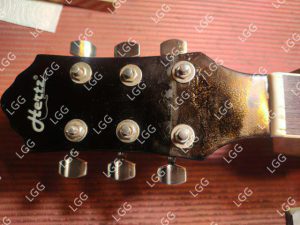
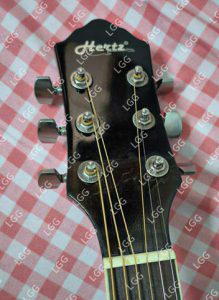
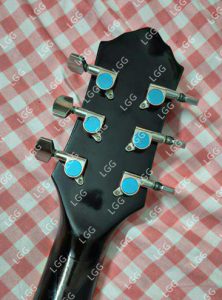
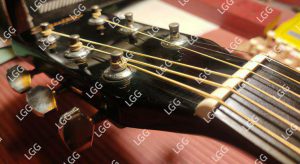
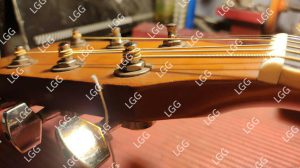
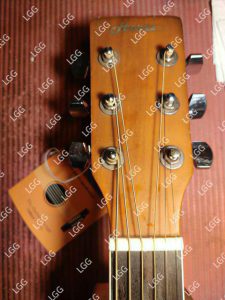
And while I was trying to string it up, I thought the tuning machines were just a tad loose. So, all the ferrule nuts and the screws holding the tuning machines to the headstock were snugged up.
Remember how I say that the same kind of guitars, or, guitars with the same kind of problems seem to follow each other to my work table? Well, here is another prime example.
Some weeks back, this instrument came back to me
Those of you who are regular readers of my blog, will remember this one. For those of you who would like to read what work was done on this one, you can do so here
The bridge split that had cured so handsomely, had returned to be worse than before.
And not just the cracking, the bridge was even lifting.
The owner was sure that he did not want the old bridge repaired but wanted a new one to take its place.
Easier said than done, as I learnt during the last repair. But if it had to be done, it had to be done!
As I was taking off the bridge, I realised that there was a belly behind it. For the new bridge to stick properly, one had to give it as flat a surface as one could possibly have.
So, the first thing that I did after the bridge came off, was to clamp it flat with some heavy duty clamps.
After 48 hours of remaining clamped, when the pressure was released, the results were pleasing
With the clamps off, I tried to figure out why the bridge had come loose and why it had cracked again. The tell-tale marks were found here
This crack in the top told me that it was this that helped create a crack in the bridge. However, a disconcerting thought crossed my mind. If a crack in the top aided a bridge crack, why could it not cause a crack in the bridgeplate too? My heart sank at the thought of a split bridgeplate.
If that was so, then it would be useless to replace the bridge on it, for that too would crack soon. I peered through the soundhole, keeping my fingers crossed, half expecting a big, old split to stare back at me, but thankfully, the bridgeplate was solid without any sign of trauma.
Quickly, I went about repairing the top, such that the split itself became invisible.
While I was working my mind was also searching for reasons why the bridge had lifted again. It was then that I saw it
This was a remnant of the spruce veneer of the multi layer top. It was amazing how evenly it had broken off, as if someone had cut it with an X-acto knife. You must forgive my mistaking it as a mark left by the bridge during the factory assembly process, when I removed the bridge the first time around. This little border of spruce prevented the bridge to stick to the top properly.
Now that I knew, I went about removing this border under lights and magnification.
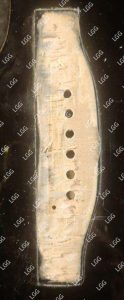
After spending about 45 minutes carefully removing the border, such that the finish remained undamaged, the footprint looked like this
Notice also that there is no sign of a crack in the top!
Thereafter began the process of glueing the bridge to the top. As I placed the new bridge on the old footprint the holes refused to match. If I matched the holes, there was something like a 2 mm of the bridge footprint exposed behind the bridge three-fourth of the way.
There was nothing to be done except plug the holes and redrill new ones.
Out came the violin sound posts and I went to work. Cutting each plug in line with the top and then sanding it flush, slow and tediously, the job got done in the end.
With everything else in place, it was time to slap on the bridge
The entire exercise ended two days later when the clamps came off. The fretboard and the dry, new bridge were given a coat of love, and a new saddle was put in place of the old bent saddle.
The owner decided to put in strings on his own and so that is how the instrument was returned – without strings but with the saddle standing in its slot!
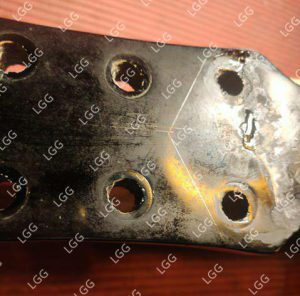
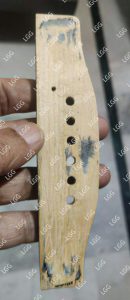
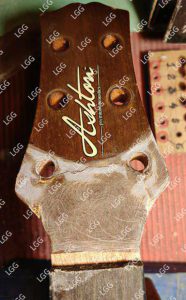
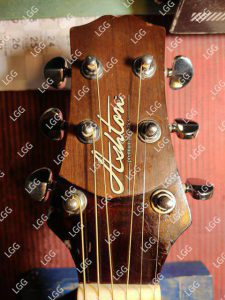
A while back this #ashton came to me in this state
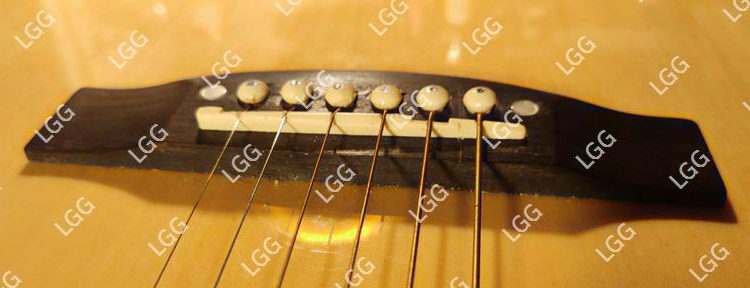
Not only was the bridge split through the line of the bridgepin holes, a (possibly) leaning saddle had also split it open in line with the saddle slot. See? If that was not enough, the bridge was lifting so much, I had to probe and poke to see what was holding it on!
If it had been just one of the splits and not both together, I would have still repaired the bridge, why, you will learn soon. But this one was beyond redemption and just had to go.
It wasn’t a bad guitar and the construction quality was quite alright, except for the dry fretboard,
quite a common ailment in the instruments that come to me, but even the best guitars can fall apart if not taken care of properly.
With this #ashton, there was nothing which could be done except replace the bridge. Now, I am always wary of replacing bridges for I don’t have the space to possess the wherewithal to fabricate a bridge from a piece of wood. I am left with two or three shapes of bridges that are available in the market.
Given the number of guitar companies out there, each bridge is slightly different, and if I have to replace a bridge, I choose the one closest in shape and size to the original.
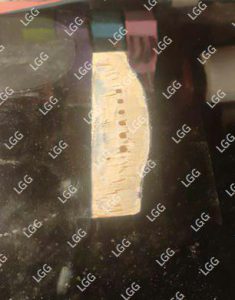
But first the original bridge needed to come off and it did pop off though the (CA) glue used to fix it to the top refused to let part of the bridge part with it.
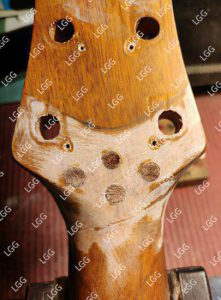
After the partial cleaning, the bridge footprint looked like this
There was still lots of CA glue deposited on it, which needed to be removed, but more on that later.
Without the bridge on, I could plainly see that string tension had worked on the bridgeplate and a not-very-good-quality bridge, causing it to split. Just from the outside, I was sure that the bridgeplate too would have been split, but peering inside, I was happy to note that that tragedy had not struck. The bridgeplate, though, had buckled somewhat under string tension.
So, the next logical step was to remove the belly and try to straighten out the bridgeplate.
While this process was on, I selected a bridge that could replace the original
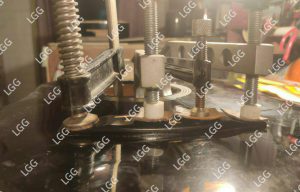
The replacement bridge had bridgepin holes marked but they had to be drilled through. That was done and then the diameter of the holes was checked by pushing bridgepins through them, to see where they sat.
Almost all holes needed to be reamed, and so, each hole was reamed some till the bridgepins sat perfectly.
Then I tried setting it on the guitar itself by pushing two outside bridgepins through the bridge and the top.
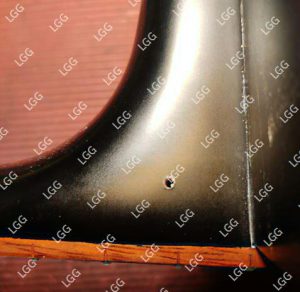
Carefully inspect the corner of the bridge closest to you. Do you see it?
While the ‘e’ bridgepin hole lined up perfectly with the hole in the top, the other five moved progressively inside the line of the holes in the top. The only solution was to plug the original holes in the top, stick the bridge and then redrill the holes, so that the bridge sat in the right place (without affecting the intonation). AND THAT IS EXACTLY WHY I DITHER FROM REPLACING BRIDGES!
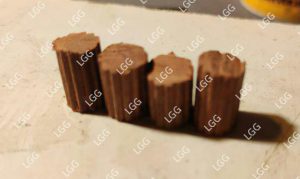
So, I went about plugging the holes with these spruce wood violin sound posts which I had bought many, many moons ago, because I knew one day I might have use for them – exactly for this purpose. That day had come.
Very briefly, sound posts are installed inside violins and other instruments belonging to the violin family (violin, viola, cello, double bass). Not only does the sound post support the top of the instrument, it can also alter the tone dramatically, and completely change the sound depending on the position or angle.
While I enlarged the holes in the top a bit to receive the posts, I sanded the posts themselves a bit so that the fit would be a snug one.
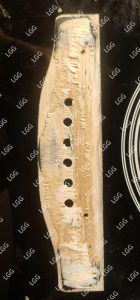
After all the holes were plugged they were cut and sanded flush, such that if one ran a finger along them, he would not feel even the slightest lip.
Now the stage was set for the new bridge to be stuck to the top. I did that and made it sit perfectly on the footprint of the original bridge, but – believe it or not – forgot to take photographs of the process!!!
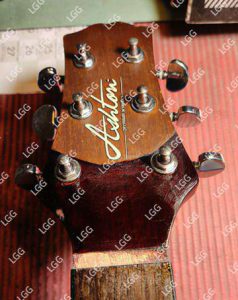
Anyway, the bridge stayed in clamps for two days, during which other areas of the instrument were given love: the headstock, the hardware on it, the fretboard, the fretwires…
Fretboard being cleaned of dirt and grime deposits
After the clamps came off, new holes were carefully drilled and the new, very dry bridge was given a coat of love which made it shine, while making the grain in it pop out.
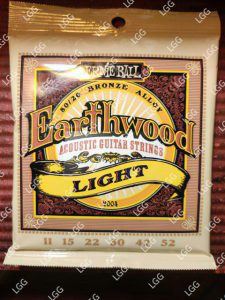
All that was left to do was to string up the instrument and see if everything was in order. The owner had chosen these strings for his guitar.
Here are the final few parting shots of the #ashton, looking every bit the billion dollars it wasn’t! The bottom line though, was that the owner was mighty pleased with the results.
Oh! Did I mention that the instrument got a lovely set of bone nut and saddle too? It did!!
HAPPY NEW YEAR, FOLKS!!! May the year be one of fulfilment, peace, happiness and prosperity!
Some time ago, this older #Yamaha F310 came to me with a complaint of action so high that it was unplayable beyond the 5th, 6th fret.
It had a rising bridge,
which in the process of its lift,
had pulled the top too along with it, giving the instrument a more-than-healthy belly. A look inside showed the main cause of the problem – the ‘X’-brace arm on the bass side had come unglued.
Seeing the loose brace, the belly and the rising bridge, I was pretty confident that the action problem could be solved pretty easily. That was my undoing.
More on that later.
I started work with taking the old strings and the bridge off the guitar.
Not the cleanest of jobs I have done, yet nothing that I could not remedy. So, the first order of business was to get all the fibers of the top glued down to create an even surface for the bridge to reglue to.
Once this was taken care of, I reglued the loose ‘X’ brace arm, which to my understanding, was the main cause of the belly bulge and action.
The reflection in the mirror shows the brace pushed against the top, and if you look really carefully, you’ll be able to see the glue squeeze-out too.
After this was taken care of, work to cut the belly down to size began.
With each 48-hour effort, the belly was reduced some. The following photographs show the results of the last two efforts
Once I was satisfied with the results, it was time to bring the bridge and the top together.
And while the bridge remained clamped for another 48 hours, it gave me time to work on other neglected areas of the instrument – like the fretboard.
Oh, and there was also an under-saddle pick-up attached, which the owner felt had outlived its utility. He asked me to remove it. Removing the under-saddle piezo element meant creating a shortfall in the height of the saddle.
Considering all the work done on the guitar, I was sure that the saddle without the piezo element would fall terribly short and would have the strings flapping around on the fretboard. So, I buttressed the saddle not with one, not with two, but with three plastic shims. It helped that #yamaha uses plastic nuts and sadddles in the F310.
Now, all that remained to be done was to string up the instrument. The owner had chosen these
I tuned up the guitar and to my horror, it had an action high enough for a double-decker bus to pass under! I tried shaving the saddle, I tried fiddling with the truss rod, I even dialled in a lower than usual action at the first fret, but all these brought about mere cosmetic alterations.
It was then that my attention went to how and why the top under the fretboard extension had broken loose and was jutting forward in the soundhole.
I could make out that the neck block inside the guitar had come loose, and tilted forward, and with it moved the portion of the top under it. In fact, so severe was the move that the portion of the sides glued to the neck block had also moved – just about an inch on either side and along the very top of the neck-to-heel joint. I forgot to take photographs of it.
My earlier thinking that I would just be able to tap the neck block back into place, after smearing some glue behind it was grossly flawed.
Unfortunately, the neck block must have moved under string tension during the months of extreme heat, when the glue must have melted somewhat. The glue then dried on the block, sealing it in a tilted position, pulling forward everything in its contact, thus leaving no room for intervention.
The only way to solve the problem was a proper neck reset, which was too much for this old guitar – the owner’s first. As sentimental value goes, the owner would have to continue to play up until the 5th, 6th fret – after all the time and effort put into the instrument.
Though each instrument which I fail to correct, saddens me, this one was probably the saddest of all, for I knew that the owner had set his heart on playing his beloved guitar right up and down the neck and not just on the first five frets!
To those unfamiliar with the brand name, Seagull Guitars and Simon & Patrick are sister brands under the Godin company, a Canadian giant (To know its worth just check out its selling price in India).
I received this model to work on, recently.
The owner, a knowledgeable young man, brought in the instrument after he saw the action rise on it and discovered that the bridge was rising.
As I went over the excellent construction of the instrument, one point rankled me – the nut and saddle on such a pricey instrument was of a micarta-type material. Now, don’t get me wrong. I’m sure there are many who find nothing wrong with the material, but in my book, nothing matches up to bone except ivory! If you don’t fancy too bright a tone, I could do buffalo horn for you.
Anyway, the customer was all for the bone replacement after I extolled its virtues to him.
Strings were taken off, before the bridge was gently prised off. Imagine my surprise when I discovered that the bridge had been glued on with regular wood glue (they still find the time to do such things???)!
I’m joking, of course! In an ideal world you want the bridge to be glued on to the top with wood glue, so that when people like me need to take it off – for whatever reason – it comes off clean without damaging itself or the top.
But did I say it came off clean? It did, well almost, except it pulled up a little flake on the treble end of the top. Nothing that good old wood glue wouldn’t cure.
While this dried, I went to work on the bridge.
Despite getting glue and little wood fibers off it, there was still an odd boundary marked on it, probably left by the margin on the top.
Do you see it? I cleaned that up and I cleaned up the bridge too. But then there was still a step to go before I could glue the bridge to the top: checking whether the bridge was flat enough to be stuck to the top.
Simple, mark it with pencil and then keep sanding till the pencil lines disappear. But actually, not so simple. It required a lot of elbow grease, and with it, time.
Finally, I got it looking like this
With everything ready, I glued and clamped the bridge to the top.
While it cured, other areas of the instrument were paid attention to like the fretboard, the fretwires and the hardware on the headstock.
There was just a bit of a problem: the nut was just a hair short in its slot. Meaning, the width of Seagull guitar necks is slightly more than what I am generally used to working on. It was a mistake and I told the owner so. He was gracious enough to say that if the instrument played correctly, he did not have a problem with minor aesthetics.
So, here are a few close-up shots of the nut in the slot.
Meanwhile the glue had cured under the bridge and the clamps were taken off and the bridge was given a ‘coat of love’. Look at it glow!
The strings the young man chose were Elixir 12s.
With a swanky new bone nut and saddle and fresh set of strings, this baby could sing (I knew that without these three in place).
When the owner came to pick up the instrument, he was pleasantly surprised – maybe even thrilled!
Here are the parting shots not just of this blog post but the last blog post of 2025.
Have a blast ushering in the New Year, but stay safe, people. More importantly, keep your guitars safe!!!
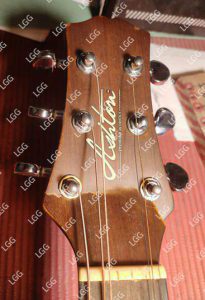
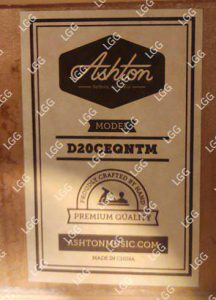
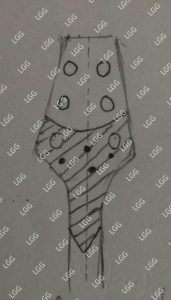
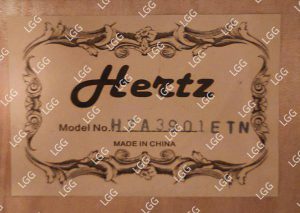
This landed on the workbench recently, and I still haven’t been able to figure out its name. The label read one name and the headstock quite something else but quite illegible.
A completely laminated instrument, it had some years on it and the job card was a litany of woes.
A probable reason for that could be that it was not a personal instrument but belonged to an office, passing through many hands.
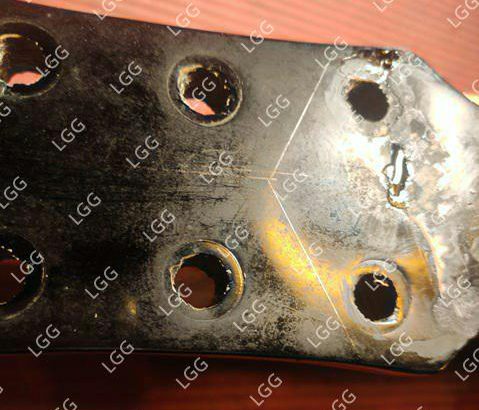
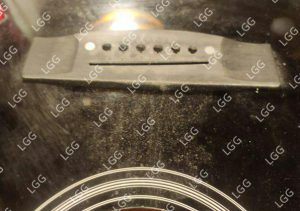
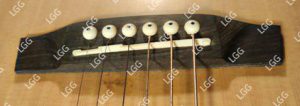
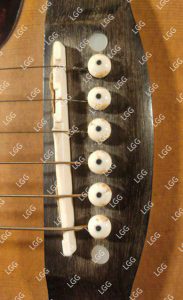
So, the guitar had a healthy belly, a crushed saddle was leaning in the bridge, and the bridge itself was lifting (naturally the action was sky high).
Did you notice something? Someone put the saddle in the reverse position. Wonder who was playing what on this instrument!
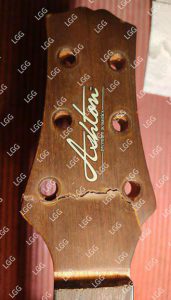
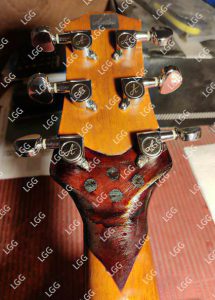
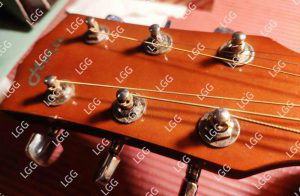
If that was not all, the guitar was missing a couple of ferrules on the front of the headstock
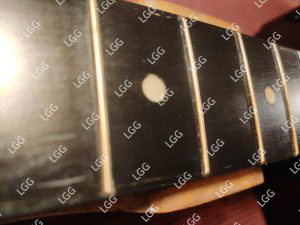
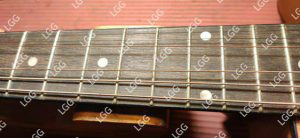
The dehydrated fretboard was sporting a large crack, spanning a few frets,
And, of course, the fretwires were tarnished while the fretboard itself carried a complete DNA record of who all had played it – or it seemed so.
The first thing to do was to take off the bridge to gain access to the entire area, so that the belly bulge could be dealt with.
And maybe, it’s time that I stopped repeating that the bridge was glued on with cyanoacrylate (super) glue.
With the bridge off, efforts began to push the belly out of the guitar.
After a 24-hour clamp time, the belly got reduced but had not gone completely. A second attempt was made with changed clamping positions.
Another wait of 24 hours, after which the belly was reduced to negligible levels. While it was in clamps, I decided to clean the bridge of all the CA glue and wood remnants.
After the clamps were removed, (the belly seemed appreciably reduced) the bridge footprint was cleaned up and readied to receive the bridge. For a good glue-up job, a good wood-to-wood joint is desirable.
Now, with everything in readiness, the bridge was glued to the top, clamped and left to cure for a good two days.
Of course, before the glue-up, I dealt with the crack in the bridge. Complicating matters was the fact that there was not one crack running through but two cracks that seemed to line up.
The two cracks were dealt with and this is the result
Also, the fretboard was cleaned of all its crud and the good wood shone through.
Also, a new saddle replaced the old crushed one. Since the owner(s) did not wish to put in too much money into it, the replacement saddle was also made of plastic.
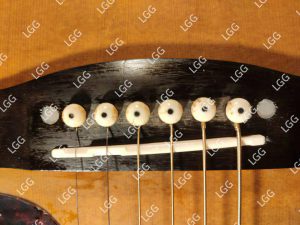
The missing ferrules were replaced, screw holes were plugged to receive screws and hold the tuning machines in place.
Strung up, I was happy with the results. So was the owner(s).
This Fender FA 125-CE which came to me recently – was, in many ways – a mixture of opposites. Quite clean otherwise, its headstock and the portion between the soundhole and the bridge, under the strings, was proof that dust was never removed from those portions of the instrument.
Though it seemed like quite the singer, its bridge had lifted, and had even pulled a belly in the top, behind it.
The ideal way to deal with a belly is to first remove the bridge and then go about straightening the top. If the bridge is lifting, it only helps things. Remove bridge, remove belly, clean both surfaces and reglue bridge!
With the bridge off, the first task was to clean the underside of the bridge and its footprint on the top.
Do appreciate the second outline outside where the bridge was actually seated. The outer boundary marks till where the finish on the top needed to be cleaned for the bridge to seat properly on the top. Both parts were cleaned with a lot of effort
Meanwhile, with the bridge off, I could see perfectly how warped the top had become.
That was the state of the top. Needless to say that the bridge too had got warped some.
The patient was rushed into intensive care and treatment began soon after.
The photographs above show the first 24 hours, which had some degree of impact
A second 24 hours was needed with some ingenious clamping
and after the clamps were removed, the belly had got reduced further (but had not gone completely).
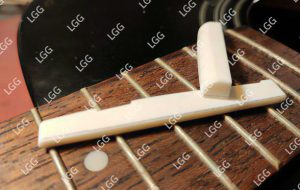
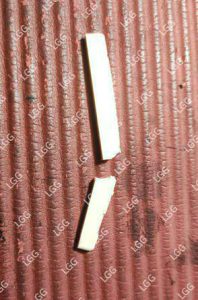
And while, the instrument stayed clamped, I worked on other areas of the instrument. The (plastic) saddle, for example, was curling and tilting in its slot – never a good thing for intonation. I told the owner that things would improve dramatically if he were to get a bone nut and saddle put in the instrument, and he agreed.
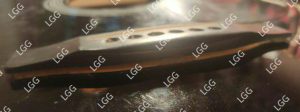
The factory-fitted plastic saddle is on the left and the new intonated bone saddle on the right. Can you see the difference in how straight the bone is?
Anyway, to those unfamiliar with these things, replacing a nut and saddle, is hardly ‘replacement’. Minute measurements make all the difference in a well-seated nut or saddle, and the the sound produced thereof.
Just to give you an example of the measurements involved
You can also see the area marked off to be removed from the saddle.
Meanwhile, the nut slot too, was readied to receive the new bone nut
The headstock too, was cleaned and polished
The fretboard, dry as tinder, (as also the bridge) were shown love, cleaned and oiled
And then began the process of glueing the bridge to the top.
Enough glue, enough clamping pressure and enough time, generally, makes for the perfect joint.
While the glue dried, I again found something to work on. Lacquer had chipped off near the end block, on the top, creating a small crater.
I filled it up and sanded it smooth to a point that when I was taking a photograph, I had difficulty finding the touched-up area.
The owner chose these strings to go on his guitar
But before I threw these on, there was a little graphite powder needed in freshly cut nut slots.
I strung up the guitar, waited a day and then called the owner and handed it over. The owner was pretty happy with the outcome.
However, a week or so later, he called me to inform that the bridge was lifting again! I called the guitar in, again took off the bridge, again cleaned up the two surfaces, again clamped and reglued it.
Hopefully, the bridge will hold fast now!
And as often as I do, I forgot to take photographs of the finished job!!!!!!!!!!!
I say ‘The return…’ because it is after a long-long time that a Yamaha, and that too a F310, came visiting me!
I had started to think that going by my consternation – which I have seldom tried to hide – for this particular model (sold in India), owners had shied from approaching me. For those of you who don’t know the reason for my angst, you need just go to the search bar of this blog and type in Yamaha. See what (all) you come up with!
Anyway, when the young man walked in with a Yamaha F310, my eyes just rolled up of their own accord, and he just stopped dead in his tracks. I controlled myself and asked him how old the instrument was. I think he said eight or 10 years old, which immediately brought relief to me, and I remember telling him, “Then there’s hope for you and that thing”!!
What was it in for? Just action adjustment, fresh strings and itty-bitty things here and there. As I inspected it, my wonderment grew by the second. Despite its age, there was no more than a hint of a belly on it. The bridge was stuck fast to the top and despite the crusty old strings on it, it carried a punch.
As my eyebrow rose in pleasant surprise, I had thought to myself – maybe aloud – ‘This must be from a time when Yamaha India had not become obsessed with money-making, when it started putting in crap pieces of wood together and started calling it a guitar”!
So, I got down to work and began to take the strings off (of course, after measuring the action on it). But as I got to the headstock, a nightmare stared me right in the face. There, smirking back at me, were six of the best Luthier Knots, waiting for me to undo them!!!
TIME FOR A RANT! Ladies and gentlemen, boys and girls, you don’t need a knot to hold a guitar string in the tuning peg. It is not a string string; it is metal. Wound right, guitar strings will stay wound on their respective tuning pegs till kingdom come! But should you decide to change strings, those knots will convert a 10 min job into a 45-min one, and if you’re anything like me, you’d be mouthing profanities for all of those 45 minutes!
I remember getting myself a drink of water after I finished taking the strings off.
A thorough cleaning of the body followed and as I kept the guitar aside, I went to work on the saddle to reduce the action. Another rant: you do not play with the truss rod to reduce action. You shave the saddle to reduce action! The truss rod has been provided to dial in an amount of relief that you find comfortable. IT IS NOT MEANT TO REDUCE ACTION! Yes, when you dial in or dial out relief, it affects action but it does not mean that action is to be corrected with the truss rod.
So, saddle shaving it was.
You will be pardoned for seeing sniff lines, but in fact, that’s just dust from the plastic saddle that Yamaha India so generously provides to its patrons.
Anyway, once I had taken off as much as needed to be taken off, I slipped the saddle back in its slot.
The fretboard, dry as tinder, and with tarnished frets
was cleaned and love shown to it, after which it shone. The bridge too, was paid attention to.
Time to restring and the moment of truth. I think the owner had provided me a set of strings to put on which I did, and WITHOUT any knots on the tuning pegs
I’ll leave you with the last few photographs to admire the F310!
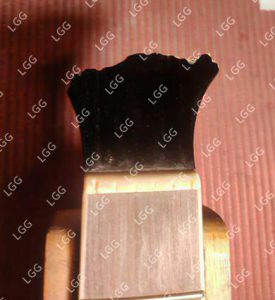
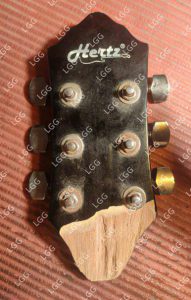
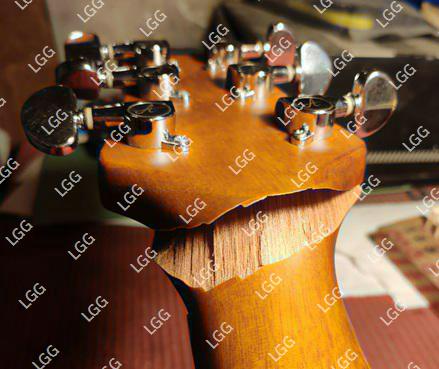
with not just a cracked but a lopped off headstock
Thankfully, the owner, a sensible young lady, did not try and get adventurous with glue, but instead, brought it to me.
Even if the headstock had not fallen off, the guitar seemed to have seen better days. That’s proven by the rust on the hardware on the headstock.
Besides, the fretboard and bridge were in a pitiable condition – dried to tinder.
I dry-fitted the two parts and they fit well, telling me that this would turn out to be a good and strong joint.
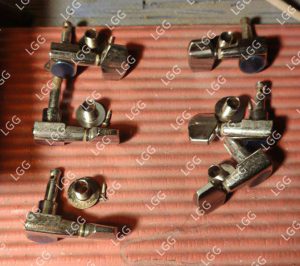
The next step was to take the hardware off the headstock, so that all that weight of the metal would not act against the glue trying to keep things together.
As I kept each tuning machine and its parts in order, I did clean and polish it up, so when it came time to put them back on, I would not waste any time cleaning them.
Thereafter, I applied glue and clamped the two parts together. That was the smallest job. Cleaning up the squeeze-out from around the clamps was the bigger problem. That too was done.
After two days of drying, I took off the clamps and as I had imagined, the joint was a good clean one.
However, while the seam was more than evident on the neck, on the face of the headstock the glue line was ragged and with missing pieces.
What followed was a very involved process of colouring, drop-filling, sanding, more drop-filling, more sanding till everything appeared seamless, well almost!
I had marked off the area to be sanded and worked within its boundaries. Later, that area needed a coat of something to make it similar to the rest of the headstock. Spray can lacquer seemed like a good bet.
Again, I masked off the area to be sprayed and sprayed on lacquer. That was my undoing, for I underestimated how far the overspray could go. Do remember that this is two surfaces that I am talking about, each of which required different masking and different treatment.
I was very satisfied with how things turned out on the neck of the instrument but I realised I could have done a better job on the face of the headstock.
While the paint dried I went to work, cleaning up the entire guitar with special attention to the fretboard, the fretwires and the bridge.
After all the spray and paint job had dried up, I went about putting on the tuning machines
and the strings followed. The owner gave me these strings to put on
This was the real test of the job – whether it had been done well. If the joint did not hold, all the effort would have been for nought.
But everything did hold together.
The owner was thrilled with the results and even made little of my regrets about how the overspray had spoilt the entire look of the headstock. I was ready to sand it back and respray/buff it out evenly but she would have nothing of it.
In truth, from two feet off, one would not be able to see the overspray, but yes, to the player, or someone sitting very close, it would be painfully evident.
The young lady left me a glowing review, one that left a very satisfied glow on my face. However, you will never be able to read that review even if you try to find it, for it never appeared. The young lady had sent me a screenshot of the review she posted on Google and that is how I know there was a review of services rendered.
I hunted high and low for some contact in Google, even asked friends, customers if someone knew of a way. Finally, sifting through pages of the Net, I found a way to contact Google, and they asked me for this, they asked me for that and finally wrote back to me saying they couldn’t find anything wrong with my account!
So that was that. I seek satisfaction in the fact that my customer is happy with the work I did on her instrument.
I have often commented on the strange coincidence that similar instruments or those with similar problems seemingly find their way onto my workbench. If you’ve been a regular reader of my posts, this is the third consecutive black dreadnought to stumble into the Lucknow Guitar Garage, and who’s to know that there are no more to follow???!!!
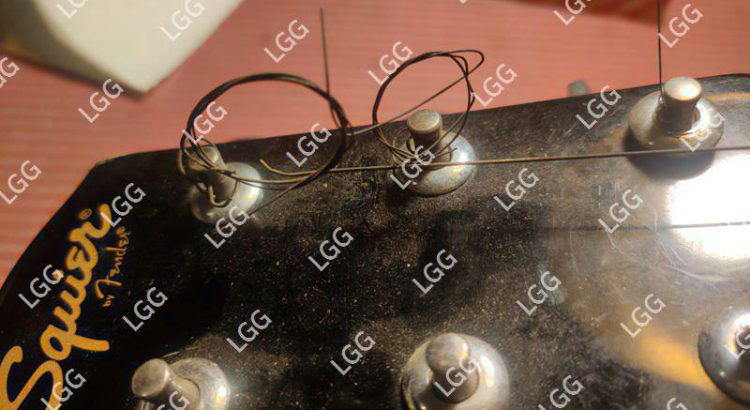
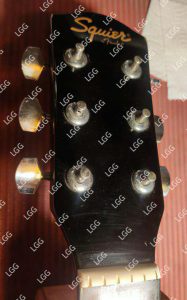
This Squier came to me with its bridge having lifted enough to park a few trucks in the shade!
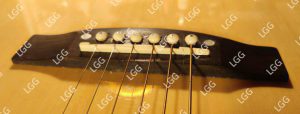
That was the problem but what caught my eye immediately, was the ‘modern art’ on the headstock of the guitar. The extra length of the strings had all been twisted into circles at each of the posts. I saw it and now I can’t unsee it!!
So, here goes my why-not-to-do-it explanation and a rant to boot!
The manufacturer (in his goodness) provides strings of a certain length. He does not know what type of a guitar you possess. Maybe you’re a jazz music enthusiast and have an archtop, endpin-type string restrain with a floating bridge.
This type of guitar takes up much more string length than your regular flattop guitar. This does not mean that because the manufacturer has given you that much string, you HAVE to use up every micro millimetre of it even if you own a flattop! Realise that you are at complete liberty to snip off whatever falls beyond the post!
Your twisting and turning the extra length into various shapes (modern art), only does one thing: creates a string buzz that I’ll be damned if you can make out where it’s coming from. I think ‘experts’ call it a sympathetic vibration.
In any case, if you think your headstock is looking pretty, it does not (not at least to my eyes).
Anyway, getting back to the guitar on my workbench, I did don surgical gloves before I touched the strings – or anything on it. Those were probably the crustiest strings I had laid eyes on.
Work began with marking the bridge outline on the top, taking it off, cleaning its underside and its footprint on the top.
Once that was done, it was time to reglue the bridge. Now, this was the time when the rain was beating down, thick and fast and there was excessive amounts of moisture in the air. One had to be careful to give the glue enough time to cure.
Glue was liberally applied to both surfaces and then they were clamped together
This arrangement was left undisturbed for three days.
However, in those three days, other areas of the guitar were paid attention to – areas that needed attention direly.
The headstock, tuning machines were cleaned and burnished.
The fretboard was cleaned and oiled. The fretwires were cleaned and polished
And then when the clamps came off, I gave the entire guitar body a proper bath and then a polish. Thankfully, all the crud deposited on the body came off and the guitar shone like new!
Then, I let the guitar rest for a full day before throwing on strings.
Meanwhile at the headstock end, things looked like this
I’ll leave you to it with these last two photographs
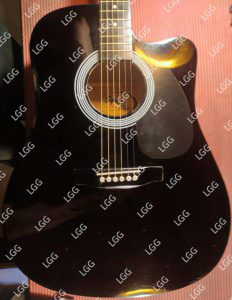
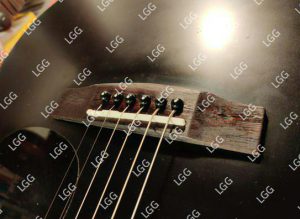
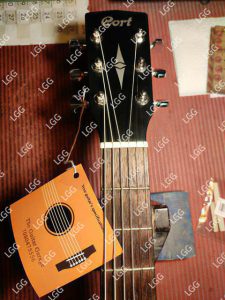
This Cort was brought to me only for a change of strings. As I quickly examined it, I realised that there was much more than dust and grime that needed to be cleaned off it.
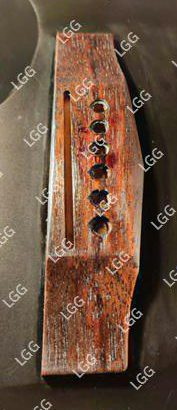
There was a jagged crack that ran almost the entire length of the bridge.
A crack like this begins (almost always) in between the bridgepin holes and is caused due to three or four reasons. One is when the hole is too small or the bridgepin is larger than usual. Invariably, string tension helps pull the wood fibres apart even as the bridgepin is pushing to make room for itself. This is the main reason.
A second reason is when the manufacturer uses inferior quality material for the bridge. A good hard wood like ebony, rosewood or walnut will resist the temptation to split under pressure for much longer than just any other dyed piece of wood. Not to say that the aforementioned woods will not split; they will but after much longer.
A third possible reason could be using strings far thicker than prescribed for a certain model of the instrument. Here in India, a majority of players are youngsters who are starting off, and while they are into their first-second guitars, the budget usually remains under Rs 17K (around $190). In fact, the lower the better.
In that range, one would be lucky to get a solid top. The back and sides are almost always laminate. So, in such an instrument, if one was to throw on 13s, they are most likely to create havoc with the bridgeplate, the bridge, the neck-to-heel joint and other such.
A little fun fact: the best selling guitar in India (from a reputed Japanese name) costs only around $100!!!! And in that $100, you even get a gig bag, a guitar strap, a few picks, an extra set of strings, and probably a string-winder too!!! I leave it to your imagination the quality of the guitar itself which comes with so many freebies for that price!
Anyway, I got working on what was before me and with some labour, it looked like this
With some more effort, it looked like this
But this bridge was a little different. Usually when I work on bridges, you can hardly make out that they have been worked on. Here the scar was painfully visible. But structurally it was solid.
The owner had tied a noose around the neck of the guitar. On my suggestion he got a strap button put on the heel of the guitar (the ideal place). Here is evidence that I did, in fact, put the strap button, though the photo with the strap button installed, I forgot to take!
Also, on my suggestion, the owner opted to get a bone nut and saddle installed in the guitar in place of the plastic crap already there.
If you look carefully enough, you will be able to see that it is already calibrated to where the height and width of both needed to come down to.
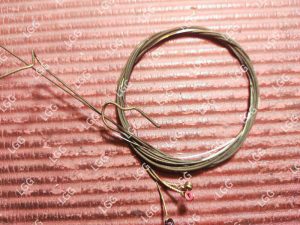
The owner chose these strings to throw on his redone guitar
And soon, all was well and the customer was happy!
I think I have worked on this instrument before – a set-up, bone nut and saddle – but I’m not very sure. But it recently came to me in this state, with the owner naturally none too happy.
He said that the instrument was in its case and when he took it out to play, he found it like this. From the looks of it, the break was along the seam of the neck joint, but it was a break. It wasn’t as if the seam had opened up.
But besides the obvious problem, it was also apparent that the guitar was dry to quite an extent. The bridge and the fretboard bore testimony to this.
It seemed to me that the entire headstock was being held together by the cracked faceplate, which could have given way even by just trying to detune the guitar. I did that and in fact, took off the strings and the hardware on the headstock. Contrary to my fears, the two parts of the headstock stayed together, held by the faceplate.
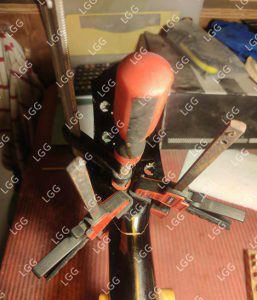
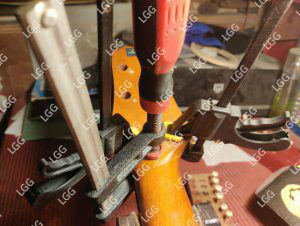
A simple glue-up job would have sufficed, but I thought that reinforcing the joint would not hurt anybody, least of all the instrument. So, I cut four dowels to place them along the seam of the break. These I called My Four Sentinels!!!
But first the glue-up. Glue was liberally applied and then equally painstakingly taken off as it oozed out of the joint under clamps.
Thereafter, I let the instrument sit undisturbed for two days. After that period, when I took off the clamps, I knew just by looking at the joint that it would hold but I wasn’t ready to take chances.
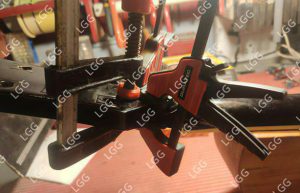
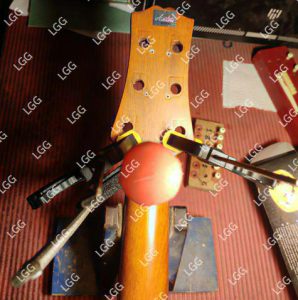
Holes were drilled to receive My Four Sentinels and they were glued in place.
These were then shaved off to make a seamless joint with the headstock.
If you look closely enough, you will see a pencil line just beyond the two E string tuning machine holes. This was the line I drew to tell myself till where I needed to sand the entire surface.
Not very clear in the photograph, but I also drew a ‘V’ on the neck with its end point running in line with the centre line of the neck.
On the front face of the headstock too, there was a similar area marked. These had to be sanded for two reasons: a) to knock back any areas standing proud along the seam lines, and b) so that when paint is applied to the area, it has something to adhere to.
But before that the area had to be sanded
Of course, due care was taken that the name on the headstock face did not get damaged in the process.
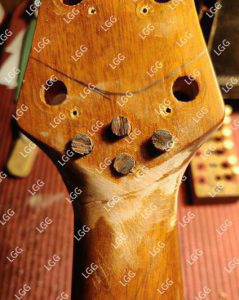
Once this was done, the sanded area was painted dark and even got a coat of lacquer. The idea behind the effort was two fold: a) to hide the seam lines of the joint on the front and the back of the headstock, and b) to hide the existence of the dowels.
While I succeeded in my first mission, I failed in my second. My Four Sentinels still stood out proud!
To be fair, if you were to look at the instrument from even four feet away, you would not be able to pick up that the painted area was hiding a repair. It looked as if it was part of the headstock design. Besides, the owner was a stage artiste and to the first audience member, standing at least 15 – 20 feet away, nothing would be apparent.
And there we were, at the moment of truth: stringing the guitar up to see if it could take the strain of strings tuned to pitch. The strings that the owner had chosen were these
I strung up the guitar, tuned it up, and left it for a day or two to see how the instrument would react under stress.
Just a small, quick one this Sunday but about a very disconcerting trend among the youth today. There is a shocking lack of basic information – about the acoustic guitars that people own, and just about everything that concerns them (the youth).
Day in and day out people (primarily youngsters) come to me and call the saddle the bridge, the nut ‘the white thing at the top’, don’t know the difference between the fretboard and the neck, not knowing what action is, not have any inkling about the specifics of the instrument that they own, and are happy to remain blissfully oblivious!
Paradoxical, wouldn’t you say that there are people like this around in today’s day and age when oceans of information, on everything under the sun, are available at the click of a mouse, or a swipe of a finger on the smartphone.
There’s nothing inherently wrong with not knowing the basics of things, only it makes one a sitting duck for unscrupulous elements in society. And they exist – and thrive – because the uninformed outnumber them 10 to one.
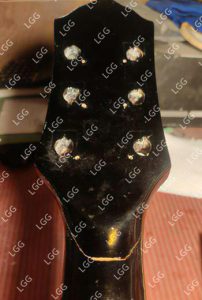
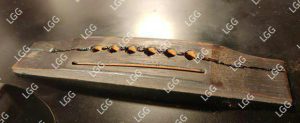
The other day a 27-28-year-old came to me with his guitar – a Hertz.
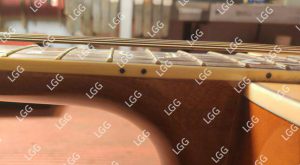
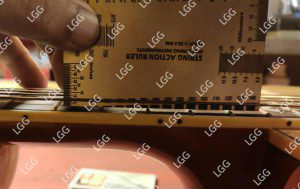
He said it was “very hard” (to play). One look at it and I had to agree that indeed, this would be hard to play
This is the 12th fret and you could easily push John Cena under there!
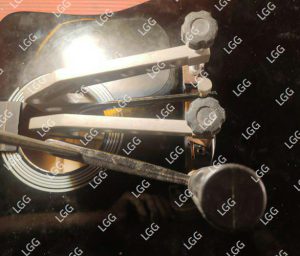
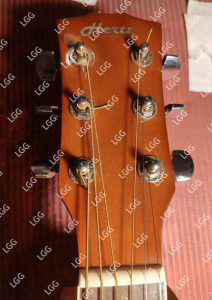
The other sticking point – literally – were the string ends with which you could murder a person, or else, be able to commit suicide with!
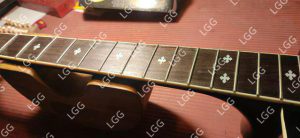
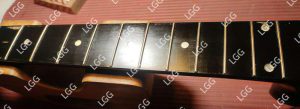
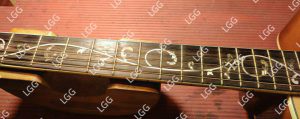
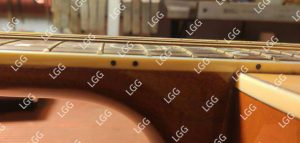
But it had a very pretty fretboard with abalone appointments
I checked things on the instrument and found that the relief in the neck would have been enough for five guitars!
Also, the saddle in the guitar had been put in the inverted position. The bass end of the saddle was towards the treble end of the bridge (and vice-versa)!
I pointed out the issues to the owner and asked him to return the next day to pick up the instrument.
I tried to coax him into getting a bone saddle and nut but he baulked at the idea as if I had asked him to take a sip from the toilet bowl. However, preferences – religious or otherwise – need to be respected.
After he left, I started working on the instrument. I loosened the strings (he didn’t wish to have them replaced) and pulled out the saddle from its groove, and to my amusement, only half came out with the other half securely lodged in the saddle slot!
And since the owner did not want a bone nut and saddle, and I had run out the plastic stuff, I asked him to get me a plastic saddle.
Meanwhile, I removed as much of the relief as I could. After the plastic saddle came in, I put it in, tuned up the guitar and took measurements. According to my measurements (.160 inches on the bass E string), more than half the saddle had to go for the owner to be able to play the instrument with some degree of comfort.
I did that which left just a sliver of the plastic thingy to hold up the strings.
Naturally, once I was done, the action stood at a very healthy spot.
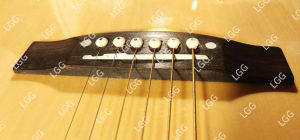
Meanwhile, I also snipped off the string protrusions, giving a nice, neat look to the headstock.
Though the young man left satisfied, I urge all youngsters to read up, learn and become aware about everything that concerns them. You have nothing to lose and everything to gain!
Well, only I am to blame! Partly staying busy and a greater part, my laziness! Mea culpa!
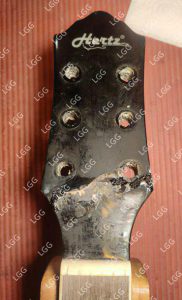
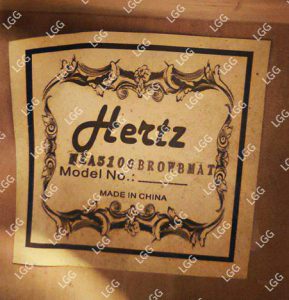
I am here now and bring to you this Hertz that was brought to me by a returning customer.
It had some years on it but I could make out that once healed, it could play and sound good.
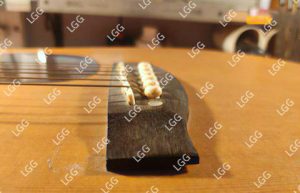
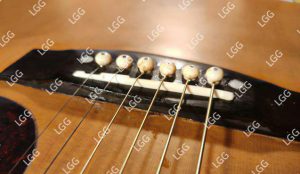
It’s problems? Well, the bridge was lifting and the saddle was tilting forward and had an odd curvature to it as it stood in its slot.
As a result, the action was sky high.
This was even though the owner had tried to shim the front face of the saddle in an effort to make the saddle stand straight.
I told the owner that once the bridge is reglued, the action will come down much, but once I make the saddle stand upright, it will again raise the action a bit. He understood.
I also told him that this would be the perfect time to get a bone nut and saddle installed, which would improve the sound of the instrument – in quality, volume and sustain. He understood that as well.
I began work with taking the strings off and as I tried to remove the saddle, it came out like this
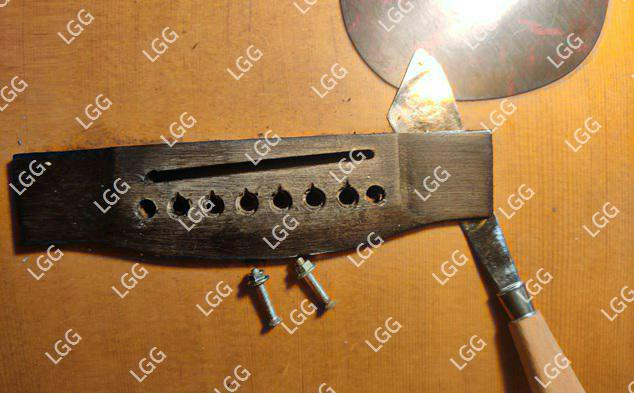
However, my main worry was the bolts and nuts hidden beneath the two plastic dots (on either side of the bridgepins) on the bridge. Look at the photograph showing the paper shim and you will know what I am talking about.
I have often dwelt upon the uselessness of this hardware, and also the fact that they do more harm than good. Good surface-to-surface contact, enough glue, enough clamping pressure, and enough curing time will ensure that the bridge lasts on the instrument for a good two or three decades! Bolts and nuts ensure that the top is torn apart, if the bridge begins to rise.
So, the hardware had to go. The plastic dots were gently prised out of their spots and the hardware was removed. I could almost hear the guitar let out a sigh of relief!!
Then began the task of gently trying to remove the bridge. It came off but not too clean, but not too bad either. I’ve seen worse.
Both the underside of the bridge and its footprint were cleaned, glue applied and stuck together with enough clamping pressure. After that I left the instrument to dry and rest.
Unfortunately, I have lost all the photographs I took of the process – right from cleaning the bridge and its footprint to the clamping and curing process. How it happened, I am still scratching my head.
Anyway, love was also shown to the fretboard, the fretwires and the bridge. Sanded clean and with a touch of oil, they shone.
Work was also done on the swanky, new bone saddle and nut to make them fit their slots perfectly, and once they were in place, new strings were put on to get the saddle to stand straight and for optimal action to be dialled in.
From here on, it was a saga of tuning and loosening strings as I tried to dial in the correct action at the 1st fret and the 12th fret.
Here are some photographs of the finished job
Most gratifying was the reaction of the owner to the changes to his guitar. He was mighty pleased with where the action stood and remarked ‘Bone se farak to bahut hai (Bone, indeed, makes a difference)!
There are times in guitar repair – as are in life – when you get the feeling that the Almighty is testing your patience and resolve!
A simple job like a bridge reglue, where you basically repeat steps that you have repeated umpteen times before to certain success, will yield horrifyingly discouraging results!
Take for example this Ibanez that came to me a couple of months ago.
Yes! It was presented before me exactly like this with the Hydra-like tentacles sticking out, as if searching for a prey to sting! There were other eyebrow raisers too.
The winds on the post left a lot to be desired
The nut slots were a little too deep for my liking
There was enough dust on the guitar to say that it had been in a state of disrepair for quite some time. The state of the strings also told a story of neglect, rusted and corroding as they were.
However, the main reason why it was on my counter was
this gap under the bridge through which you could drive a bus and park.
As I had told the owner, there were two options before him: 1) I could try and push glue under the bridge, clamp it shut, and hope it stuck, or, 2) take the proper route, take the bridge off, clean its underside as well as its footprint on the top and then reglue them. The owner chose to take the the “proper route”.
But before the bridge could come off, the strings had to come off. In that process occurred a tragedy and a discovery.
The bridgepin breaking off in its hole was the tragedy, while
the state of the fretboard was another instance of disregard for the instrument: dry and with months of grime caked on it.
But the task at hand was to reglue the lifting bridge, for which the bridge would have to be first removed. It came off, though grudgingly, but the more important fact was that it did not take much of the wood from the top.
What you see in the photograph below is evidence that random spillage of super glue was used to hold the bridge to the top. Whether it would hold for more than six months was no concern of the manufacturers.
What followed was the cleaning of both surfaces.
Once the top was cleaned of old CA glue and splinters, another problem presented itself.
The lifting bridge had managed to lift the top enough to create a step-like lift, right in the centre of where the bridge had to sit. This ‘step’ would not allow a proper surface to surface and contact and needed to be flattened for the bridge to sit correctly and stick securely to the top.
Repeated efforts over a few days and heat and pressure treatments flattened it out.
During the flattening process, I even checked inside the guitar to spot loose braces, but there were none. Satisfied, I proceeded to glue the bridge to the top.
And that is where trouble began.
After two days, I released it from the clamps, put on the strings chosen by the owner
After a day, I called the owner to come and collect the guitar. He came and happily took it away, only to send me a photograph, a day later, showing the bridge rising again.
I called the guitar in, told the owner, I will try to push glue under the bridge and clamp it shut, hoping that it would stick. If it did not, I would have to take off the bridge again, and reglue it all anew.
I pushed glue under the bridge and clamped it shut. When I released it from the clamps, I strung it up and waited for two days before again asking the owner to come and collect the instrument.
Before he could arrive, the bridge started lifting again!!!
I stopped the owner and waited for my exasperation to end – not talking to anyone. The next morning it was back to Block A – removing the bridge, cleaning both surfaces and reglueing.
This time it stuck. Why? Someone please tell me.
The same process, the same clamping pressure, same number of days left in clamps…
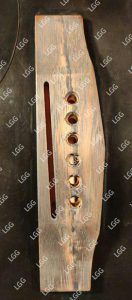
A troubled soul contacted me recently, asking if could repair his Mohan Veena. Now, to those who were enjoying teenage in the mid 90s, Pt Vishwa Mohan Bhatt winning the Grammy on his acoustic guitar improvisation – the Mohan Veena – was a big thing. At least to me it was. Why? I don’t know. His name and the name of the instrument just got stuck in my memory.
So, after all these years, fancy being bumped by a pleasant memory!
I took one look at it and I said that I would do it. The tailpiece had somehow split but it seemed a simple enough break. And so, I got to work – on the instrument and not just the tailpiece.
For the uninitiated, the Mohan Veena has umpteen strings (yeah, I didn’t bother to count), but most of those are sitar strings which pick up the resonance of the heavier strings vibrating above and start vibrating too (sympathetic vibrations). The instrument is played employing a slide.
I cut off all the strings and then cleaned each ferrule and string post. The fretboard – which doesn’t have any fretwires and sees no fretting – was cleaned too. The headstock was dusted, cleaned and polished and the floating bridge was cleaned and oiled.
Here are a few before and after photographs
The last photograph in this sequence shows a little interesting detail, Which I feel I must highlight.
At the nut and the bridge, there is no nut or saddle but a thin brass pipe, easily bent by a finger’s strength. That strings actually ride over these and do not crush them is rather interesting. Both of these were just sitting in their grooves, ready to fall off. With the owner’s permission, I glued these in so one could have two less pieces to worry about. But this was done not before I polished up the little brass pipes to a warm shine (You can see that in the last two photographs.
The tailpiece came last with both pieces going together perfectly, except for a little missing sliver of wood on the top of the tailpiece.
The two became one and so I thought
The owner happily took his instrument home, only to call me a couple of days later, and tell me that the joint had failed!
Interestingly enough, he had a second Veena, the back of which had come undone, and which someone had already tried to fix once and failed. I took a look at the globs of glue sitting in the open back and expressed my inability to be able to do anything with it.
Now this had a metal tailpiece.
To get the first Veena in working condition, it was decided to replace the broken tailpiece with the metal one. The operation was duly performed, and successfully at that.
A new (wooden) tailpiece has been ordered, and till such time as when it arrives, the metal one will have to hold strong.
This guitar came in recently with the lady owner complaining of fretwire buzz around the 10th fret – across the fretboard – but primarily on the ‘e’ string.
I took one look at the saddle and saw the saddle falling forward. Meanwhile, at the nut end of things, the slots seemed a little too deep for my liking.
I suggested to the owner that changing the nut and saddle to a set of proper dimensions, and that too of bone, should help solve the issue. A saddle standing straight in its slot, would raise up the strings automatically.
But before any of that happened, I had to put on my hazmat suit to clean the instrument.
And of course there’s always some DNA deposition on the fretboard
In this photograph, mark also the pitting that is beginning to occur on the fretwires. As is the case generally, it was more evident on the treble strings than on the bass strings.
So, first the strings were taken off and the fretboard was given a much-needed bath. Thereafter the brushing and oiling followed, giving the board a well-cared-for look.
Next, it was time to replace the nut and the saddle and dial in bone elements. The operative phrase here is ‘dial in’. For first-timers to the blog, or new to (acoustic) guitar maintenance, one does not throw out old nuts and saddles and replace them with new ones. One has to measure, cut and sand these two very important elements to the optimum so that playing and the sound produced thereof is soul-stirring.
In that line, measurements were taken and pleasantly enough, the nut was near perfect with just a couple of slots requiring lowering. The saddle, however, was a whole different story.
Following the radius of the fretboard, the saddle was shaped and put into the slot. It was strung up to find that the treble side was higher than desired. That was duly shaved off, after which the treble strings sat perfectly. Thereafter, the rest of the process of setting up the instrument followed. The relief was perfect and didn’t need to be touched,
Only the nut slots remained, which were attended to .
YEAH! I work on electrics too – but only fretwire stuff and (God forbid) structural damage.
This pristine US-made Stratocaster from 2002 was brought to me after the owner – himself quite capable of taking care of his instruments – had tried just about everything to get rid of the irritating fretwire buzz.
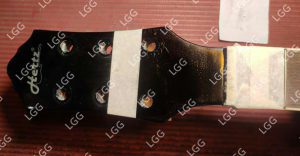
Out came the tape and assortment of tools to tackle the issue: I had managed to find six high frets (Find the six red dots to find the naughty fretwires).
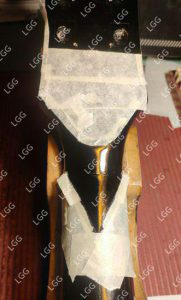
But before I began employing the tools, it was imperative to protect susceptible areas. So, the mummyfication of the instrument was undertaken
One tries to level a particular fretwire in relation to the neighbouring two fretwires flanking it. But, the wonderful thing about fretwire levelling is that in the process of levelling more higher fretwires seem to crop up, multiplying costs, time and effort.
My simple rule is that if there are more than six fretwires and spread widely that need attention, it’s best to level, crown and polish the entire fretboard. The funny part: I enforced the rule only after doing the Cha Cha Cha – two steps forward, two steps back – for three hours on the fretboard!
The old tape with all its markings was ripped off and fresh tape was put on. Fresh sandpaper was installed over the levelling beam and the radius of the fretboard taken into account. Once the fretboard was levelled, the radius would have to be re-introduced into the fretwires for the sake of playability.
If you can see, the radius gauge that fit the fretboard was 9.5″. I rummaged through my entire drawer of radius cauls and could not find a 9.5″ caul, though I am still sure that I had a 9.75″ caul. The closest I came was to find a 10″ caul.
Now, this is the beauty of an electric guitar: you don’t have a 9.5″ radius caul, work with a 10″ one. You can always change the radius of the bridge by playing around with the screws there (screwing around with the bridge?) In fact, it was the owner who suggested that I work with the 10″ caul and he would take care of the bridge.
Once the levelling and crowning was completed, all 22 frets were individually checked again and rectified, if needed.
Then came the worst part – polishing each fret with 11 grits of sandpaper and cream to bring them up to a certain level of gloss, so that bends and slides would come with effortless ease.
The tape from the fretboard and body was finally removed and the body buffed. I leave you with the final photographs of this US-made Fender Stratocaster.
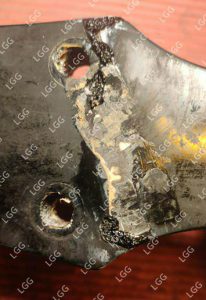
As if to rile me some more, along came this instrument from out of town.
I must apologise but what looks like an ordinary lifting bridge, was in fact ravaged by someone who seemed to have got his hands on a chisel and a hammer. You can’t see it in these photographs but what I saw was piles and loads of wood glue oozed out and dried form under the bridge. I SHOULD HAVE TAKEN A PHOTOGRAPH OF JUST THAT!!!!!
Another eye-opener on the instrument was the string winding on the headstock. It was as if the owner had vowed to wrap every millimeter of string provided by the manufacturer, and as a result the peg heads looked like this
Do you also see the accumulated dust?
The guitar had exceedingly high action, despite its piezo element not been threaded through the bridge to run under the saddle, and was flapping free inside the guitar.
While looking at the bridge I also saw
three bridgepins of one type and three of another. I also saw a crack beginning to develop which I pointed out to the owner. However, keeping the damage to the pocket in mind, it was decided to let the crack be, and only glue the bridge to the top.
Wood glue and animal glue are preferred in instrument repair for two reasons: a) they are easily cleaned by water, and b) they have the ability to stretch, and so, when the instrument (say guitar top) moves, the glue stretches and moves and does not break up. However, they are not space fillers.
An epoxy, on the other hand is an excellent space filler and cements everything into place, but don’t expect it to be as stretchable as wood or animal protein glue.
Back to the specimen on my counter top.
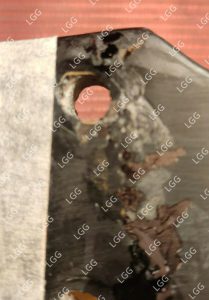
Out came the palette knives and work began, first to carve away the oodles of glue that had dried up beyond the bridge in a rubbery mass.
Talking to the owner, it became apparent that he had let his instrument slip into the hands of the wrong person who wrenched the bridge off the top. In the process…
Can you see how much of the top is still stuck on the bridge? Beside the footprint of the bridge are chunks of wood glue that had been chiselled out. There was a lot more that had to be dug out from the footprint of the bridge.
After hours of pulling and cleaning and sanding the footprint was cleaned. The glue-up job that followed required that the biggest and strongest clamps in my armoury were brought out and employed in the assembly.
What you probably perceive as ooze out in the first photograph in this set is actually the dyed bridge having lost colour at places.
The guitar bridge was stuck alright but I could not do anything about the action. The saddle had been shaved to a minimum and the relief in the neck was in the vicinity of .002 inches!
I let the piezo element continue to flap inside the box while I strung it up with new strings.
However I did manage to bring down the action considerably on the 1st fret.
‘N’ae pas peur d’essayer’ is French phrase meaning ‘Don’t be afraid to try’! I doubt the author was referring to intricate rectifications to your acoustic guitar!
Glue-up jobs on acoustic instruments are not one of those things that I would advise my readers to undertake – unless they have an experience of instrument-making or woodworking. Then too, I prescribe a generous dose of caution.
Imagine, you have a Rs 50K guitar and (God forbid) something were to happen to it. Would you try and repair it yourself or take it to someone who sees five such instruments in a day? While you might see superficial defects (cracks, dents, chips and breaks), experience will check for the unseen that may also have got affected in the trauma.
Even if you own a Rs 5K instrument which you love dearly, and which suffers trauma, maybe an expert set of hands will be able to rectify it in such a way that the repair does not become an eyesore, a life-long and painful reminder of an accident that should not have happened.
Recently, I was handed over one such Rs 5K instrument which somebody had shown their ingenuity on. It seemed to me that the guitar had fallen on the endpin and the impact was such that the top had been knocked out of the sides.
The owner, or someone, decided to take it upon themselves to ‘rectify’ the issue and threw on a generous helping of epoxy and slapped the top in place!
Almost the entire periphery of the top bore signs of epoxy that had been wiped off in a very haphazard manner. In places like the immediate surrounding of the end block, where the seam separation was much more pronounced and the seam didn’t quite come together, the services of a Philips screw were employed – leaving me aghast!
I am in the process of trying to make the guitar playable for a child but I don’t think there is much I can do about the nearly botched repair.
Having a tall saddle is always a good thing. For one, it increases the break angle of the strings (the angle that the strings make, rising from out of the holes and leading up to the saddle).
This, in turn, affects the sound emanating from your guitar. Greater the height, greater the break angle, more is the downward pressure exerted by the strings on the saddle, deeper is the contact of the saddle with the top of the guitar, better is the transfer of energy, and thus, better is the volume and sustain of the instrument. This is something that most of my customers would recall me talking about.
However, there is a flip side to having too tall a saddle. The saddle slot in the bridge is of a certain depth. With a very tall saddle, there is always the risk of it leaning forward under the tension of the strings.
Over a period of time, this can lead to tragedy with the front edge of the bridge breaking off completely. If that does not happen, the bridge cracking from that point is a very distinct possibility.
In an ideal world, we would like to have a tall saddle and still a very low action height at the 12th fret. But that seldom happens. Usually, if the saddle is tall, then the action on the instrument will be high too.
And so, to manage the action, we have to shave down the saddle.
So, when you’re inspecting guitars to choose one, don’t listen to the sound, don’t look at what colour it is, don’t even worry about the size of the body. Look instead at how low the action is, and correspondingly, how tall the saddle is. If you find a guitar with a tall saddle (say exposed height between 4mm to 3mm) and a very comfortable action, it means that the neck angle (the angle that the neck makes to body of the guitar once the two are brought together during the manufacturing process) is excellent. Short-list that instrument immediately.
Over time, as the strings exert pressure on the guitar and neck, trying to bring the two ends of the guitar together, this geometry changes, and the neck starts lifting. Thus, over the life of a guitar, one may have to shave down the saddle two or three times to keep the action on the instrument within comfortable playing limits.
The point I am trying to make is that when you look at a guitar with an averagely tall saddle and satisfactory action, know that you’ll be pulling out the saddle to shave it down so that you can make the action comfortable. In another three or four years time, you’ll be repeating the process as the strings are constantly acting on the neck and body of the guitar. Where would that leave the height of the saddle, the break angle, the volume and sustain?
Select an instrument which has a saddle standing 3-4 mm above the bridge (measured between the ‘D’ and ‘A’ strings) and yet has comfortable action. Never mind what brand or how the guitar looks, nine out of ten times such a guitar is going to sound good and serve you for many years.
While being a post about a repair I undertook recently, this also is an illustration and proof that you must always bring your guitar with the strings on, even if they are tuned down.
This helps me check out a whole host of problems: belly, lifting bridge, action over the fretboard, relief in it…
Without the strings, I will have to put on a fresh set of strings, because I need to measure the parameters mentioned above, the cost of which will be PASSED ON TO YOU!
This guitar a, #Pluto, sporting a handsome sunburst, came to me for a cracked bridge – without strings, and for a fresh set of strings.
I can understand the thinking behind the missing strings: take them off so that they do not cause any further damage. Correct to quite an extent but having them on and tuned a step or one-and-a-half steps down won’t hurt anymore, but, in fact, aid me much.
Anyway, I went about cleaning and repairing the bridge, and while it was healing, I worked on the fretboard and fretwires, cleaning and polishing them.
I put on a fresh set of strings to find the action a bit high. Just for the heck of it, I decided to see how the bridge looked from the end block end of the guitar. There was a gap under the bridge right around.
And so, the strings were taken off in preparation for bridge removal and the knives were brought out.
The bridge came off and with it some of the top too, glued as it was with super glue.
The bridge and its footprint were cleaned to the margin marked and then readied for glueing. The glue job went well.
After a wait of a day, I strung the guitar up again and sent it home.
Last week I left you at the point where all was in readiness to glue the bridge to the top – well, almost all.
When I placed the bridge on its footprint, just to see how it sat, this is what I got to see.
Not encouraging at all. What the lifted wing tips told me was that due to the continued strain of the strings on a lifting bridge, the front corners had warped. Not good at all!
So, for me to have any chance for the bridge to glue properly to the top, the bridge would have to be sanded till the warp in it was removed. So, sanding it was till the bridge became straight, or at least till the point till the bridge wings reached a point from where they could be forced down to be glued to the top.
After a lot of sanding and checking with a ruler, things seemed to fall into line and the glue up process began. The clamps and cauls were readied, and once all was in readiness, the bridge was glued to the top and clamped.
After more than 72 hours under clamp pressure and when the humidity was well below the 45% mark, and the bridge sat perfectly in its footprint, I was very optimistic about the outcome.
While the clamps were on, there was ample time to tend to other things – the fretboard for example.
The fretboard was cleaned and the fretwires were polished and oiled.
After the period in quarantine, the instrument was released from the clamps and made to rest for another two days before the thought of strings was entertained.
The strings which the owner chose were, naturally,
But before these went on, first the bridgepin holes needed to be re-drilled.
The strings were put on but tuned a full step down (D) instead of the standard tuning (E). The instructions issued to the owner were to keep it at that tuning for at least a month.
Among the new(er) guitars in the Indian market, Tanglewood is a brand that I have come to like for its simplistic yet sturdy design.
Yet the Tanglewood that came to me recently
had a lifting bridge, and one which seemed to have taken a bit of the top as it lifted. Also, the belly behind the bridge was H-U-G-E!!!!
The owner, a returning customer, pleaded with me to get the guitar into shape again and I had to explain to him that I would try my best but as things stood, it did not look too promising, for as I would take the bridge off, more of the top would come off. How would I reconstruct the top?
I can tell you now that I have never taken more time to take a bridge off the top as I did with this guitar. After some 25 mins (usually it takes no more than 10) of prying and prodding, and crackling sounds (which told me I was trying to break CA glue/epoxy) the bridge came off.
It was a huge sigh of relief that I heaved when I saw the bridge footprint was indeed intact and not a gaping hole. However, much of the material from the top had remained glued to the underside of the bridge.
This seemed the right time to clean up the bridge footprint on the top.
However, the astounding thing was the belly on the instrument. It was like a whole step
But first, the pulled up bits of wood needed to be glued back. There were three major spots.
After that I turned my attention to the belly, to try and reduce it as much as possible. I began…
After two or three days, the belly had reduced but not appreciably
Again preparations began to attempt a second time
Again, after a couple of days, the results were encouraging but not complete. And then I got thinking. What if the braces were loose on the inside? I checked and, indeed, both arms of the ‘X’-brace were loose.
I apologise for the muddy photographs but that is a .006 inch feeler gauge finding enough room to wiggle underneath the braces. These needed to be fixed first before anything else.
While these were glued, I turned my attention to the bridge and cleaning it.
Here too, there is a funny story to relate. The more I worked on the bridge, scraping it, the more I felt that I was working with ebony.
Now, this was not a high-end instrument and I was a little surprised that Tanglewood had used ebony on it. However, when I checked the instrument specifications online, it read that the bridge was of rosewood! Try as hard as I might have, I failed to notice a single attribute of rosewood in the guitar bridge, which was blacker and plainer than any rosewood I have seen till date.
Were my eyes lying or had Tanglewood made a boo-boo while compiling specifications of this model? Let’s see if we get a clarification from the company.
After the clamps came off, I measured the belly, and it was much lower than earlier, but there was enough there to throw the action of the instrument out of whack!
Again, the belly was put into compression mode
And again, after a two-day interval when the clamps were removed, the belly was measured.
This time, the results were most encouraging.
The stage seemed set for the glueing of the bridge to the top. But that is a story for next time!
So, this came in a few weeks ago. It was a pretty all-Mahogany Martin (and I got so excited I forgot to take a photograph of the label in the soundhole!!)
I looked it over and except for some battle-scars, along the lower bout periphery, could not figure out what was wrong with it. And true to a Martin, it had that beautiful mellow sound, though the action could have come down a tad.
It was left for the owner to point out this
And then as I thought, all those battle scars were in fact, repairs carried out earlier. The other side of the bout had opened up previously for there was enough glue in the area to take care of this repair!
Also, the couple of large dings and scars – all on the lower bout – were previous repairs. Pretty easy to surmise then that the instrument had had a rough ride till then.
Anyway, that was in the past. The job at hand was to stop the instrument from posing as a prop for the next edition of ‘Jaws’, and put it together. It also needed fresh strings.
Many times, when the back or the top separates from the sides more than a couple of inches, the two seams don’t want to come together. This happens especially when any seam has remained open a day too long.
But thankfully that was not the case here. Even though the seam separation was at least a foot or even 1.5 feet the two came together perfectly – thus showing that it hadn’t been long since the seam had separated.
So glue was pushed in and my trusty spool clamps, which I made almost a decade ago, were pulled out and put to work.
While this was clamped, the glue residue on the other side was cleaned up, the fretboard was paid attention to – cleaned and oiled – and the fretwires were burnished.
Strung up with fresh strings, the owner took it home with quite happy with the results.