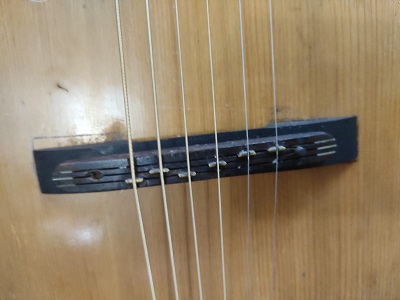
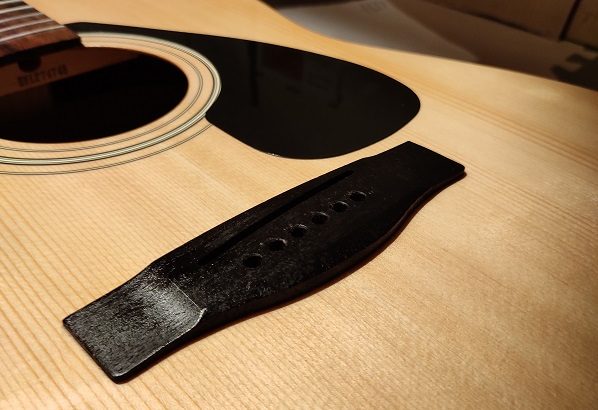
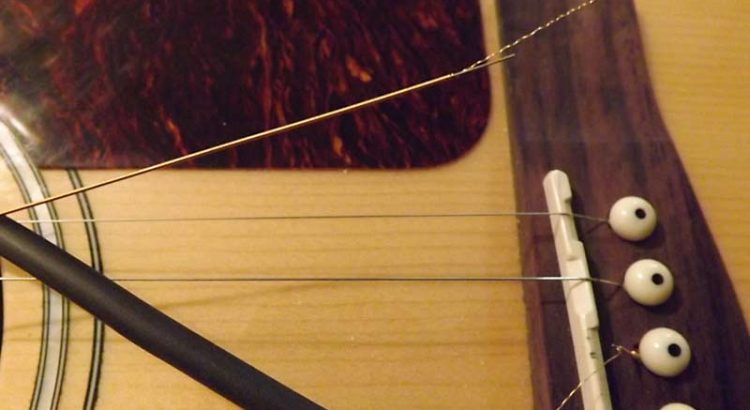
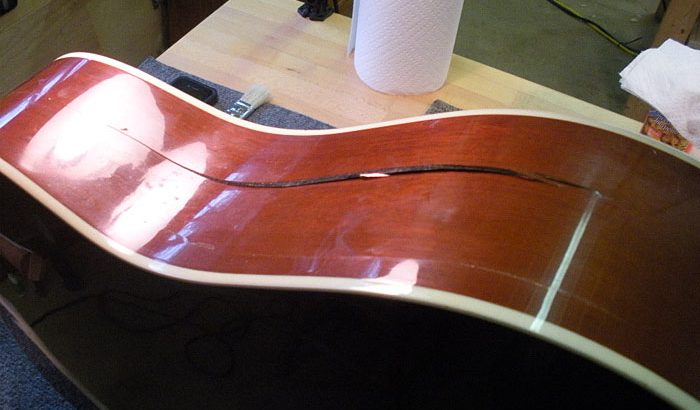
This was one helluva job II (tackling issues)!

Last week, you took a look at the problems. This week, you shall see me sorting them out.

The order in which I decided to go about the work was this:

  1. Take off bridge
  2. Clean bridge and area on top where it would sit
  3. Clean guitar body of epoxy glue
  4. Glue bridge back
  5. Install new tuning machines

Taking the bridge off

It is never too difficult to take off a bridge that is lifting, but of course, there are exceptions. This one did not give me too much trouble. A few spatulas and palette knives and it was off.

The photo on the right gives you a very clear picture of where the bridge was lifted up from, how much and for how long. You may be able to guess the answer to the first two questions, for the third, suffice it to say, that you won’t see dust build up like that in a few weeks or even a few months.


Cleaning bridge and area on top where it would sit

Now that it was off, I set about cleaning first the bridge. Here is the bridge through a few stages of cleaning.

After it was thoroughly clean, I wiped it down with lighter fluid and scored the underside with an awl – not very deeply – but just enough for the glue to sit in and have something to grip on to. But very pretty wood.

Notice, there are two locating pins in the bridge that help seat it exactly where it should.

But that was just the underside of it. The top of it, which had collected dust over the years and had braved the elements, needed to be cleaned too. Here are some of the tools I used to clean it.

Sandpaper of different grits stuck on different contoured objects to reach every nook and cranny. That black pen-like thing is a nail cuticle remover. The middle one a PVC pipe leftover, and the one on the right is just a wood block I fashioned for the purpose.

Then followed the area of the top where the bridge would sit. Cleaning old glue residue completely off it and off the underside of the bridge is imperative because unless the old glue is removed, the bond with the new glue won’t be a very strong one.

The photo on the left is the bridge area cleaned, while the one on the right shows, how much glue and dust came off it. Blades, scrapers, knives: oh, I went to town on it!

And while I was armed with all these, I decided to scrape clean the binding too.


Cleaning the guitar body of epoxy glue

After that it was the turn of taking the epoxy resin glue off the front, sides and back of the guitar. Before I started on that, I thought long and hard about the tool(s) that I would use. After much choosing and rejecting, I turned to my trustee wood-carving micro chisels.

After that it was a good two hours of dripping sweat as I carefully peeled and chipped away at the glue. At places, it came off whole, while at others, it entailed more sweat.

When it was finally over, both the guitar top and me were breathing a little easier.

Once the top was clean, it was the turn of the back and sides.

And when you have a lifting seam like this,

you require a really thin and small dispenser to get glue into the opening. Something like this:

Installing new tuning machines

While this dried, I decided to take the old tuning machines off and clean up the headstock of the guitar. It was a good thing that I did that because, when I tried on the snazzy, new tuning machines, they wouldn’t go in. Holes for the old tuning machines were much smaller and had to be reamed!

Reaming is a painfully slow process and you have to go slow, otherwise, if you overshoot the mark, there is nothing else to be done but to fill up the hole completely and start all over again!

You can see the reaming taking place in the left photo, as also the new tuning machines waiting to be installed. The photo on the right shows the need for clamping the neck down so that the strain of reaming the headstock did not get transferred to the neck. If it did, it was quite possible that the neck would crack, or even break into two!

And that was not the end of the work on the headstock. The holes where the screws of the old tuning machines went in, did not match up to where the screws of the new machines would go. So, I had to fill up the holes with pieces of wood, mark the point where the new screws would go in, and then drill out new holes.

Fitting the new tuning machines was just a matter of 24 screws and a Philips-head screwdriver .

Here’s how the headstock looks now:

Later, it was time to give a bath to the guitar and clean it of the years of dust and grime deposition. But before that could happen, the area where the bridge would stick to the top had to be covered and protected from getting wet.

That’s painter’s tape and on top of it, packing tape, cut exactly to size.

Meanwhile, the process of ‘bathing’ the guitar included dry sanding the entire body with ‘0000’ steel wool and then wet-sanding with 2000, 3000 and 4000 grit sandpaper. 

That black block you see is hard foam, used in packaging, and something that I picked up from the road.

The final step was polishing the entire body. Of course, the intention was never to make it look like a brand new guitar but for it to look like a well-cared-for guitar.


Glueing the bridge back

Once everything was clean and smelling good, it was time to glue the bridge back on. But before that, both surfaces had to be as dry as they could be. So, I employed my heat gun to dry out the bridge area of whatever moisture might have crept under the ‘covers’.

And while that dried, I gathered everything that I would need for the glue-up job.

And the glue? Here it is, and more than was required. While doing a glue-up job like this, I have realised that there is no such thing as too much. If it is too much, it will ooze out and can be wiped away. If it is too little, the joint won’t hold.

The photo on the extreme right features a violin clamp. Not a very powerful clamp but then it has a lot of reach. You clamp bridges to tops by clamping through the soundhole, and usually, the distance from the soundhole edge to the farther edge of the bridge is 5 -6 inches. This Hobner’s bridge was fixed some 8″ away! Only a few of my collection of clamps had that kind of reach and so I had to ‘deploy’ my pair of violin clamps.

Put it in place, clamp everything together such that not even the air will be able to get through

and once the glue starts oozing out from under the bridge, wipe, wipe, wipe, and then wipe again. For once the glue dries, there’s no way to get it off, except with a scraper or a chisel.

While the glue dried, I went about shaping the new bridgepins.

Also, all that scraping on the top of the guitar had left scratches and marks just inside the margin on the lower bout that weren’t very pleasing to the eye.

I thought about it and came up with this:

My reasoning: 30+ years for a guitar’s age translates into it being a teenager. And like any teenager, there’s no harm if it experiments a little with its looks. So, I taped off the binding and the inside of the top, leaving a 1cm channel in between, which I painted black. With the white tape removed, it did come out looking nice.

HOWEVER…

I have done such glue-up ‘operations’ umpteen times without a single failure. I failed this time, and rather magnificently. The law of averages had caught up with me. And the only reason, I could think of why I faced so many failures was the moisture in the air.

In all, I had to reglue the bridge four times!  Here is the view of the re-glue efforts the 2nd time, the 3rd time and the 4th time, and each time I left it clamped for longer and longer: 60 hrs, 72 hrs, 96 hrs and then a full week.

And each time, these went under the top to provide support and increase clamping pressure.

It stuck the fourth time but I don’t think its going to stay that way for too long.

NEXT TIME: Some free gifts, some odds and ends!


This was one helluva job (and it ain’t over yet)!

The rains is a time when all glueing jobs should be avoided. If imperative, enough time and ventilation should be available for the job to succeed. REMEMBER YOU READ IT, AND READ IT HERE FIRST!

Despite knowing that I undertook this job, and boy, did this guitar fight back! Read all about it later. 

First, the Rule of Two struck again! 

Remember just a couple of weeks ago I worked on a Hobner guitar and gave you the lowdown on the company? Well, its 30-some-years-old, 12-string cousin came calling, and seeing the pain it was in, made me go ‘ooh’, ‘aah’, ‘ouch’!

While the earlier model was a F-hole, floating bridge-type jazz guitar, this one was the regular flat-top guitar (although the top wasn’t all that flat), with a round soundhole.

The history. A former Army officer’s instrument, it travelled with him through postings and remained his friend and confidante. And as can be imagined, he loved it very much. (And from here my guesswork begins) Somewhere down the line, the officer stopped playing it and the instrument was left tuned to pitch, standing in some corner (or hanging on a wall).

Weather can be very unkind to string instruments and it treated this 12-string no different. Under the dual impact of the weather and under-tension strings, the bridge lifted off the solid-top guitar (yeah, even I had my eyes popping out when I discovered that it was a solid top. I had never seen a Hobner with a solid top – not very good spruce but spruce nonetheless). The top itself too cracked open at multiple places – besides along the seams. 

That ruler that you see is wooden and quite thick. Do you see how much of it is able to go under the bridge?

And because of the bridge lifting, it had also managed to pull a belly into the top. Also, the fretboard extension was loose from one end.

(As my guesswork continues) The officer’s daughter, much in love with her father, tried to stabilise the instrument. Acting out of love (I am sure her intentions were all good) and with whatever she thought was the strongest glue available (I think at least 15 years ago), she used an epoxy resin glue – all along the seams on the top and back, the heel, and where the heel cap should have been!

Now, epoxy resin glues are fine for furniture, but for string instruments and especially on those areas which need to move, it does more harm than good.

She used the same adhesive on the cracks on the top and when the guitar did not look too good, covered it with some electrical insulating tape. The black lines in the first photograph (and below right) is the tape hiding the adventure! And the elements continued to act on the instrument and on the electrical tape-epoxy combine. When I tried to remove the tape, at places it came off and at others, something came off while the rest of the black remained ‘absorbed’ in the epoxy. 

Here are some other samples:

There were other abrasions too: like this section of the heel. Notice the discoloured margin on the left? It seems as if the heel wasn’t seated properly. But it was! Solid as ever and not wishing to budge no matter how much I pulled or pushed it.

Also, a 2-inch portion of the side (on the right) just below the binding (the white strip) had come loose and was loose till an inch below, where it opened up in a crack.

The headstock, as beautiful as it was, was a pain as far as getting strings off it was concerned. Someone had knotted all strings – increasing my BP!

The tuning machines that came with the instrument were cheap, flimsy things. At the time when Hobner must have made this instrument, these tuning machines must have been the only ones available. Not so now. Now, even the cheap tuning machines would be many times better than these and there are sets available now that cost three, four times the cost of a cheap guitar!  These had to go!

And when you have a 30-odd-year-old instrument, there are bound to be more hurdles than smooth sailing.

Half a screwhead! How do you get that out? Pliers! Of course!

And so, it wasn’t a surprise that I pulled out this instead of a regular bridgepin –  a piece of wood fashioned to serve as a bridgepin: ingenious and practical, but hardly pretty.

And after 30-some years, there are bound to be more than a couple of dustworms inside the guitar!

My brief from the Fauji: ‘Yaar, you do whatever you want, but I should be able to play it’! As you can imagine, this will take some doing, and for you, some reading. So, we’ll break this one up in a few parts (at least two) so that it doesn’t become too laborious a read.


Next week: Tackling the problems


A shattered nut makes this 12-string a dull boy!

Ladies and gentlemen, another 12-string visitor that I had the pleasure of giving my attention to. And like I had said some time back, the same make and model guitars visit in twos and threes, by some quirk of nature. So, here is another Pluto!

What made it special was that it was a daughter’s gift to her father!

And just beyond the lower end of the photo on the left above, lay the problem that needed to be addressed. Though a comparatively new guitar, the strings had managed to break the (plastic) nut on the guitar.

Sadly, the owner had failed to find a place in town to replace a nut for a 12-string guitar, leave alone a bone 12-string nut! It was then that the guitar came to me.

As I inspected the instrument, it was apparent that it had not received the initial set-up so necessary for it to function best. It had all the tell-tale signs: loose hardware on the headstock, dry fretboard and bridge, and tarnished frets. The action too was on the higher side and could have been much better.

Further, it did not make sense to just replace the nut and leave the (plastic) saddle in place. So, out came both and were replaced by bone elements.

As I pulled out the saddle, I was shocked to see something in the slot. A SHIM!!! And not just one, but two! After I prised them out, I noticed that they were nothing but visiting card strips. I remember thinking unconsciously, ‘That should take care of the high action’. And it did!

Replacing the saddle was the usual grind – pun intended – getting it to the same dimensions as the plastic one that had long been chucked.

The new bone saddle (the one on the right) was just a wee bit longer than the plastic one. Once the dimensions were met, I tried putting the saddle in its slot and was surprised to find the saddle rocking in it, as if there was a high spot in the slot.

In all my years of guitar repair and working on very inexpensive instruments too, I have never come across an instrument that had an uneven saddle slot cut into the instrument. I looked at the slot intently but I could not see anything wrong there.

Then I took my special saddle-slot chisel and tried scraping the bottom of the slot and sure enough, the chisel scraped up some pieces of wood that had been left when the slot must have been routed.

With this out, the saddle sat proud and straight in its slot. Perfect!

And as I have pointed out before, if you wish to determine whether it is a bone nut or saddle, or a plastic one, just look at its underside. If you see holes there, believe that it is synthetic. Some time back, I had talked about other ways as well to figuring out whether what you’re holding was plastic or bone.

If you wish to read about those, here it is:

Happy 2020, and let’s bone in on nuts and saddles!

That done, I looked at the hardware and gave it a gentle tightening. Remember, it is part of your monthly instrument upkeep: going over the hardware on the headstock. Using the right-sized spanner, test the nuts on the face of the headstock. They should be as snug you requiring just a little bit of force to loosen them. While tightening them, don’t mistake them for nuts on your car wheel, on which you use all the force you can muster to tighten! Just snug enough, and just like this:

Now, turn the guitar over, and  still concentrating on the headstock, take the right-sized screwdriver to tighten the tuning machine screws. Again the rule of thumb is snug and not overbearingly tight. Just like this:

With that out of the way, it was time to let the ‘Love Potions’ work their magic: one for the fretboard and bridge and one for the fretwires.

Look at how pretty the wood looks now. In fact, look at how pretty the whole guitar looks now, dusted, polished, tightened and oiled.

It wasn’t a forbiddingly expensive instrument but as I played it, sweet sounds emanated from it. I hope the owner thinks so too!


Hertz – a chip, a pickguard and a ‘bone upgrade’

The footnote on this page – as also on all other posts – reads that if you are sentimentally attached to your instrument, its value in terms of money means nothing. 

It could be a Rs1,000 guitar or one hundred times that value but because it means so much to you, and you bring it to me in the hope that I would be able to make things alright, I make an extra effort to ensure that that faith in me is not dashed.

This is just a 6-month-old guitar that came in because the owner was beside himself with grief because this had happened.

How it happened and when it happened, he didn’t seem to know. 

While I promised him that I would take care of it, I inspected the guitar.

The bridge, though a handsome thick piece of wood, had these two plastic dots.

Now, every time I see these dots, just one word rises in my mind ‘SHIT’!!!!!!!! That’s because these dots hide screws under them. And sure enough

though it is not clear in the picture, what you see on the extreme left of the mirror is a nut and a bolt.

The renowned Gibson stable began the practice in the mid-30s (I think) and carried on with it till say a decade or two ago (again, not sure about the dates), because they saw the futility of it. However, guitar makers all over the world latched on to the idea and some in India continue to hang on to it, refusing to let it go. Here was one example.

Manufacturers put in a nut and a bolt on the farther side of the bridge in the mistaken belief that the hardware will help counter string tension, consequently preventing the bridge to lift. 

I am not one hundred per cent certain how far that approach worked, what I can tell you for a certainty is that if the bridge lifted despite the hardware, it would do so ripping through the top.  I have seen tens of guitars like that which cost double and sometimes triple the cost of repairing a lifting bridge.

Anyway, that was your history lesson for this Sunday. Getting back to the young man’s instrument, there was nothing that I could do about the hardware, but for his sake I hoped that the bridge would behave itself and didn’t decide to lift.

I told him how there would be a dramatic increase in volume and sustain if he allowed me to swap the plastic nut and saddle for bone elements.

He agreed and out came the cheap plastic

Any time you see holes in the underside of the nut or the saddle, believe that you are looking at something synthetic

to be replaced by a bone nut and saddle.

As always, there was little work to be done on the nut but the saddle took a lot of time getting to the right height. 

That was the simple part. Now, to repair the banged-in lower bout area.

 If the wood had broken or cracked, it would have been a much easier repair. Only, it had been crushed in very slightly. Crushed and decompressed like that there was no way I could straighten the wood fibres.

And so I turned to my trustee wood fillers.

The one on the left is the real deal, while the one on the right is also a wood filler, but I use it more to give a tint. And on the right of the tube you see how I try out the shade.

I marked off the area with some painter’s tape and filled the affected area.

Not pretty? Yeah, I know! But things always get worse before they start looking better! After filling in the ‘dent’, I let it dry.

As it dried, I took out my ‘tools’ to work on the area.

This is a piece of plastic – not too stiff and with enough give in it – that I picked off the road. The photo on the right shows what I intend to do with it. That’s #600 sandpaper stuck on it and I used it as a sanding tool.

An interesting tit-bit about me: I am quite the junkie and when I walk on the road, I usually do so with my eyes glued to the road. Nuts, bolts, erasers, washers, odds and ends, I pick up almost everything: you never know when what will come handy!

Anyway, I sanded the area flush with the top and then on the surrounding area I went about removing sanding marks with progressively higher grits of sandpaper: #800, #1000, #1200 and #1500. I could have gone up to #8000 but it was good enough at #1500.

And mind you, the ‘operation’ was performed under magnification. After I was through sanding, I brushed on a little lacquer (varnish) and all was good!

While I was at it, I noticed a little dent exactly where a pickguard would have been. It was either a fingernail mark or a plectrum mark. And since I had seen it, I filled that in too and sanded the area smooth.

 And then it was time for the ‘Love Potions’: one for the fretwires and the other for the fretboard and bridge.

Amazing what they do to the fretwires and fretboard.

The owner chose to put these strings on the guitar

and also took my suggestion to put on a pickguard. 

That is how the pretty one looks now. I dare say, the owner seemed happy with the outcome.

But what of the dent? 

WHAT DENT???!!!


New strings and some TLC for this Hobner!

This is the last of my friend’s guitars that I attended to, and it sent me back some 30 years, when I started playing the instrument myself. Then, in India, a proper guitar meant a Hobner. 

Here’s a little side story for you.

The German brand Hofner was established in 1887 and gave Sir Paul McCartney his signature bass instrument that he continues to play to this day. Such was the success of Hofner that their models were exported worldwide and became models for guitar makers all over the world.

In the India of the late 70s, Hobner was born in Calcutta (now Kolkata), and for the 80s teen, it was his/her first guitar. Hobner has since given way to Signature a name that today’s teen/youngster will quickly recognise.

Hobner was just one company. Guitar enthusiasts may also recall seeing Hobner’s cousin, ‘Hovner’: again modelled after the acclaimed Hofner, and also a Calcutta-based company, and thus, my quip about it being Hobner’s cousin. For all you know, cousins may have owned the two brands!!!!!!!!!

All, I needed to do with this f-hole, floating-bridge guitar, was to change its strings and give it a once over.

Giving it a once over, I saw that it had seen many summers and many bonfires. The battle scars were all too apparent.

The little black marks are probably where the pick dug into the wood.
Here you can see the odd plastic used to make the nut.

The little chip on the headstock, where it met with the neck of the guitar, had been taped with cello-tape. I thought long and I thought hard about removing it and fixing whatever was broken under the piece of the tape but finally decided against it.

You never know what little piece of history you may be pulling off by pulling off the little piece of cello-tape. Besides, my brief had not included fixing anything, anywhere.

But it was a beautiful headstock – very different and…warm!

Meanwhile, I also saw this

Look carefully at the feet of the bridge. My friend had marked exactly where the feet of the bridge should stand. A wise move. However, as the guitar lay before me, I noticed that the bridge had moved back a little on the treble side.

I asked my friend if he had noticed intonation issues, and he said ‘yes’! So, that was another little but important adjustment to be made.

The second thing that I noticed was the condition of the fretboard (deplorable)

and the ‘zero fretwire’. The guitar had a lovely, low action, thanks to the ‘zero fretwire’ because of which I did not think the odd plastic nut needed to be changed into bone. The zero fretwire, wherever present, acts like the nut as the strings ride predominantly on it than on the nut. The work of the nut in such cases is merely to ensure that strings stay in one place and don’t fall off the fretboard.

I got to work and with a little love potion for the fretwires

and a different love potion for the fretboard, it looked like this

The intonation turned out to be vastly different from what it initially was. Now, to wait for my friend to play it and say what he thinks of it.

Anyway, this beauty is ready to sing for a long time to come

Troublesome, tilting saddles, the Ashton kind!

So, the next of my friend’s guitars that I took a look at was called an ‘Ashton’. I was unfamiliar with the brand so I looked it up.

I learnt that it was an Australian company based in Sydney, which got its instruments made in China (at least that is what the label inside the guitar said), which got sold in India!!!! That’s cosmopolitanism for you!!!

As I went over the guitar, there was just one adjective that sprang to mind: Neat! Nothing fancy, no frills, no trims, yet, all quite there. I remember asking my friend how old it was, and if I remember correctly, he said that he bought it for 10K a decade ago.

As he gave me that figure, I thought to myself: ‘Certainly a solid top’! And as I looked at it with a magnifying glass, sure, it was a solid top. But then something caught my eye, right at the soundhole. See if you can see it too!

It was not only not a solid top, but it was a double laminate!!!!

Here, let me go off on a tangent and explain, plyboard, laminate and solid guitars a little. I have done it several times before, but I received a request recently to explain that concept again. So, get your popcorn and your favourite beverage and let’s get rolling.

PLYBOARD GUITARS

In producing anything for commercial purposes, the investment in raw material is of prime importance as far as the end profit is concerned. The cheaper the raw material, the larger is the profit margin. And so, in India at least, a majority of guitars are made from plyboard (what we erroneously refer to as plywood): 9mm.

Next time you’re near a hardware store just ask to see a piece of ‘9 mm ply’ and you will understand what I am talking about. It is reclaimed layers of very, very thin wood that are pressed into becoming one piece of wood under pressure.

Yes, you cannot separate the layers but that does not take away the fact that THEY ARE different layers of wood pressed together, and that is what affects the overall sound of the instrument, if one were to build an acoustic instrument out of it.

To explain this, let me take another little diversion and take you right back to school, into your Physics class. Refraction, and we learnt about different mediums and how the ray of light bent, passing from one medium to another.

That is pretty much the case with plyboard and sound too. Imagine sound waves traversing a homogeneous material and travelling though a heterogeneous piece like a plyboard: it is bound to affect the sound.  No wonder, you get such guitars for Rs 3.5 K and from a reputed house like Martin, the very base model will cost something like 10 times that amount!!

LAMINATED GUITARS

This is what you would actually call plywood: several distinct layers of different woods of a specific thickness mashed together. Again, if you are near a hardware store, ask to see a piece of plywood. Compare it with the 9mm piece and you will understand what I am talking about.

For construction purposes it comes in various thicknesses, but for the purposes of guitar building, what manufacturers do is press in a layer (referred to as veneer) of spruce wood or cedar wood with any ordinary wood. The idea is that the spruce/cedar will retain some of its properties while the other wood will support it. Unfortunately, it does not work that way. Remember refraction?

But upright manufacturers say upfront that ‘x’ guitar is a laminated guitar, which means that the top, back and sides are not single pieces of wood but laminated.

But to give the devil his due, laminate guitars don’t sound half as bad as plyboard ones. Why? To answer that let’s see who makes these guitars. It’s big brand names who wish to put an affordable piece of their know-how in your hands, or those, who produce for a market of ‘hobby players’, as is the case in India. 

Real serious players, who know what they wish to buy, are few and far between. Most go into a shop asking for an acoustic guitar and walk out happily clutching a classical instrument, when what they actually had in mind, was a steel-string American folk guitar!  

SOLID WOOD GUITARS

One-wood guitars. No pressing, no mixing, just solid wood. And how do you confirm that it is a solid-wood guitar? Look for a wood pattern on the top or the back of the guitar. Now look for that same pattern on the underside. If you see the same pattern there too, it is indeed a solid-wood guitar. The sound of an instrument made from this wood is a pleasure to be heard: the volume, the sustain, everything. And let me leave it at that.

Try finding one in town and play it for sometime. Tell me what you felt!

Back to the Ashton on the counter; it was a double laminate. Let me explain. So, instead of the regular lamination of a single layer of spruce/cedar and some other wood, it had a top and bottom layer of spruce sandwiching a layer of ordinary wood.

Now, there can be two reasons for doing this. a) A mistaken belief that an extra layer of spruce/cedar will lend a better tone, or, b) to fool people into believing that it was a solid wood guitar! In both instances, a wrong move!

Whatever be the reason, there was nothing to rave about in the guitar, except its simple, clean looks. What was more, its plastic saddle was too thin for the slot and was tilting over.

Thankfully, it had not reached the stage where it could force a crack into the bridge. So, I just loosened the strings and pulled out the saddle and the nut, replacing them with bone elements.

Like always, the nut did not require too much work, the saddle though had to be cut down some, and then some. The black that you see in the nut slots is carbon, which acts as a lubricant for string movement, not allowing strings to get pinched in the slot.

Again, with this one, the corners of the bridge had started lifting and 12 to 18 months down the line, should pose a risk. For now, I let the bridge be.

A little love potion for the fretwires, and some love potion for the fretboard, and look at it shine!


Leaning saddles are…tilting towards TROUBLE!!!!

Recently, a former colleague landed up at my place with not one, not two but three guitars for me to have a look at!

So, the next three guitars that you are going to read about in this blog, all belong to him.

The first one that I took a look at was this one.

It came with a complaint that the pick-up installed in it was not working. I pulled out all the wiring but there was no break anywhere that I expected to see. Of course, that just left the battery compartment connection with the rest of the pick-up as the possible culprit.

And since the battery compartment would not seat completely, I could not check it at all.

I tried finding a replacement but it was not available locally. I have since ordered it online and going by the shipping times these days, God alone knows when it is going to arrive.

And as usual, my eyes went to the saddle and nut. Plastic…and leaning further than the tower of Pisa! But wait. What was that?

Yes! It was a crack. Under string tension, the leaning saddle had managed to crack the bridge. So, the first order of service was to take off the strings and saddle and repair the bridge.

Nothing that a little rosewood dust, some cynoacrylate glue and five grits of sandpaper – #800, # 1200, #1500, #1800 and #2000 – won’t solve. 

Now, see and tell me where the crack is.

Jokes aside, it was in the very nick of time that this instrument came to me. A couple of weeks more of string tension and maybe, it would have come to me in two pieces – still stuck to the top. Then, I would have had to scrape them off the top and glue in a new bridge.

NOTE TO READERS: Whenever you buy a guitar – new or used – one other thing to check is how well the saddle sits in its slot. If it leans, check for a crack along the length of the saddle slot. Ideally, you want to see the saddle sit absolutely perpendicular to the bridge, for it perform the best in transferring sound.

There were other issues too that required attention, but nothing as dramatic as the bridge going Splitsville!

Of course, the saddle and nut would have to go: the saddle because it had served its time and looked as if it would crumble in my hands as I took it out of the slot, and the nut because it too was ‘broke’!

In fact, my friend had been most ingenious in slipping in a piece of string, between the actual string and the nut to keep the string from buzzing.

Then there were minor dings that were more cosmetic than anything

the fretwires needed attention and the fretboard was a little dry…

But there was a little problem that will most likely become a very big problem 12 to 18 months down the line.

The bridge was indeed lifting. The pencil lines on the pieces of paper show you just how deep an ordinary piece of paper managed to slip underneath the bridge. 

I informed my friend about it but decided not to do anything about it. There was nothing I could do except the actual procedure of taking the whole bridge off the guitar, cleaning the mating surfaces and then gluing the bridge back on. I decided that my friend needn’t spend all that money right away.

So, I replaced the nut and the saddle with solid bone. The nut sat perfectly but I had to cut down the saddle quite a bit for the guitar to have the same action that it had with the old saddle and nut.

The dings were touched up and while they disappeared at most places, at other places, a shade or two of lightness remained.

Maybe next time! For now, it looks like this!

Miraculous sound transformation in this one!

Most guitar repairmen often say this, but I am only realising it now: guitars come in batches!
Last week I worked on the same model of the same company and this week, its sibling lands up.

The week before last it was a Yamaha F310. If you consider price range, all three guitars are more or less the same.

Before the Yamaha, I had worked on three toy guitars (Rs 3 – 3.5K), the ones that I love so much!

So, yeah! guitars do come in batches, I do agree.

Having bought this previously loved Ibanez MD3NC-NT, the owner was wise to have it shown to someone who knew a little more about acoustic guitars than himself. 

NOTE TO READERS: Guitars – like shirts – are mass produced. If you want a really proper fit, you have to take it to the tailor to get little things done. Even a brand new guitar – electric or acoustic – needs to be looked at and set up to play the best that it can ACCORDING TO YOUR PLAYING STYLE!

As I inspected the guitar, I noticed that there was nothing wrong with it, except, the action was a tad high. I measured it at 2.25 mm.

However, it was the action at the first fret that alarmed me. Quite easily, I managed to slip in a .025″ feeler gauge under the first fretwire.

I played the instrument, and to my ears, it seemed that the 5th and 6th strings were oddly subdued. I thought that maybe changing the strings and putting in a fresh set would do the trick, but the owner clarified that he had changed strings just last month.

That got me thinking. If D’addario .012 – .053″ strings are sounding like this, maybe it’s the nut and the saddle. Of course, they were plastic!

I suggested that I could bring the action down and I would like to change the nut and saddle to bone components, to which the owner agreed.

And then I went about my routine. Loosen strings, pull out the bridgepins and keep them in order;

pull out the saddle and clean the bridge slot in preparation of receiving the new saddle. But wait!!

What is that in the saddle slot – right where the 5th and the 6th string would be?  I pulled it out with a pair of tweezers and to my astonishment, it was a piece of card paper, cushioning the saddle on the bass side. No wonder the 5th and 6th strings were sounding dead!

A closer inspection of the saddle revealed that a manufacturing fault had left the saddle shorter on one end (bass side) than on the other end. Naturally, the saddle rocked lengthwise in its slot in the bridge and to stabilise it, the card bit had been shoved in. While the saddle rocked no more, the piece of paper managed to all but deaden the bass strings.

It was a 76 mm saddle and was replaced with a bone one of equal length.

Removing the nut from its slot, I found a strange white, powder-like residue, and even as I write this, I am sorry to inform you that I still don’t know what it could have been and where it came from.

Anyway, I scraped it clean and glued in a new bone nut.

Thankfully, the neck was as straight as an arrow. Not a bad thing at all. Once the strings are put on and tuned to pitch, the tension, invariably, pulls a little relief (a little gap between the strings and the fretwires) into the neck.

Installation of the new saddle entailed a bit of work and a lot more calculation and marking than I am used to.

See what I mean?

With the new bone nut glued in, I stuffed its slots with graphite so that the strings would not have any problems running through them.

Meanwhile, the fretboard and the bridge were given a much-needed ‘oil massage’.

Stringing it up with the strings that were originally on it, the action was exactly where I wanted it.

The owner hesitantly acceded that yes, the action had improved as well as the volume, and particularly the sound of the 5th and 6th strings.

Two days later, he messaged me to inform that indeed the sound had improved tremendously and he was enjoying playing the instrument.

I patted my back!

Here’s me signing off with one last look at the guitar!

The Ibanez returns – for strings and bone elements!

I had worked on this guitar some time back though it was only a bit of tuning up that was required then.

Recently, it returned for a string change and slight action-correction. I noticed that the saddle and nut were plastic (yes, that is the first thing I notice when instruments are brought to me), and also that the strings had already bitten into them. The grooves in the nut were deeper than I would like to see.

Ideally, what you want to see on the nut slots is that the strings ride half in their slot and half outside, for perfect playing and sustain. So, strings should never be seated more than half their circumference in their slots. 

I suggested to the owner that it was just the right time to swap the plastic for new, bone elements – a compensated saddle and a nut – as in any case the action correction would require me to work on the saddle and nut. The owner saw light and agreed.

But before I put the new nut and saddle, I removed the old one and cleaned up the slot where it would sit with a small chisel. Any residual glue or chips of wood are bound to affect both action and sound.

My reasoning in suggesting to the owner that he replace the saddle and nut was that going by the rate at which the slots were deepening in the nut, soon the slots would grow so deep that strings would start buzzing.

In order to avoid a buzz, or worse, the nut splitting due to string tension, and double work for me (first work on the plastic set and then later on the new bone set) I thought of doing it at one go and save myself some work. Of course, if the customer came back a second time, he would have paid me a second time, but goodwill is prime.

And after all that thinking and planning, look what I did? I first worked on the plastic set using old strings, left things just a hair above where I wanted them, and then marked the bone saddle and nut to the plastic pair’s dimensions and then worked on them!

Just what I had hoped to avoid! But then the owner now has a bone saddle and nut in his guitar and a spare plastic set, should he require them in an emergency. However, the plastic pair will work only on THIS guitar and no other instrument.

Once everything had been worked and reworked, it was time to put everything together and hear what the Ibanez had to say.

And while I had the fretboard in full view, I thought a little polishing of the frets and a little oil for the board itself would only make the guitar look prettier.

See the difference?

Meanwhile, the strings that the owner chose were these.

These ‘Authentic Acoustic’ strings from the house of CF Martin, are probably among the best acoustic strings for amateur players. For bigger bucks, there are other options. 

CF Martin is an American guitar company established in 1833. Till date it makes only acoustic guitars and its instruments are the pride and joy of players around the world. It was this company that gave guitar manufacturers around the world the famous  ‘X’ brace pattern as early as between 1840 and 1845 – a pattern that is used till today. The company began making its own strings in 1970.

But just as I was about to string the guitar up, I noticed that the buttons on the tuning machines were very loose. The buttons are what you hold and turn to tune up your guitar.

If you notice, the buttons are held to the rest of the tuning machine with a screw. Tightening or loosening that screw gives you that perfect movement which is not too loose and not too tight.

However, the trick to doing it right is that you just don’t pick up any screwdriver and start twisting. Check very carefully the size of the screwdriver and use one that fits perfectly on the screwhead. Using a bigger or a smaller screwdriver can ruin the head of the screw, which may lead to it remaining permanently stuck inside the button.

When the owner came to pick up the guitar, he wanted the action to be lowered still. Remember, I had left a little bit on the saddle, just in case the owner wanted it lower? So, I removed that extra portion and the owner was very happy with the action.

All’s well that ends well!


A visit by a troubled Yamaha F310

After a long, long time, a proper guitar on the counter top and as you can probably notice, not too used also: the pickguard still carried the skin from the manufacturers! 

The lady player brought it in on the recommendation of an acquaintance, who is my customer and also an avid reader of this blog.

The trouble, as she said, was that she noticed that the action had got increasingly high over the period (around 1 year) she had owned it. She also complained of a certain ‘dulling’ of the sound.

As I measured the action (left photograph) at the 12th fret, it was 3.25 mm. Ideally, I like to see 2.25 mm or better still 2 mm at the 12th fret. So yeah, the saddle would need to be pulled out and given some amount of shaving.

Meanwhile, in the photograph on the right, I am trying to measure the action at the 1st fret. I know you can’t see it but I am holding a .025″ feeler gauge when ideally, I like to read between .016″ – .018″. Again, the nut height would need to be reduced.

As far as the ‘dulling’ of the sound was concerned, though I did not feel the same when I played the guitar, but I took the young lady’s word for it. If you look closely at the photograph on the right,  you see even the thickest string buried in the nut, while the 1st string is deeper inside.

What you should see on your guitar nut is that all strings – thick or thin – sit just half their circumference in their respective slots. Since these weren’t, that could be the possible reason for a certain deadening of the tone.

So, I advised the customer to have both the saddle and the nut replaced with bone elements and with new strings, everything should be sorted out. She agreed.

I took off the strings, pulled out the bridgepins and kept them, each in its respective slot in my block, so that when they went back into the guitar, each pin went back into the hole it came out of.

As I took out the saddle, I realised that there wasn’t much meat in it. I measured and marked, and this is how much I had to take off it. Likewise, I measured and marked the nut too.

This, of course, is the saddle that was installed in the guitar. I shaved it, put it back in, put back the old strings, just to see if everything measured up. 

Since everything added up, I took off the strings again, took out the saddle and the nut, took a swanky new set of bone elements, marked them with the old, plastic elements and shaved off to the  required height.

After I put those in and left the glue to dry on the nut (you never glue in the saddle!), I decided to give the fretwires a shine and oil the fretboard too with boiled linseed oil (Alsi ka Tel I think, it’s called). Here, you can even catch a glimpse of the new bone nut installed to the correct height.

Along with the fretboard, I also decided to pay attention to the bridge and gave it a little drink of oil. Doesn’t it look pretty?

After the glue had dried, and the excess oil had been taken off, it was time to restring this beauty. To give the owner a bigger bang for her buck, I had suggested that she try .013″ to .056″ gauge strings. The strings chosen by the owner were these:

Of course, I did point out that while the volume will increase appreciably and there will be better sustain, initially, these strings will be painful and will need a little getting-used-to. 

But before actually stringing the guitar, there was one little step to be done: shaving the bridgepin ends at an angle so that the ball-end of the strings did not catch on the pin ends but slip off them to rest against the bridgeplate, where they ideally should.

This is what the bridgepins and ball-ends of the strings looked like at the end of the exercise:


And as each string went in, it got a little 90° bend in it, again so that the ball ends did not rest on the pin ends but against the bridgeplate. 

After stringing it up and tuning it to pitch, the strings needed to be stretched to bring them out of their ‘Inertia of Rest’ and get them used to the tension that they would be living under. 

The reason why you often find new strings losing tune fast is because new strings are not stretched, or not enough. Do this one little step and your guitar should never fall out of tune again.

The customer had also requested that I install a strap button on the heel of the guitar. This is how it looks now.

And the guitar itself? Here it is:


Attention parents: Here’s why you should never buy a Rs 3 – 3.5K acoustic guitar

The period of lockdown has been cataclysmic for most of us, with people wondering what to do with their time.

During this period, I have received umpteen calls from children and parents asking if I also sell guitars. My answer in the negative must have been a disappointment for them but I did also guide them about what they should look for while buying a guitar, and why a Rs 3,000 – 3,500 guitar is a recipe for disaster.

I have told them, and all who ask me, that in India, the starting range for a passably good guitar is Rs 5,000. Anything below that price is a wastage of money. With, say, a Rs 7,000 guitar, you spend once and have the instrument last a lifetime and beyond.

Here is my reply to them in greater depth, explaining my reasons for shaking my head at cheap instruments.


CONSTRUCTION

It’s actually a no-brainer. Why does a simple sponge cake at your corner bakery cost ‘x’ and at a reputed bakery 10x? A simple answer would be that it is primarily due to the quality of ingredients used in making the cake.

While that is true, another aspect is that at the up-market bakery, they try to protect their reputation. ‘Reputation’, you ask?

Yes! The upmarket bakery realises that its clientele is used to a certain quality and any compromise on that quality would mean losing that clientele. And so, the upmarket shop invests in maintaining that quality by investing in good ingredients, and particularly in workers, who can maintain that level of quality, for only when the workforce understands the concept of quality, will they produce a quality product.

Now, read the above few paragraphs, replacing the word ‘acoustic guitar’ with ‘cake’ and you will realise why the Martins, the Gibsons, the Taylors, the Matons, the Breedloves, et al, carry the price tags that they do.

Now, let’s look at the construction of the 3-3.5K guitar. I would like to break ‘construction’ into several sub-heads:

a) Materials used
b) Bridgeplate
c) Braces
d) Drilling of bridgepin holes
e) Bridge screws
f) Fret ends

a) Materials used

The primary reason why a Rs3 – 3.5K guitar is able to cost that much is because of the materials used in building it. Let’s start with the wood – or the lack of it. In this guitar, not wood but plyboard is used. To remind you, plyboard (plywood is a grade above plyboard) is layers of wood loosely pressed together – not good at all for sound transmission.

b) Bridgeplate

This is a piece of wood that is supposed to support the bridge by sandwiching the guitar top between itself and the bridge. Ideally, you want a hard wood piece (mahogany, rosewood, walnut, maple) serving as a bridgeplate, and for it to run at least for 3/4 the length of the bridge.

The purpose of the bridgeplate is to take the strain from the ball-ends of the strings and not to let the tension from them be transferred to the guitar top. If it fails in this purpose, it can let the strings pull up the top exactly in front of the bridge.

Like this:

Not a very good shot but there are Rs 2 coins at each end of the ruler. The centre of the ruler is touching the top but its ends are raised the width of a Rs 2 coin at either end.

This is called belly bulge in a guitar and is very common in almost all acoustic guitars, irrespective of how expensive they are. However, while in an expensive guitar it might take years for a belly to emerge, in a cheap guitar with a faulty/lightweight/incorrectly placed bridgeplate, it can be a matter of a couple of months.

In the worst case, it may rip right through the top, pulling out the bridge and all!

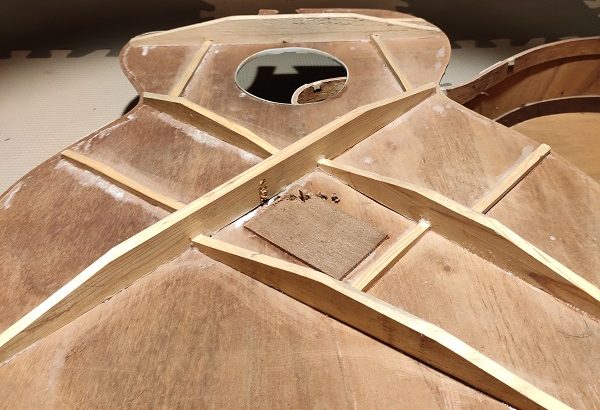
Notice how useless this bridgeplate (the little square piece in the centre) from a cheap guitar is. Just two bridgepin holes pass through it, while three are passing through the guitar top itself and one has actually pierced a brace/strut.

And while this guitar was fortunate to have one, I have often come across cheap guitars without bridgeplates!

c) Braces

The pieces of wood that you see standing upright in the picture above are called braces or struts. As the name suggests, the function of the braces is to ‘brace’ the guitar top against the tension of the strings (there’s a force of 80kg exerted by the strings when they are in tune).

Braces also help the guitar top to vibrate, so their length, height and placement is of prime importance.

Here’s a better look at them:

In a high-end guitar, they end up looking like this:

Notice the difference in symmetry, the finish. While you are at it notice how you can see the characteristic lines in the underside of the second guitar – a high end one. It shows that it is a solid spruce top and not a laminated one. Notice also the size of the bridgeplate.

d) Drilling of bridgepin holes

In cheap guitars, often the bridgepin holes are all over the place. Either they are not in a line, or, they are not drilled exactly at 90° to the guitar top. If they are not drilled at an absolute right angle to the guitar top, there is always the fear that the leaning forward bridgepin or the laying back bridgepin will fall victim to string tension, pulling the bridge one way or another.

In the cross-section of the guitar top (above), the dotted lines represent the path the drill should have taken. Often in cheap guitars, you will find bridgepins either leaning forward or laying back. What this does, is to not have complete contact with the string all through, impeding sound transfer. Also, it does not sit too well on the eyes.

e) Bridge screws

So, with all those faults, what is the best way to hold everything together? Screws.

Every time you see white dots on your bridge, know that they are not just for show, but are hiding something sinister under them: screws. The white dots are just efforts to hide the screws from plain sight. All you need to do is take a mirror in through the soundhole and look up at the bridgeplate and you will see the nuts and bolts there.

Nothing wrong with screws – Gibson started using them way back in the day – except that the screws chew into the plyboard, causing more damage than providing structural support.

f) Fret ends

The haphazard way cheap guitars are put together, leaves a lot to be desired. Sharp fret ends is another factor to watch out for.

Such fret ends can be a real pain when you play.


HARDWARE

The tuning machines on a cheap guitar are the worst things about them. It is a miracle that they actually turn and do not allow the string to slip through them!

On your left is your favourite toy and on the right is a branded guitar. On each is the set of tuning machines that came with it from the factory. It is tough trying to tune the guitar using the tuning machines on the left, while its a breeze doing it with the ones on the right.

Tuning machines have gears inside them and the more teeth they have, the slower they move, allowing you to ‘fine tune’ your guitar. Gears with more teeth cost money and so never exist in cheap guitars.

Oh, the list is a lot longer, but for now, I suppose this will suffice to help prove to you, dear parents, never buy your child this set of problems. Yes, I understand that you don’t know whether your child will continue with this ‘hobby’ for long, but when you buy a branded guitar, it will have a resale value.

How to take the smell out of a smelly guitar

The next in the how-to series is how to deodorise a smelly acoustic. But before we do that, first, we must understand how a guitar gets “smelly”.
Normally, when an acoustic guitar leaves the factory or the maker, it carries that distinctive smell of wood, varnish and paint. But over the years, due to our own bodies – the sweat and grime that get onto the body of the guitar and the areas that we constantly touch, stay there and get layered by more sweat and grime – guitars can start smelling bad.

And then there are habits, like smoking. Cigarette/cigar/cheroot smoke is one such smell which non-smokers (women guitarists particularly) find most offensive.

Playing with dirty hands often lets matter from them drop into the soundhole, which over a period of time, tends to develop a smell, and often, the smell tends to get absorbed into the exposed, raw wood inside a guitar.

Nine times out of 10, when one needs to deodorise an acoustic guitar, it is because the smell has got absorbed into the wood of the guitar from the inside, due to something having fallen in through the soundhole. 

Many times it is not so much the guitar as it is the gig bag or the lining of the hardshell case in which the guitar is housed that transfers the odour to the instrument. Whether it is the case or the guitar itself, there are umpteen number of ways that you can deodorise the item with simple, everyday items that may be present in your house.

  1. Baking soda
  2. Car air freshner
  3. Coffee Beans
  4. Apple slices
  5. Tea bags
  6. lemon slices
  7. Pinewood chips
  8. Cedar wood chips
  9. Rice
  10. Old newspapers
Pix courtesy: survivalsullivan
  1. If it is your case/bag take baking soda and sprinkle liberally inside. Being the excellent deodorant that it is, it should be able to pull all the offensive smell off the bag/case. Later, you could use a vacuum cleaner to lift out the baking soda.
    In case, it is your guitar, you will have to take off the strings and lower a shallow dish full of baking soda into the guitar. Let the guitar lie on its back in a place where it won’t be disturbed and where there won’t be a need to move it. Leave it there for a few hours and then take the dish out. The offensive odour should have been removed by now.


2. An ordinary, can-type air freshner should be helpful too – both in the case as well as inside the guitar. Again, you will have to take off the strings for this.


Pix courtesy: healthline

3. Coffee beans are the biggest natural deodorants that you can lay your hands on. Remember, they keep a little jar of coffee beans in perfume stores to clear your nose?

Keep coffee beans in a small open container in the bag/case or inside the guitar. Leave it for a few hours and the job will be done.


4. Half an apple cut into quarters and dropped into the bag/case, or, left inside a guitar for a few hours will also do the trick


5. If you don’t have apples at home, lemon slices will do the same job, maybe better. However, you will have to be careful not to leave the slices lying on bare case material or inside the guitar. You will have to keep it in a container of some sort.


6. Few tea bags dropped into the case or left hanging from the strings into the guitar, should also do the trick


7) Chips of pinewood will also work, only you have to be careful to use ‘chips’. Pinewood dust should work but I don’t think blocks will work


8) If you can lay your hands on cedar wood chips, that should be great too


9. Rice is known to work wonders in removing offensive odours from inside a guitar. Drop in a cupful or two of uncooked rice and then give an almighty shake to your guitar. Rice with its absorbent properties will take away any bad smells residing in your instrument.


10. There is nothing quite like old, yellowing newspapers that work better as deodorant. But be sure to find old normal newspapers and not the glossy variety.

Crumple the newspaper into balls and stuff them inside the guitar (Naturally you will have to take the strings off to do this). Leave the guitar like this for a few days. Pull out the newspapers and the with the newspapers, you would be pulling out the bad smell too.


Having described all these tricks, I would like to add that prevention is always better than cure. So, stop drying your clothes on your guitar, or even using it as a clothes hanger, and don’t eat French fries and play the guitar at the same time!    

Stringing a steel string guitar – how to

Pix courtesy: sweetwater

A young customer, a student, recently messaged me asking me to teach him how to restring a guitar.

While I thought about how to explain to him, I also wondered that often, we talk about big issues, leaving the simplest and the most essential things unexplained. So, I decided that in this blog post, I will describe how ‘I’ restring a guitar.

It is essential to understand here that there are many ways in which people string up guitars. As long as the strings don’t slip out of the tuning post, or lose tuning, all those methods are correct.

But first a little look at guitar anatomy.

Pix courtesy: artistguitars.com.au

To take off the old strings, loosen the tuning keys (machine heads) enough and then using the notch in your string-winder, pull out the bridgepins. Do be careful about keeping the bridgepins in order, remembering which pin came out of which hole because not all strings are of similar diameter. Once a pin becomes used to a certain string size, it will not seat properly with any other string size.

Pix courtesy: tabs4acousticBefore you keep away those pins, I urge you to take a look at them.

If they look anything like the bridgepin on the top, you need to file it, at say, a 45° angle – like the lower of the two bridgepins. A simple hobby file will help you accomplish the task. And why should you do this?
Filing the bridgepin like this will help seat the ball-end of the string right against the bridge-plate (which is right under the top, under the bridge), as it should be, rather than it getting caught at the end of the pin. The ball-end of the string stuck on the end of the bridgepin can makes a huge difference in sound transfer. It can also move while you tune/ untune a string, making it slam against the bridge-plate, damaging it.

Here is a diagram to understand it better:

Pix courtesy: thegearpage

With the old strings off, now is the best time to give a good cleaning and rub to your guitar – especially those areas that become inaccessible with strings around – the headstock and the area between the soundhole and the bridge that comes right under the strings.

With everything dust-free and clean and with the hardware at the headstock given a little tightening, it’s time to string ‘er up!

Pull out your strings and right at the ball-end of each, pinch between the forefinger and thumb and bend it 90°. You don’t have to measure with a protractor, even a small bend will do.

This done, put each string in its hole – say a couple of inches – and close it by pushing in its respective bridgepin. Remember the groove in the bridgepin is to accommodate the string. So, when you are putting in the pin, the groove should be facing the string.

As you push down on the pin, pull up on the string. Keep pulling up till the string stops coming up. This means that is seated against the bridge-plate.

With all six strings pinned in the bridge, one end of the problem is tackled. Now to look at the headstock. Remember, you have to thread the strings from inside the tuning post, not the outside – as shown in the diagram below.

Pix courtesy: hazeguitars

Then turn the tuning machines in such a manner that the hole in them faces the general direction from which the string will come into them.

At the headstock, I divide the strings into sets of three. So, I have three thick strings – E, A, D – and three thin strings – G, B, e. For the two sets of strings, I follow two different methods to wind.


The bass strings (E, A, D)

These being thick and pretty stiff, I just measure up to the next post and snip it off. So, for example, I am winding the E string, I will measure till the A-string tuning post and cut it off there, as shown in the screenshot below.

Slip in the string into the E-string machine post and just let a mm or two stick out. Then, using your string winder, start winding, even as you hold on firmly to the string. As it winds and starts getting tight to hold, place it in its slot in the nut and tighten – not too much, but just enough to keep it from slipping out of its slot on the nut.

Follow the same procedure with the A and D strings.
But why cut off the strings? Why not let them be?
Because when they look like this

you know that you are looking at a monster!!!!
Do me a favour. Go to Google, and type ‘acoustic guitar headstock’. Find me one photograph that looks like this. My guess is that you won’t find one!
Now go, right on the top of this post and look at the main photograph. That is taken from the Gibson website. THAT is how acoustic guitar headstocks are supposed to look.


The treble strings (G, B, e)

For the treble strings, I start with the ‘e’ string. Here, I don’t measure and cut before hand but just slip the string in the tuning post.

  1. Then with your right hand, pull back about 5″ of string.

2) Turn the free end inwards towards the ‘E’ string

3) Lifting the string with your right hand (the one over the fretboard), pull the free end under it

4) So, what you should have, is the string running over the fretboard in your right hand, and its end, turned inwards and under it and over it.


5) Pull the string across as shown by the arrow. What this does, is to lock the string in place.

6) Now, you can take your string winder and wind the string completely. Do not forget to ensure that it sits in its slot on the nut.

Likewise, wind the B string. All photos to demonstrate the treble strings’ winding are screenshots of a YouTube video by ‘Acoustic Life’.

For the G string, I follow this method or what I do with the bass strings – depending upon my mood at that time. You too, are free to do as you please.

But whether it is the bass strings or the treble strings, string winds on the tuning machine post should come from the top to the bottom. The angle that creates, helps in excellent sound transfer.

Pix courtesy: fineartamerica

Once the strings have been wound, tune up the guitar. After you have tuned it up, hold each string between your thumb and forefinger around the 12th fret and give it a healthy pull. Don’t worry! Except for the G string and the ‘e’ string, there is no fear of them breaking.

You may hold it at the nut as shown in the picture below.

Pic courtesy: theguitarjournal

Strings are not used to the tension they are put under. When you first tune up your guitar with new strings, the tendency of the strings is to try and return to their original position. AND THAT IS WHY new strings go out of tune and you end up thinking that there is something wrong with your guitar!!!

Once you have done that, tune up your guitar again. Again give the strings a good tug. It will go out of tune again. Tune it up again. Again give them a tug and tune up again!!

Once you have done this exercise at least four times – properly – I doubt if your strings will go out of tune again, just standing.

SO, THERE YOU GO, SHUBHAM! THAT IS HOW I CHANGE STRINGS ON MY GUITARS!

Hardly any ‘Pleasure’!

This is the second of the ‘clean-up’ jobs and the guitar was ironically labelled ‘Pleasure’. I was in half a mind to ask the chief minister to get me PPE for this – exactly the type that our Covid-19 warriors don. 

Take a look at what state this was brought to me in.

Why do people buy an instrument or keep a pet if they can’t take care of it? That is the question I asked myself repeatedly as I went about cleaning this guitar.

Admittedly, this is hardly a good or an expensive guitar but that is no reason to leave it standing in the corner of the room even as you have it white-washed!  

I was in half a mind to just dust it with a rag, change the strings and hand it back saying ‘It looks good like this’, but then I decided not to be mean to the guitar and to the owner.

As I looked it over, there were a few problem areas that I could see plainly. 

As you might notice, the tuning machines were missing a couple of screws, and as the tuning machine was wound fixed just to one screw, the one that was attached had really chewed into the wood of the headstock.

The remaining screws on the tuning machines were too loose. The screws on the ‘G’ string tuning machine were not completely seated. Consequently, they had not only chewed into the headstock but had, in fact, managed to crack it!

Enlarged screw holes needed to be filled and re-drilled. These are just toothpicks jammed along with glue and then shaved off level with the headstock. 

If you look closely enough, you will notice that a drop of machine oil has already been fed to each tuning machine so that they function that much smoother.

However, the main problem remained this:

The nut had broken and dropped off from the ‘B’ string at some time during the eventful journey of this guitar. Replacing it with a new one involved shimming it with material from an old credit card, so that it would stand at the same height as the old one. Good old plastic under a plastic nut never hurt anybody!

With that done, and as the glue dried on the new nut, I turned my attention to the fretboard. It required no less than an hour’s elbow grease to get the drops of splattered paint off it. 

After it was cleaned, a healthy coat of boiled linseed oil was put and left there for some 20 minutes. The already dry fretboard, after being put through all that soap-water and toothbrush needed that drink of oil, but ideally to condition rosewood/ebony fretboards just an application of the oil and its immediate removal is recommended.

What remained was the toughest job: cleaning the body of the distemper! For three hours I toiled with the soap water and toothbrush before the thing resembled a guitar again.

And while I was at it, I took off the pickguard. The white area that you see in the photograph on the right is all, pure dust!

So, everything was cleaned screwed back on, strung up and the guitar makes a noise!!!

ADVICE: If you have convinced yourself that learning to play an instrument is not your cup of tea and you have decided to give up your “new hobby”, instead of leaving the guitar standing in a corner, give it to a younger cousin/nephew/niece. Maybe, he/she will be able to apply himself/herself more than you did. 

Learning to play a musical instrument is all about application. It is not as if you were learning to ride a bicycle. That you can learn in a moment: as soon as you learn to balance yourself.

While learning a musical instrument one needs to be dedicated to the thought of learning. If you’re influenced by Brad Paisley or Arjit Singh, remember that they did not learn to play the way they do, overnight. It is after months of dedicated effort that one learns to just change chords without losing beat. But one needn’t put in eight hours a day practising how to play (some people are able to do that too), but 15-20 minutes daily, without fail should be enough.

It will come, later or sooner!

Cleaning caked dust and years of grime off this one!

Do you believe in fate? I have begun to, after last Sunday!

Remember, last Sunday, I talked about how you can clean and maintain your acoustic guitar with household items/products?

Around noon, a person landed at my doorstep with not one but two guitars that looked as if they had been excavated from under years of debris! And no, he had not read my post. He didn’t even know I wrote a blog!

Never one to refuse a guitar that comes to me, I took one look at them and thought to myself, ‘Now, what have you got yourself into?’ There was a truck-full of muck on them that would take decent time and effort to take off. Strangely, the photograph on top does not quite depict the state it was in.

Here are some more for you to relish the job I had on my hands.

Short of completely dismantling the guitar, I did almost everything. There were loose tuning machines because they had lost the little holding screws behind the headstock of the guitar; the strings in them, probably Adam had put in. Now, Adam managed to tie knots into the strings to hold them in the tuning posts, while the extra length of string had been coiled into modern art at the headstock (my favourite peeve)!

If that was not all, it was an instrument with a floating bridge. Look at the photograph of the bridge. A floating bridge, as the name suggests, is not fixed but floating. It just sits on the top of the guitar and is held in place by the strings running over it. Usually they are adjustable, but the problem with such bridges is that their position is everything; a fraction of a millimetre difference left or right, or up and down on the top can play havoc with the intonation of the guitar.

So, the first thing I did was to mark exactly where the bridge would go once the guitar top had been cleaned up. I used tape to mark the bridge area and then set about cleaning the guitar.

I decided that there was no place better than the headstock to start from. So, off came the remnants of strings and in came the mug of hot water in which a few drops of household dish-washing liquid had been mixed. An old toothbrush and lots of elbow grease was also used in the cleaning of this contraption.

With the dust and grime finally off the headstock and the body, it was time to turn my attention to the fretboard of the guitar. The problem with fretboards – all fretboards – is that while the body and the rest of the guitar is protected by paint, or at least a thin layer of varnish, the fretboard and bridge are made of bare wood, and thus, need careful handling.

It took me over an hour to clean just the fretboard, all the frets and the fretmarkers. Different grits of sandpaper were used to clean, polish and shine the frets before coating the fretboard and bridge with boiled linseed oil.

The sad part is that I got so engrossed with the job at hand that I forgot to take photographs. This one shows the body cleaned and polished but not the fretboard.

Then, as I put everything together, I decided to give the bushings on the headstock a little extra care. A chrome polish did the trick nicely.

A wait of 5 – 10 minutes and the bushings buffed out just fine.

The owner had also wanted Elixir coated strings to go on this guitar, and so, Elixir strings it was. Looking at the nut, my initial reading was that the slots in it were too low and the strings would buzz. But, thanks to the zero fret (the very first fret almost stuck to the nut) there were no buzzes, while the action was amazingly low.

I wish I had taken photographs of the finished job!!!!!


Clean your acoustic guitar – with household products!

What makes you go, ‘Wowwww!!!’ when you see a car or a motorcycle? For me, it is when the vehicle is without a speck of dust and grime on it, looks polished, and gives that general look that it is well-cared for. It shows the character of the person driving it too.

Of the many, many guitars that I have fixed in the 10 years of me repairing acoustic instruments, seldom have I come across a guitar that had been well cared for; I mean kept spic and span. 

Each time I have told the owner to keep the guitar clean but it dawned on me only yesterday – when I repeated my words to another customer – that I had never told anybody HOW to clean your guitar and keep it in ship shape!!  

So, here is how I would advise you to clean your guitar. Please understand that this is not how I do it but this is how I am asking YOU to do it, so that you don’t break the bank on products while doing it. 

Know also that for each job that I will talk about here, there is more than one product available in the market. They are certainly not bad for your guitar but if you can get the job done for much less, why not?

WHAT YOU WILL NEED

  1. Two worn out COTTON t-shirts cut up so that the back and front form two pieces. You should have four halves of good, soft cotton.
  2. One unused , SOFT toothbrush
  3. One unused, HARD toothbrush
  4.  Scotch Brite pad  Yes, the same thing used to clean utensils with
  5. Glass cleaner (Colin)  It comes as a spray
  6. Waxpol car wax tin You will get this at any car accessories shop and is probably the most expensive item in this list. But don’t worry. It should last you a lifetime. What you are looking for is solid wax not the liquid variety.
  7. White vinegar Your corner grocer should have this. A half-a-litre bottle costs under Rs 30
  8. Dish washing liquid just a drop or two
  9. Warm water in a bowl
  10. Usha sewing machine oil If mother does not have it, buy it. This too will last a lifetime.
  11. Ear buds and toothpicks 

All set? Here we go! 

For you to be able to do all that I am about to tell you, the strings will need to come off the guitar. So, it will be best that you save this exercise for when you are ready to change strings. For the sake of making your cleaning job easier and also to make explanations more understandable, we will break up the guitar cleaning according to area and into three parts: i) The fretboard and bridge, ii) The Body, and iii) The headstock and hardware.


  1.  The fretboard and bridge
Pix courtesy: premierguitars

If your fretboard looks like this, you have work to do, so roll up your sleeves. In that bowl of warm water, put in a few drops of the dish-washing liquid ( a drop or two is enough for 100 ml water). Take the HARD toothbrush, dip it in the water and start stirring till you see the soap mix with the water.

Now, take out the toothbrush and go to work on your fretboard in circular motions. You can apply as much force as you want. Start at one end and go to the other, paying attention to each fret.

After you are through with this step, take one of the halves of a worn out, pure cotton t-shirt and wipe your fretboard dry. Inspect it. If you are satisfied with the result, wonderful.

Pix courtesy: guitargeargalore

If you feel that you have removed most of the deposition from your fretboard, but not all of it, take the Scotch Brite – DRY –  and go to work on the fretboard. Rub briskly, concentrating on problem areas but not leaving any part of the fretboard unattended.

After you are done, take the SOFT toothbrush and brush away whatever remnants of the Scotch Brite pad are left. Inspect. What do you see? Clean fretboard, shiny fretwire? 

You’re welcome! 

Pix courtesy: liveabout

Moving to the bridge, remove the saddle and the bridgepins and with your SOFT toothbrush, give the bridge a brisk brush. You will need to be careful if you have an under-saddle pick-up in your guitar. 

If left uncleaned for long periods of time, dust tends to cake in areas that is hard to reach (like in between bridgepin holes and on either side of the saddle). If you are able to brush it off, excellent. Otherwise, it’s back to the warm water, HARD toothbrush and the piece of t-shirt to dry off things.

Pix courtesy: guitargeargalore

till your bridge looks something like this:

Pix courtesy: Yamaha


ii) The body 

There are different processes to be followed if your guitar cost you under Rs 6.5 – 7K and over it. Why? Because of the material used in each is the reason for its price. 

For less-expensive guitars, take one of the t-shirt pieces and properly dust the front, back and sides. Do pay special attention to the shoulders of the guitar (the area of the body on either side of the neck, where it meets the body) and the area between the soundhole and the bridge, over which the strings run, because all the dust seems to settle in those two areas. 

Then take the end of another t-shirt, dip into the soap-warm water solution, squeeze it as dry as you can get it and simply give the front, sides and back of your guitar a healthy rub – in circular motions.

On more expensive guitars, you do all of the above and then follow up with Waxpol. Take a fresh piece of cotton t-shirt and ‘moisten’ a corner with ONLY WARM WATER. With this corner, wipe out a little bit of the wax from the container. You will notice that it is as hard as candle wax. Please don’t try and take out a whole load of the wax, only as much as you would take out shoe polish on a brush from a tin of polish.  

Go over the front, back and sides in circular motions. I would advise you to do one portion at a time. For example, you wax both the sides. The side that you applied the wax on first, return to it and with a fresh t-shirt piece, give it a good buffing till there is a healthy sheen to it. Next, turn your attention to the side that you applied the wax on last.

Next, go to the back, do half first and then the other half, and then the top, exactly how you did the back. The wax not only protects your guitar from minor scratches  but it even hides smaller ones. What’s more, it gives it a nice sheen and makes it smell good too!

EXCEPTION: No wax should be put on guitars with satin finishes. Just a wipe with warm water is enough.


iii) The headstock and hardware

Pix courtesy: pxfuel
Pix courtesy: premierguitar

Does your headstock and tuning machines look anything like this? They should not. And yes, I know one of those photographs is that of an electric guitar and the other one of a bass, but you get the point, don’t you? 

Now that you have the strings out of the way, clean the headstock front and back. If you need to use your moistened rag, so be it. You will notice that it is difficult to clean areas very close to the tuning machine. Take a ear bud and try getting into these spots. If you still can’t use a toothpick with a corner of the t-shirt wrapped around it.

If your tuning machines are beginning to rust, take a bit of the white vinegar in small container (the cap of the vinegar bottle will do) and dip a earbud in it. Next dab the rusty area with the vinegar and leave for some time. After waiting 15-20 minutes, bring back the Scotch Brite pad and give those tuning machines a good rub.

Now is also the time to check if any of the tuning machines or your strap buttons are loose. Tighten them and then drop a single drop of Usha oil into each tuning machine – if they are open like the one in the photograph.

Pix courtesy: jazzguitar.be

If they are closed, see if they have a hole in them. If they do have a hole, dip a toothpick in the oil and touch it to the hole.  


ADDITIONAL NOTE: String cleaning liquids, sprays, polishes are another waste of money. In a t-shirt, just pinch a string between your thumb and forefinger and pull up and down the neck. Do this before and after playing and you can come and thank me later.

Pix courtesy: guitaranswerguy

However, one implement that I have found particularly helpful, for it is time saving, is this:

Slide it under the string, shut it, and pull up and down the neck. All six strings cleaned at one go! I have a few of these things. Next time you’re here, remember to pick up one of these handy-dandy tools. 


Should you shim your saddle/nut?

Pix courtesy: cadam7777777

That acoustic beauty that you had been eyeing for a long time, you buy and it finally arrives at your doorstep. You rip open the packaging, tune up the instrument but discover that due to a rather low saddle/nut, your brand new guitar is buzzing.

Scenario 2: The deal that you’re getting on that old acoustic is a steal. Everything is perfect about the instrument, except its saddle/nut is really low. Again that irritating buzz!

Is it alright to shim the saddle/nut?

A shim is a piece of material stuck to the bottom of the saddle/nut to increase its height and improve action on the guitar. The use of shims is very common among guitar players and everything has been used from ordinary business cards to credit/debit cards to bone and ebony.

So, is it ok to shim the saddle/nut?

Yes and no! Don’t slap your forehead, hold onto your horses as I explain.

In the first scenario, where you have waited and saved to buy your dream guitar, a low saddle or nut can be a bummer. But, unless it is a boutique guitar maker, who will take the time (and very big money) to get everything right, it is quite possible that the manufacturer of your guitar, who pushes out at least 50 instruments a day, inadvertently, didn’t give the required height to the saddle or the nut.

Low saddle. Pix courtesy: guitarrepairbench
Healthy height saddle. Pix courtesy: musicradar

Why would you want to scrimp on the cost of a new saddle or nut? Just throw out the offending piece and get a bone saddle or nut, OR BOTH installed! So, no, don’t shim!

In the second scenario, a low saddle or nut on a previously owned instrument – most probably – means that the action on the guitar demanded that the saddle/nut be brought down for the instrument to play properly. To confirm, you may put in a shim of any material and check the action.

And then again, maybe, there’s too much relief in the neck and instead of using the Allen key to straighten the truss rod (and thus, the neck), the previous owner, for whatever reason, decided to shave down the saddle/nut or both to get the action right!

If you take the instrument to a guitar technician who knows what he/she is doing, he/she will set-up the instrument and put in a new saddle/nut or both, if it is required.

So, again, no shims required!

But I did say that shimming a saddle/nut is okay in some cases. Let’s understand where and how.

For that allow me to drag you back into school and into the Physics class. The topic of study is ‘refraction of light’.

Remember there was an example of how a rod put in a beaker of water appears broken or twisted? If you recall, the teacher had attributed it to the rays of light passing from a rarer medium (air) to a denser medium (water), and in the process, bending. That bending of the rays of light is what causes the rod to appear broken or twisted.

Much in the same manner, when you shim a saddle/nut with just about anything you can lay your hands on, you are bound to kill the sound of your instrument. When sound waves move from a rarer to a denser medium, or vice-versa, it is quite possible that much of the energy is lost due to absorption, UNLESS, the shim that you are using is of the same material as the saddle/nut.

Bone shims. Pix courtesy: 4shandicrafts

The homogeneity of material ensures that no sound energy is lost but is seamlessly transferred from the saddle/nut to the shim and to the soundboard/headstock.

So, if it is a bone saddle/nut and it must be shimmed, ensure that it gets only a bone shim for negligible energy loss.

Pesky string buzz, causes and getting rid of it

Hello there, wonderful, beautiful people!!!!
Last Sunday, we discussed why particular strings break and what to do to avoid it.

This Sunday, we shall dwell upon that godawful problem: string buzz. For those of you who have not encountered it, God bless you, you are fortunate. And then again, maybe you are experiencing it even as I write, and you don’t know about it!!!

You get a buzzing string when you pluck/pick it and it hits a (few) fret(s) – up the neck or down the neck – causing that strange muted (if it is the thicker, wound string) or a sitar-like sound (if it is the thinner two strings).

So, what causes it? You say neck relief, neck angle?

Correct you are, but there is more to it than meets the eye!

Here are the reasons why a string or a few strings may buzz, moving from the simplest and most obvious reasons.


  • A low saddle or nut

A low saddle or nut will always return a string buzz and cause problems. Throw out the saddle or nut or both and replace them with new – preferably bone – elements.


  • Change in string gauge

Your friend, band-mate tells you that x strings are the best. You switch to x strings only to find that you have developed string buzz!

IF your guitar was set-up, it was set-up for the particular strings that you wanted, or the ones that you had on your instrument. By changing the string gauge (the thickness of strings), you’re changing that delicate balance of everything, and naturally everything is thrown out of balance.

If you go from bigger to smaller-gauge (thicker to thinner) strings, you will find that the action on your instrument has increased, making it much tougher to fret notes and chords. In extreme cases, you may even find that in the process of playing a particular note, you are actually playing a much sharper version of it.

In pulling down the string to the fretboard, you actually elongate the length of the string, which makes the note sound sharp.

Conversely, if thicker strings are thrown on, they are bound to hit the frets as their size does not allow them the same space to ‘move’ as thinner strings.


  • Dented/Uneven frets
pix courtesy: bristolguitartech

After a few years of playing something like this happening is quite normal. It is like the tread on the tyres of your vehicle disappearing after you’ve driven it a bit. But then, you have two options: get the tyres re-treaded, or, get new tyres.

Likewise, in guitars, once these dents/divots appear, you have two choices: get new frets, or, get the original frets levelled, crowned and polished.

If you don’t get either of the two things done, it is quite likely that strings get caught in these dents, creating that horrible buzz.


  • Little or no pressure while fretting

It takes younger students and new players a bit of time to realise the pressure that they are supposed to apply for a note or a chord to sound right. Till they do, every note buzzes, as do the chords but they don’t realise it till the teacher points it out to them.

Also, habitual electric guitar players often experience string buzz when they have to transition to acoustic instruments. Electric guitars demand a much softer and gentler touch for them to respond. Acoustic guitars, on the other hand, demand a much stronger grip on the fretboard, in comparison.


  • Change in tuning
Pix courtesy: thinkns

Your guitar is in standard tuning (E, A, D, G, B, e). Suddenly, you feel like playing a few songs that demand that the guitar be tuned down half a step (Eb) or a full step (D). As you tune down your instrument, you discover that along with the new tuning, you have also managed to give your guitar string buzz.

It’s pretty simple actually. Once the tension on the strings – to which your guitar was set up – is reduced, it is bound to create problems. Amazing, right?

Those were the more obvious causes of string buzz. There are a few others, not so common, yet, if you’re trying to figure out where that buzz is coming from, check these out.


  • A heavy hand?
pix courtesy: aop.cap.ca

You strum your guitar hard and that is how you play. But then if you lay your hands on a guitar that is not set up to your playing style, you are bound to get string buzz.

For a heavy-handed player, the action is raised a bit higher so that he/she gets the string clearance while playing.


  • Art installations look good in museums, not on the headstock of your guitar
pix courtesy: umgf

Frankly, how many times have you seen this. Pretty common, right? However, what is the purpose of it? Nothing! What is the problem in winding your strings like this? String buzz!!

How? The vibrating length of a string is between the nut and the saddle, but it is also true that string vibrations are carried to the tuning peg post on the headstock. Once the post vibrates, any length of extra string also vibrates.

While playing, you would think that your strings are hitting your frets, when actually it is the extra length of string picking up vibrations and causing that disturbing buzz.


  • Mummy-fying the tuning post
Pix courtesy: stringsdirect

Do your tuning posts look like this? Shame!!!

Manufacturers make strings of a certain length so that all categories of customers can be catered to. Steel-string guitars with slotted headstocks, archtop guitars and slide guitars, and all such guitars, require more string length. However, your simple Western, flattop guitar does not require the entire length of the string.

Please use only as much as will keep the string from slipping out of the peghead, the rest NEEDS TO BE CUT AND THROWN AWAY!

Winding it as shown in the picture only causes problems in tuning, transfer of vibrations, intonation and, of course, string buzz.


  • Loose hardware on the headstock
Pix courtesy: frets
Pix courtesy:frets
Pix courtesy:frets

We just learned how sympathetic vibrations can fool players into believing that their guitar is buzzing. It is, but not what you would classically define as string buzz.

Another such case in point is when the hardware on the headstock gets loose. With the guitar resonating, the hardware picks up the vibrations and if it is not snug, it can cause a buzz big time.

Every time you change strings, do check the hardware on the headstock of your guitar. It does not need to crush and crack the headstock, yet, it should not move if you try to move it by hand.


  • Loose braces
Pix courtesy: stewmac

If you look inside your guitar, there are these pieces of wood running through the length and breadth of your instrument. They are present both on the top as well as on the back and serve two prime purposes of providing structural support and helping the top and the back to vibrate when strings are vibrating.

These pieces of wood are of a specific height and thickness depending upon the size and shape of the guitar, and are stuck to the top/back. Over the years, it is very common for braces to come loose at one end, or both ends (remaining stuck at the centre). Once you have a loose brace, every time you strum your guitar, as the top or the back vibrates, the brace vibrates too, giving off an odd rattle that can be very confusing to pick where it is coming from.

If you think you have a loose brace, you have to take your instrument to a qualified guitar tech who will stick it right back.


  • Improper/no set-up
Pix courtesy: musicalinstrumenthire

To get the right gap between the strings and the frets all along the fretboard, several fine adjustments have to be made – these adjustments are known as the ‘set-up’. To set up an acoustic guitar properly requires specialist tools, accurate measurements, and expert knowledge – so it needs to be done by an experienced guitar technician.

When I set up a guitar, I ask the owner to play a little for me, so that I can see how hard or softly he hits the strings. Also the kind of music he/she plays: lead, rhythm, finger-style, helps me set up the guitar perfectly for THAT specific player.

If you think you have no problems with your instrument, wait till I set it up for you. You will notice that even a well-playing instrument can be made better with a few alterations/modifications.


Every time I change strings, my G (E/ A/ D/ B/ e) string breaks!

Hello, fellow guitarists! How are you holding up? How is practise in lockdown holding up? For all those who used to point towards a paucity of time, now there is no reason.  

But getting back to the issue, before we discuss it in detail, know that the G string is actually the thinnest string of all the six strings!

Don’t be fooled by its thickness. Underneath all those coils of copper or bronze lies a string thinner than your thin ‘e’ string, and so, it is most easily broken, given the slightest extra tension, or, if there is something out of the ordinary.

Out of the ordinary? Hmmm…what could that be?

Jump right in!  

So, if you find yourself in that unenviable position where a particular string (or two) break(s) each time you change strings, it could be one of the two reasons:

A) Sharp edges of the tuning post hole

pix courtesy: guitaranswerguy.com

The tuning post is that part of the tuning machine that sticks above the headstock. It bears a hole through which you thread the string and then wind it. In cheap(er) instruments, the quality of tuning machines is cheap too and thus the overall finishing on them is far from satisfactory.

In such cheap tuning machines, the hole edges are not properly rounded, leaving sharp edges. When a string is wrapped through such a hole, it  won’t break it immediately, but certainly as you tune it up.

pix courtesy: store.dactechnologies.com

The way to sort out the problem is with the help of a hobby file that can go through that tiny hole. My weapon of choice is a simple rat’s tail file.  File out the edges of the hole on both sides and I doubt if you’ll ever break a string because of that.

B) Bad or improperly cut nut slots

Look carefully at the nut on your guitar.

Pix courtesy: guitar.com

If it looks anything like this, you will see that from the nut, except for the ‘E’ and the ‘e’ strings, the other four strings have a deviation in their track. They don’t run straight off the fretboard, onto the nut and into the tuning machine.

If the slots on the nut are improperly cut, or, the nut on your instrument has never been changed, chances are that you have found the reason why new strings break as you are tuning them up.

The strings, as they run through the slots of the nut, rub naturally through them. If there is any imperfection in the way these slots are cut, they are likely to cause very expensive problems.

To sort out the problem, it is best to go to a guitar technician and have the nut replaced. If you are comfortable doing it yourself, go right ahead. However, if you go to a proper guitar repairman, he/she will do a decidedly better job and quicker too. 

If, however, you’re in love with the nut already on your guitar (c’mon man!!!!), a guitar repairman should be able to work the slots and smooth them out, again removing any sharp edges and corners.  

The reasons why I choose to replace the nut and not work on it, are two: i) the cost of ‘repairing’ the nut could be almost as much as a new one. So, why not get a new nut?

ii) when a new nut is put in, naturally, everything is re-calibrated, in short, you get your instrument set up, which should get it playing the best that it can.

I don’t know whether you noticed or not but the reasons for string breakage deal with areas that the strings are constantly in contact with: tuning machines, the nut and even the saddle.

And so, the last thing that you want to look at is also the health of the saddle in your guitar.

pix courtesy: guitarrepairlongisland

Imagine deeper grooves in the saddle and the strings sitting in them. Not only is that reason for strings breaking, but such grooves can cause intonation issues too.


What’s the buzz about this Ibanez in lockdown?

Hello, peoples!!!!
How hangs it with you folks during the lockdown? Yeah! It was pretty boring for me too till this beauty of an Ibanez (V50NJP) landed up on the workbench, buzzing worse than a mosquito in heat!

Thing was that the nut – and thankfully, it was a bone nut – on the otherwise beautifully kept guitar was REALLY low. I know everybody likes low action on their guitar, but often, if the person doing the set-up on your guitar knows his numbers and what he/she is doing, chances are you get a really low action without your guitar buzzing.

I must apologise for the photograph above. I was trying to show how low the first fret action was. I am holding a 0.16″ feeler gauge, wishing to show that I can’t slip it under the strings without lifting them. Ideally, it should slip in with the strings just touching it.

One thing that I forgot to mention was that this instrument belonged to a student who didn’t wish to swap the nut on the instrument with a new nut. Otherwise, I would just chuck out the old nut and throw in a new one, saving a lot of time and effort.

But mended it had to be. Loosen the strings, pull them out of the way and go to work on the nut.

So, out came the bone dust to fill in the nut slots. And then a drop of super thin cyno-acrylate glue to seal each fill in each slot. Don’t miss the special dispenser that would let just a drop drip.

After waiting for some time, it was time for the nut slots to be filed to the correct height. But before the filing process began, here’s where the action at the 1st fret stood: .018″!!!!!

Getting it down to .016″ is a painstakingly slow process. File, string it up, measure height, loosen strings, file. Repeat.

The problem with going to far in one go is that you will have to replace the nut – what we were aiming to avoid in the first place. Remember?

This is from the first filing. Five more followed before the strings sat exactly where I wanted them to.

And then all that filling and filing and super glue does leave the nut looking ugly and so the nut needs cleaning with sandpaper of different grits so that all the work done on it is not too apparent.

Finally, it was done and dusted and the action at the 1st fret stood at a very healthy 0.16″ – as you can probably see in the following photograph.

The young man was happy and I was oddly satisfied.


Intonation on a few strings on my guitar is out

pix courtesy mi.edu

There are many reasons that may cause this issue. But to understand it completely, one must first understand intonation itself.

Intonation is the accuracy of the pitch of a note sounded. When you tune your guitar you do so by plucking the open (unfretted) strings. On fretting, the tension on the string increases, which generally changes the pitch of the note. The effect, though subtle, can impact the intonation. 

Cutting out the jargon and putting it in simple terms, if the open note and the same note fretted sound exactly the same, your guitar is intonated. If not, then for the instrument to be perfectly intonated, adjustments have to be made to the saddle and nut, and sometimes, even to the action.

If the fretted note is sharp, the string needs to be lengthened (pushing back the contact point of the string on the saddle/nut or both).

If the fretted note is flat, the string needs to be shortened (bring the contact point of the string on the saddle/nut or both forward).

In electric guitars and basses this can be done with considerable ease but adjusting intonation in acoustic instruments involves a lot of work.

But here are a few reasons for some strings not being intonated, while others are perfectly in tune. Let’s go from the simplest and the most obvious to slightly more complicated issues.


* Unstretched new strings

Pix courtesy: guitarfella

Often, when new strings are put on, players forget to stretch them.

New, coiled strings are not used to the tension they are put under once a guitar is tuned up. Just like a rubberband, the tendency of new strings is to return to their original position, and thus, new strings will often go out of tune, hitting intonation.    

As a matter of practice, new strings should be stretched, tuned, stretched again and re-tuned till they are able to hold the tension when they are in pitch. 


* Old strings or bad strings

Pix courtesy: guitarchalk

Old strings need to be changed because strings have a shelf life after which they don’t sound good. But sometimes, a new set can play up too. Tough luck, but you will have to change your new strings for new strings!!


*Too much relief and high action

Pix courtesy: guitargearfinder

Relief is that optimal curvature in the fretboard (which can be adjusted) which allows the strings to vibrate with ease without them hitting the frets, or, them being a mile high from the frets. 

This ‘optimal curvature’ creates an optimal space between the strings and frets and is referred to as action.

It is interesting that the two things – relief and action – are hugely related and while adjusting the relief, action does get affected. However, while adjusting the action, the relief remains absolutely unchanged for it is two very different roads you take to reach Optimum Relief and Optimum Action.

If you need to adjust the relief in the neck, a proper sized Allen wrench to fit the truss rod adjustment is used, while if it is action you wish to lower, then the saddle and nut – on which the strings ride – need to be lowered by shaving them.

All this was an introduction to how relief and action affect intonation. So, if there is a big (concave) curve in the neck – big relief –  the strings on that instrument are going to be riding painfully high. To fret a note on such an instrument you would have to pull the strings down so much that effectively, you would be elongating the length of the string, thus, throwing the intonation on that particular string off by miles.

 An unnecessarily tall saddle and nut too raise strings uncomfortably high and we all know when the strings are high and you fret a note, what happens to that note.


*A worn saddle

Pix courtesy: guitaranswerguy

If the saddle on your acoustic guitar looks anything like this, you are in big trouble – intonation wise. 

Look closely at the saddle in your guitar with the strings on. In all probability, you will find that the exact points of contacts of the six strings are not in a straight line but some contact points are pulled forward, while others are pushed back. This is to “compensate” for varying thickness of strings.

In deeply notched saddles like the one in the picture, the point of contact has gone awry and thus, this instrument will never be truly intonated till the time that a new saddle (and preferably made of bone) is not put in.


*A tilted saddle is no good

Pix courtesy: strangeguitarworks

Look carefully at the photo above. Of course, you can see the space around the ends of the saddle, but look closer and you will be able to notice space behind the saddle too. This means that the saddle is tilted forward, which again throws the intonation out of whack.

Let me explain. We were talking about points of contact on the saddle in the previous point. With the saddle tilted forward, suddenly those points of contact have moved forward too, thus affecting intonation.

To correct this problem, either a new, thicker saddle (and preferably made of bone) needs to be put in the bridge slot, or, the bridge slot needs to be filled, a new proper-size slot routed out, which would seat the saddle upright.


*If the nut is too tall

Pix courtesy: future

Not just saddles, even the height of the nut makes a difference. The ideal action on an acoustic guitar at the 1st fret – a result of the height of the nut – is between 0.16″ and 0.18″.

To get those numbers, the nut needs to be pulled out and its bottom sanded to lower it to a proper height, so that the action at the 1st fret is just right. Again, if it is too high, you will be using extra effort to fret notes, which would cause elongation of the string, which in turn, would affect intonation. 


*Bad tuning machines

Pix courtesy: beckwithstrings

If the gears on one or two or all tuning machines are slipping, then you will be tuning your guitar the entire day and it will keep falling out of tune.

If ever you encounter such a problem, chuck out those cheap tuning machines, go to your guitar tech and get a good set installed. What is a “good set”?

Tuning machines have gear ratios – the number of teeth to a gear. The more the teeth to the gears, the more finely you can tune your guitar. If you hear that a tuning machine set has a gear ratio of 1:21, it means that it would take 21 turns of the tuning machine button for the post of the machine to complete one full turn.   


*Flat frets

Pix courtesy: jacksinstrumentservices
Pix courtesy: premierguitar

All string instruments function on the principle of a vibrating string, where the sound produced is dependent on the length of the string. Thus, from the nut to the saddle is the effective length of the string and when you ‘fret’ a note, you change the length of that particular string, which produces the desired sound.

If while fretting a note, a fret is not in proper shape (lower photo), it will never produce the desired sound. If the fret(s) is (are) flat (Pix courtesy: jacksinstrumentservices), intonation will be affected big time.

If the frets on your instrument are not in good shape, they will have to be dressed, crowned and polished for your guitar to play the way it was intended to play.

Cracks: whys and what to do about them

The reasons for cracks appearing in acoustic guitars may be twofold. Firstly, due to weather (humidity) changes, and secondly, due to accidents. While the latter you may not always be in a position to control, the former you can almost always prevent.


Humidity related cracks

Here, in North India, as we head into the dry part of summer, I thought that this would be a good time to talk about humidity issues. The drying of your instrument is evident foremost on the top and back and signs generally appear when it is hot and dry and your instrument is not cared for.

A humidity-induced crack in the top. pix courtesy: seymourduncan.com
A separating seam on the back of a guitar. pix courtesy: josefek.com

A shrinking top or back may even strain the seams and sides of the instrument enough to cause the seam to open or the side to crack.

Tops are built with a degree of arching. As the instrument dries out this arch will flatten and then take on a concave shape.

If you do not humidify the instrument at this point, a crack is well and truly on its way. The same logic applies to the back of the instrument too.

On an instrument that is very dry, an accidental bump to the side can cause a ghastly split along it, not pretty at all.

pix courtesy: dogwoodguitars

Even bridges are known to crack more often than not due to lack of humidity, though that is not the only reason for bridges cracking. Badly fitting bridgepins and saddles can also cause a split in the bridge.

pix courtesy: scottymoore.com

So, without a humidity gauge, how do you figure out that your instrument needs a drink? If you feel that that the action on your instrument has got lower (caused by a dry, flatter top), if you suddenly feel the fret ends (due to a shrinking fretboard), or, if suddenly the action has gone too high (caused by a lifting bridge, or the heel end of the neck coming loose),

pix courtesy: acousticvibesmusic.com
pix courtesy: frets.com

it’s time to get the humidity up in the instrument, before further corrective steps are taken.

Traditionally, guitar manufacturers used to stick the pickguard directly to the top before the varnish (lacquer) was sprayed on. This keeps the pickguard stuck nice and solid to the top without the pickguard’s corners curling up, as we often see these days. However, this is as much a minus as it is a plus.

When the top wood dries and shrinks, the pickguard stuck to the wood, doesn’t allow it to shrink, causing a split. Did you know that even plastic pickguards shrink? They do – with age, and when they do and if they are stuck directly to the wood of the top, they crack the top, on one or both sides of themselves.


Cracks due to accidents

A knock to the side of your instrument may not seem that bad but if the guitar strings are tuned to pitch the impact may result in a crack. If you’re unlucky instead of that crack you get a split! And that is why you are asked to carry acoustic instruments in (at least) padded cases.

pix courtesy: acousticvibesmusic.com

It is not uncommon for guitars to slip out of players’ hands while being carried: again the perfect recipe for a crack to develop, and again, the advice to carry your instrument in cases (preferably hard ones).

Wall brackets are another culprit. If one has not taken care in ‘hanging up’ the guitar, down it comes! Wall brackets are usually safe, provided you keep checking them and the screws that hold them. A loose screw can cause a lot of heartache, not to talk of the damage to the pocket.


Closing cracks

Cracks caused due to (a lack of) humidity are comparatively easy to repair (generally), if they are spotted early. A little bit of extra humidity and most of the ‘opening’ closes. The remaining opening can be closed with glue and some clamping pressure. The only care to be taken here is that the two separated halves align perfectly. Here, cauls – fibre glass or wood – clamped above and below the affected portion, work best in keeping the halves together.

In case of a naughty pickguard, it needs removal. If the crack it caused does not go with humidity, it will need to be glued, often requiring a splinter of wood too. A new pickguard should take the place of the old one.

Cracks as a result of accidents are trickier by nature and almost never in a straight line. The jagged nature of the break calls for a lot of thought, planning and good execution.

Whether caused by humidity or an accident, some cracks may require cleats to reinforce the glued up crack. Cleats are small pieces of wood (preferably of the same material as the wood in the area where the crack is) which are stuck along the seam of the crack so that it does not open up again.

pix courtesy: premierguitar.com

Cracks, if left un-repaired, can often cause more serious issues, especially if it causes the wood to twist out of alignment. If string tension adds to the stress, it should be removed until a repair is made.


Finishing it

One may restore structural stability with a repair one carries out, but finishing the repaired area such that it is near invisible to the eye is the real challenge.

The area of the joint will require to be brought up (in level with the rest of the top, back or side) and my choice for doing that is super thin super glue put in three or four applications after each application has settled and dried, and then wet-sanding the area to level everything.


A big-name 12-string visitor comes calling!

If you didn’t know, Takamine is one of the big names in acoustic guitar manufacture in the world today. With humble beginnings in 1959 as a small family-run guitar shop nestled at the foot of Mount Takamine in the central Japanese town of Sakashita, the fledgling company took the mountain’s name in 1962 and has since given to the world some amazing-sounding instruments.

This 12-string electro-acoustic guitar came in for a change of strings, some action correction and general maintenance, but then things aren’t as simple as they seem when it’s a 12-string (Are they ever??)!

The action was slightly high but the more worrying thing was how badly the nut sat in its slot. Look carefully at the picture on the right (above) and you will see what I am talking about. What was more, it was plastic, as was the saddle (below).

Both elements had to be shown the dustbin but look what I found while trying to remove them. 

Somebody – either the manufacturer or the owner, or someone else – had used an epoxy-like adhesive to glue the nut and the saddle was not something that you see everyday. Cleaning it out needed a thin chisel to be put to work!

This type of a corrugated saddle is used when the pick-up under it has little contact points which the raised portions of the saddle sit on, leading to better sound capture. But this feature can also cause a lot of problems if everything is not in sync.

So, I threw out saddle, casing, pickup and all and put in a new, simple, under-saddle pick-up and a new bone saddle.

A view of the architecture inside with the new under-the-saddle pick-up installed.

The new, taller bone saddle made up for the missing height of the casing that I chucked out. In the end, I had to shave down the saddle just a little bit to get the action just right.

Also needing attention was the strap button positioning on the heel of the guitar.

The strap button should never sit on the centre of the heel but on the side of it. Which side? The side that comes on top when you hold the guitar in the playing position.

So, the button was unscrewed, the hole filled up (you never leave open wood), a new hole drilled on the side and then the screw put in place.

Then it was time to give the fretboard some tender loving care (TLC), but before that precautions needed to be taken so that the sound system inside did not attract the steel wool fibres. The soundhole was taped off and then I went to work on the fretboard with 0000 steel wool and boiled linseed oil.

The relief in the neck checked, I then went about snugging up the hardware on the headstock. All but two of them were tight.

Then it was time to string her up with swanky, shiny new strings. 


The nut and frets’ relationship

pix courtesy: samash.com

When you brought home your guitar and got its initial set-up done, the tech guy ensured that the numbers (measurements – action, relief, nut action, etc) added up. That made your learning and playing a breeze.

Now your beloved acoustic guitar is 7 – 8 years old and you have religiously played it almost every day over this time. Excellent!!  

However, you notice that ‘pits’ are developing in the frets exactly at the spots where the strings hit against the frets. For those getting apprehensive, fret not. This is normal wear and tear that every instrument – acoustic or electric – goes through if it is ‘played’.

Chewed up frets. pix courtesy: guitaranswerguy

Just like a pothole in the road, the erosion starts slow till the pits are so deep so as to catch strings in them and affect your playing.

So, what is to be done? Fret-levelling!

It is tedious, time-consuming process where a level surface (like the one in the picture below) is run along the fretboard with sandpaper on the contact surface and rubbed till the ‘pits’ are rubbed out of the surface.

pix courtesy: guitarrepairbench

Then follows more work in putting the ‘crown’ back in the frets and bringing them up to a mirror-like shine. But that entire process, I feel, I should reserve for another post. Suffice it to say that after a proper fret job, your frets should look brand new. Much like this:

pix courtesy: flameguitars

You string ‘er up and start to play but the guitar is not responding the same way as it used to. Yes, the frets are fine but the action at the nut (1st fret action) has increased.

pix courtesy: guitaranswerguy

Let me explain. The action – at the 1st fret and at the 12th fret – was initially set to the original-sized frets. When you tried to take the ‘pits’ out of the frets, you removed material from the frets, lowering them. However, the nut remained at the same height!

Thus, the increase in action at the 1st fret. If you need to get the old action of the guitar back, you will have to lower the slots of the nut so that the strings sit lower, bring the action down.

Most people will tell you that all you need to do is deepen the string grooves and all would be well. Like this: 

pix courtesy: fretnotguitarrepair

I say ‘No’! If you lower the slots in the nut, will your strings sit to the prescribed depth: half in the slot and half outside it? Like this?

pix courtesy: musicskanner

NO! NEVER! The way out, then, is to knock the nut out of its groove and sand its bottom, just like you would a saddle, to lower the action. A little at a time does the trick! 

You can loosen the strings, pull out the nut and re-sand it, but if you overshoot the desired nut height, you will have to replace the nut.
More expense!!!