Guitar repair – Bone nut, saddle & a set-up for Mr Fender!

The process of my blog posts is basically through photographs that I take of the job at hand and then try to spin a story out of them, trying my best to remember what happened and how. It had worked for me till now.

I must confess that in the best of times, recalling events, sometimes from two months ago, is no mean task. Today is Saturday, dinner time, and the fever I ran through the week has impaired my thought process terribly. As I sit down to look at the photographs, I am scratching my head – ‘Was it this’, or, ‘Was it that’???

Fair warning for a post full of inconsistencies! Here, I must appeal to the owner to write in and correct me wherever he feels I have gone wrong in documenting the facts.

On my part, I have decided, henceforth, not to rely only on photographs but to make more detailed notes while I am working.

With that out of the way, let us begin today’s saga.

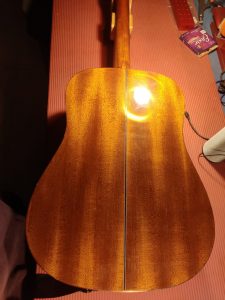
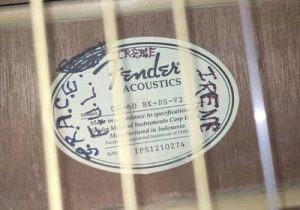
This Fender CD-60 landed up on my counter almost a month back for a set-up and some new strings

Yeah! It wasn’t the cleanest guitar I have seen

but that could be remedied.

But paper shoved into the ‘e’ string hole to hold the bridgepin in, was a new one for me

And yeah, that is a plastic saddle

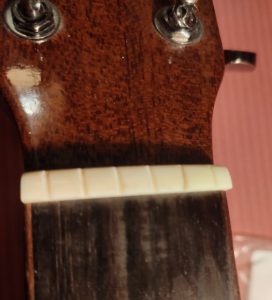
In the first photograph, you can see the cobwebs on the machineheads, but I failed to capture the nut there.

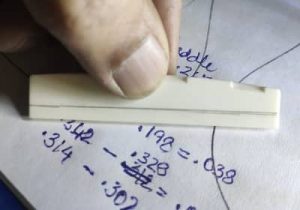
So, since the two had to go and were to be replaced by healthy, bone elements, let’s just cut to the chase and say that the swap took place without too much time or effort being wasted.

What I must mention here is that the owner decided to go for an unbleached nut (yellowish) instead of the usual bleached one (white). But before those got popped in, there was other work to be done. 

With the strings off, I cleaned up the fretboard, burnished the tarnished fretwires and oiled the fretboard and bridge.

Then came the fitting of the nut and the saddle: lots of measuring and sanding and measuring again before they sat in their respective slots.

With strings on, there came another few rounds of measurements and sandings. 

Finally, it was done

The issue of the paper stuck in the bridgepin hole of the ‘e’ string to keep the bridgepin from popping out, was simple enough. Once the ball end of the string sits right on the end of the bridgepin, the pin is bound to pop out as you tune up the string.

If it is ensured that the ball end is not caught on the end of the bridgepin, I see no reason why the pin should pop out.

I think I scored another happy customer!


Guitar repair – Breaking a break angle on this Hummingbird

The angle that the strings make coming out of the bridgepin holes and as they pass over the saddle is referred to as break angle.

The bigger the break angle, better is the sound quality, for the strings exert greater pressure on the saddle, driving it into its slot, providing greater/better contact. Consequently, there is minimal loss of energy (sound) and the sustain and volume get amplified.

All this happens if there is a tall saddle installed in the guitar. But as most of us know, the height of the saddle is directly proportional to the action: more the height, more is the action. Only on exceptionally well put together instruments does one get to see a tall saddle and a low action, which is primarily due to a great neck angle: a rarity indeed!

The photograph above is of the tallest saddle and the best break angle that I have probably ever seen.

The best of guitars that come to me have ‘okay’ break angles, and some, though only a couple of years old, have the saddle sitting barely a hair above its slot. (Break angle? What break angle?)

But then, having strings run only just ‘touching’ the saddle is not how the experts proposed it should be. In such a situation one has to ‘create’ the break angle.

One such instrument came to me, recently – a Hummingbird Pro. Interestingly, the instrument was only a couple of years old.

That it already had neck issues, was indeed sad. The easiest treatment was to cut channels (ramps) from the bridgepin holes till the saddle, for the strings to ride in.

Easy, did I say? Try cutting a slot in a 6 mm hole!

Better still, try finding something that is small enough to fit that hole but able to cut a ramp for a 0.52″ – 0.53″ string!

Whateva! I had the tool, I did the job!

This is just the 6th string slot being cut and then the other five were cut too.

After the slots were cut, a fresh set of strings was installed, but, of course, first the fretboard was cleaned up and the fretwires buffed out to a new shine.

The saddle area looked something like this

Unrelated to the story till now, is the photograph below.

It is the famed Hummingbird pickguard offered for your appreciation.  Notice how the edges ‘melt’ as it were, into the top. No possibility of your fingernail, or your pick catching on its edges.

The comment is in relation to last Sunday’s post where an instrument that came to me, sported a definitely amateurish recreation. If you would like to read about it, here it is.


Guitar repair – My encounter with a Sire!

Guitar repair – My encounter with a Sire!

The owner brought me this relatively new instrument for an initial set-up and some snazzy bone bridgepins.

When he pulled it out of the bag  – headstock first – I thought to myself, ‘Taylor’ but when it was out on my workbench, it seemed like an instrument in identity crisis.

The headstock made it look like a Taylor

The binding reminded one of CF Martin

while the pickguard made it look as if a child had made a poor effort at cutting out the very distinctive Hummingbird style

The bridge reminded me of another manufacturer, one on whom I can’t place a finger

Can you tell?

However, the label read

Ah, well!

I got to my job, first reaming the bridgepin holes to receive the new bone bridgepins.

And once this was done, new strings were thrown on to begin setting up the instrument. The owner’s choice of strings:

Thankfully, there was not a lot of setting up required and my job was done.

As I sat down to fiddle with the instrument, I began noticing details. It was surprisingly well built and near-premium quality solid wood had been used in its construction.

The back was a very pretty solid mahogany

and the front was a prettier solid spruce.

It also had Taylor-style EQ controls in the shoulder of the guitar

Strumming it, I was blown away by its bass response. Meanwhile the trebles were clear-ringing highs. Usually, it is hard to find a well-balanced instrument. Either it is bass dominant or else the trebles overpower the bass. It was a pleasure playing this one.

As I sat admiring the beauty of the Sire, one thing on the instrument stuck out worse than a sore thumb. The finesse with which the guitar was built, was missing from the pickguard – almost ‘thrown on’ there.

And sure enough, a closer look revealed the rough edges and the slight asymmetry. Take a look

When I, a small time repairman, fashion a pickguard, I ensure that there is not a single edge sharp enough to cut you, or, one on which your nail or pick may catch. The amateurish nature of this pcickguard was indeed an eyesore.

But that should not take away anything from the instrument and the way it sounded.

And as it often happens with me, I forgot to take a photograph of the finished job!!!

Guitar repair – Setting right Humpty Dumpty – II

This is a bit of an anti-climax, but it is what it is! Humpty Dumpty had no will to be ‘put together again’!

Jokes aside, as I mentioned in my last post, the main thing governing that this glue-up job went properly was removing the already existing Araldite somehow. Though I laboured more than I have ever on a job, I knew that there was always a possibility that there remained remnants of glue that I had been unable to reach.

So I glued up the parts with dowels thrown in for good measure, clamped it all up good and left it to dry for 48 hours.

While I waited, I cleaned and oiled the fretwires, fretboard and bridge, snugged up the hardware on the headstock and gave the guitar body a good rub, such that it shone.

However, when I began the restringing process, the two parts began separating. I halted proceedings right there, drilled in three more holes, inserted three more dowels, cut and sanded them flush and let the glue dry for another 48 hours.

But again when I tried stringing it up, the joint began coming unstuck. This time I knew that I had to call it quits. But I did stick the two offending parts – cosmetically. However, the instrument will never be able to bear strings (tension).

I called up the owner and gave him the sad news, but he took it very well.

Humpty-Dumpty is gone now but it has left behind a dull ache in my heart, an ache that will keep reminding me that I ‘couldn’t put Humpty together again’!


P.S.: For what came earlier, read

Guitar repair – Setting right Humpty Dumpty – I

Guitar repair – Setting right Humpty Dumpty – I

Humpty Dumpty…er…this Epiphone DR-100 VS came to me like this


‘Some of the king’s horses and some of the king’s men’ (with apologies to Lewis Carroll), had tried to put ‘Humpty together again’ (four times, according to the owner) but had failed in making the fix a permanent one. And so, it finally landed on my counter.

The owner said that he was willing to give it one last shot at trying to save the instrument, and I had my work cut out for me. No repair would be possible without first removing the old glue. This was no mean task for the glue tends to get into crevices and corners which not only impedes proper contact but also a proper glue-up later.

But as I assessed the instrument, I noticed that it had a rather pretty tobacco-burst. In the photograph it comes across much darker than it is.

I was also pleasantly surprised to see that even the back and sides were solid mahogany, while the top was solid spruce.

The build quality was nice except that not a great deal of care had been taken in glueing on the braces, for there was loads of squeeze-out on either side of all the braces. Also, the bridgeplate looked to me as if it had been made out of some leftover spruce. If that is the case, I don’t expect it to last too long and should give way in nine to 12 months – provided this repair effort comes through.


The glue

To soften the glue, in order to have the best chance at removing it, I gave it a lot of heat. And as I heated it, I got a very familiar but terrible smell. I picked at the glue for sometime, before I realised what it was – Araldite!

I let out a string of expletives but that was all I could do and it did nothing to make the Araldite go away!

To have the best shot at removing the glue, I put on my magnifying head gear and began removing the glue. After a good 45 mins of labour, I had this to show for results. This is just one corner cleaned of the glue that was very obvious.

After one-and-a-half hours of effort there was more mess on my table but the mess on the two surfaces of the headstock was clearing.

This morning I finally managed to clear all the Araldite in sight (under magnification) from both surfaces. I had to go over the two surfaces twice each so that I could remove as much glue as I could see. Did I manage to remove all the Araldite? No way, but this is how the two surfaces looked!

I tried mating the two surfaces but there were certainly gaps. I expected nothing else considering that this was the fifth attempt at glueing the headstock. However, I wasn’t too worried about the gaps. Those would be filled with my saw dust and wood glue paste and sanded flush.

Would all this make a permanent joint? Nope! Pieces of wood would need to be installed at strategic points to actually hold the two parts together. The proper way of tackling a break like this is to cut two channels running from behind the headstock to the neck (leaving a gap where the truss rod would be) and installing splines. But that requires a proper jig which would help cut proper channels, taking into consideration the headstock angle, shape of the neck, etc. Too involved!

I have done these repairs before with just pieces of wood shoved in at strategic places and have never had a complaint. I see no reason why it shouldn’t work this time. 

But that is for later. First the two parts must be brought together – even if temporarily – so that the part two of the surgery can be performed. So, I put on a generous dab of glue on one surface and held on the mating surface where I felt it should go. 

A brad nail helped hold things together.

Now, a wait of 48 hours before I remove the nail and see how well things have bonded.

Next week: the second part of the reconstructive surgery!


Guitar repair – why instruments should not be left tuned up

Here’s a perfect example of why I keep stressing upon guitar players to de-tune their instruments if they know that they will not be playing it for three weeks or more.

String tension is a very bad thing for the health of the guitar but when a guitar is being played, some of that stress is counteracted by the movement of the various parts of the instrument (top, neck and back). However, if left standing with nothing to counter that force, string tension can have disastrous effects, as this owner learned.

Let me begin by congratulating Kadence for building the very aesthetic, all-mahogany KAD-SH-103 EQ (a part of the Slowhand series). I must confess that I am not a very big fan of guitars built entirely of the same wood (mahogany, koa, etc), but after having played the SH-103, it changed my point of view (kinda)!

Besides the sturdy construction, I was very pleased to see a nice bone saddle and nut in the instrument. But if I was to nit-pick, the slots in the nut were deeper than I like to see.  

So, the owner told me that this instrument was two years old and while he played the other guitar, this one got neglected and was left standing in a corner of a room, under string tension.

My guess is that the heel separation began somewhere in April-end – May and as the heat increased and moisture in the air reduced, the gap too increased, and was only noticed recently. What followed was bound to happen and it is only a miracle that one did not see greater damage than the heel separating.

A good clean-up of the mating surfaces, lots of good wood glue, even more clamping pressure and enough time (72 hours) cured this baby!

I had initially advised putting 13s on the guitar but soon realised that putting those big strings was a sure recipe for disaster. Instead, I ended up putting 12s on it and let the guitar stand for 4 -5 hours under string tension. The following are the ‘after’ photographs.

I also cleaned and oiled the fretboard, buffed out the tarnished fretwires, snugged up the hardware on the headstock and gave the entire body a good rub-down.

My advice to the owner and to you is NEVER LEAVE A GUITAR STANDING UNDER STRING TENSION FOR LONG!

Guitar repair – dealing with over humidification!

Yes! That is a thing, a dangerous thing, and now is exactly the time (here in North India) when over-humidification symptoms begin to surface. Over a period of a month, I am expecting a lot of ailing guitars.

Just like an exposed acoustic guitar (not so much solid-body electrics) can lose moisture, become dehydrated and show symptoms thereof, an instrument can absorb moisture from the surroundings and get over humidified.

Also, if one notices that his/her guitar has dried out and the consequent humidification process goes too far, over humidification can happen, causing all sorts of problems, which may or may not be remedied.

The following are a few problems that come to my mind immediately. Please note that this list is far from exhaustive and there may be other problems associated with over humidification that have slipped my mind, or ones that I am yet to get acquainted with (We all learn each day, as we go)!


The Ski Jump

This is a classic symptom. If you look at the guitar sideways (as shown in my childish diagram), the fretboard tongue (from the body joint till its end) seems to take off into space for no apparent reason.

Also, if you sight down the fretboard, towards the bridge, you will notice that the bridge is invisible because it is blocked completely by the risen fretboard extension.

Not only does this give rise to fret buzzes, on a cutaway guitar, playing on the higher frets is near impossible for the strings are sitting on the fretwires here. 

The remedy here is to correct the humidity content, apply a little heat and pressure.  


Bellying and String Tension

Not always is the bellying in an acoustic guitar due to faulty manufacturing (crappy bracing and bridgeplate used). If it is the wet season and a belly begins to grow, it means that guitar is over humidified. 

String tension acts on the top and helps the belly grow. That is one of the reasons I tell people that if it is known that an instrument will not be played for three weeks or more, loosen the strings.


Shattered Finish

As the top expands after soaking in moisture, the finish on it does not expand in the same proportion and thus the ‘shattered glass’ look.

One may notice this phenomenon growing as the instrument continues to take in moisture. On sudden exposure to moisture – moving from a dry climate to a wet one – the shattering can be quick and dramatic. It is not uncommon for the owner to go to sleep with the guitar okay and wake up with that shattered look.

This is one problem that is the hardest to send away. Besides removing the finish from the top, back and sides and redoing the guitar again, there is nothing that can be done.

Yes, people talk about painting lacquer thinners into the crevices of the ‘shatter’ but that may work if there are one or two cracks. If it’s a maze of ‘shatter’, doing each line separately while being tedious, may end up looking botched.


Curling Pickguards

Yes, of course plastic (pickguard) shrinks with age, but sometimes, it is not the plastic shrinking but the wood it is stuck to, expanding (due to excess moisture). With the wood having moved, a corner or two of the pickguard comes loose, and then with time, the pickguard begins to curl.

First, the wood will need to be treated and then the pickguard needs to be taken off, heated some and then reapplied to the top.


Separating Fretboards


Again like the pickguard, the neck may expand on soaking in moisture, letting go of a part of the fretboard, or the fretboard may expand letting go of the neck.

Again, excess humidity treatment and then a reglue job. If done with patience this should be a clean job leaving no trace of having been worked on.


Loose Braces

Like the pickguard, the fretboard and the neck, when the top expands due to excessive moisture, some or all the braces are bound to come loose, evoking a strange rattle when you play the guitar.

After dehydrating the guitar a bit, all the loose braces will have to be detected and reglued.  


Bridge may pull up


Also due to the top expanding, the bridge may start lifting. Generally, when it is a belly caused by humidity, it is the wings of the bridge that get loose. Given enough time and string tension, the bridge getting pulled off completely is not outside the realms of imagination.


Bridgepin holes get tighter

Over-humidification may also cause the wood on just the bridge to expand. This will cause the bridgepin holes to hold the pins even tighter, sometimes making it impossible to pull them out.

If after reducing the humidity content the bridgepin holes do not get back to their original size, reaming them is the only option. 


Body comes apart/ binding comes loose

In very extreme cases, over-humidification may lead to the top and the back of the instrument to separate from the sides.  

Before this happens,  often, the binding around the instrument gets loose and falls away from the body.

Getting the binding to reglue correctly is a big pain in the you-know-what. There’s heating involved and if the right glue is not used, the binding will never reglue.


Some do’s and don’ts

  • Humidify without string tension

When you feel your guitar is dehydrated and needs a drink of water, do give that drink but completely remove string tension. That way, even if you over humidify your guitar, at least you won’t be pulling a sure belly into it because of string tension.  

  • Check the humidity inside your guitar

There are small and inexpensive hygrometers (humidity reading devices) which you can drop into the soundhole of your guitar. Once there, cover the soundhole with something that will not absorb moisture and leave the set-up for at least 48 hours.

After that time, the reading that you get in the hygrometer will be the moisture content inside your guitar. With that reading, you can either hydrate or dehydrate your guitar. Your aim should be to always keep the humidity inside your guitar between the 45% – 55% range. If the reading on the hygrometer stays in that bracket for over a couple of days at least, your guitar is at optimum humidity levels.


How to reduce the moisture content inside your guitar

That, I guess, is the aim of this blogpost. All you need to do is drop in a couple of sachets of silica gel inside the soundbox and cover up the soundhole.

Silica gel sachets are those which you often find inside shoe boxes and packaging of electronic goods.  

You DO NOT open the sachets, you just drop them as they are inside the guitar. For excessive humidity effects on other guitar parts, you need the drop a few in your guitar case, close it up and forget about the guitar for at least a week. 

Later, check, and if needed, repeat the process.

SO…if you are buying a new guitar and the salesman tells you that you must put in silica gel, just nod and forget about it. Those ‘experts’ who tell you that silica gel is needed to keep the guitar in good shape, ask them to take a walk!


There is a little caveat to this entire blogpost: whatever you have read up to this point is primarily for solid wood guitars (If you don’t know what that is, search this blog for ‘solid wood guitars’). That is not to say that laminated wood instruments are not affected by excess humidity or the lack of it. It is just that changes will be minimal and many times, unnoticeable in laminated guitars.    


Guitar repair – What will become of this guitar?

I have stalled writing this post for weeks. 

It is about an instrument that came to me having suffered severe trauma after a dumbbell (no less) fell on it! The extent of the damage made the repair cost spiral out of the owner’s comfort level and he decided not to get it repaired (at least not from me!).

I’m sure thought that he will hunt out wannabe repair persons in the lanes and by-lanes of Aminabad who will probably fix the guitar with super glue – quick and dirty – at 1/10 the cost I quoted.

Photographs of the damage follow, and what follow those, are my observations about what would have been a great repair, as also the future of this guitar. It was a Westwood.

Observing the instrument it appeared to me as if the dumbbell fell on the edge of the soundhole closest to the bridge. Obviously, the impact broke not only the soundhole periphery at two places but also cracked the X-brace right at the joint – unfortunately the X-brace joint was right under the point of impact. Due to the impact, all the arms of the X-brace too had been shaken loose all the way and were holding on to bits of glue, here and there.

Also due to the impact breaking the X-brace, other braces running up to it had also been knocked loose.

If I was to rate the damage to the face of the instrument to its innards, the outside would score a 2 out of 10 and the inside 8 out of 10.


Corrective measures

To bring healing to this instrument, one needs to start from the inside out. Check all the braces and glue them with good wood glue ONLY.

Then the soundhole can be repaired but without cleats I doubt if the soundhole repair is going to hold too long.


Problem with super glue

Cyanoacrylate glue (or super glue) is a great glue: smaller mess, fast-curing, great, strong bond. So what is the problem? It’s strength is its greatest weakness, for it is so strong that it dries hard and brittle.

For furniture which does not need to move, super glue works perfect. For string instruments, it is the worst glue ever.

Let me illustrate with this particular guitar in question. Now, it is very easy to wick superglue down all those broken braces, clamp them and the guitar is healed. But…how long will the guitar stay healed?

As you play the instrument, as the top vibrates – and along with that the braces – the vibration is going to break the superglue loose sooner rather than later. 

And what then? Will the owner get the instrument repaired again? Will anyone hazard taking on a job that has been botched earlier?

And this is where my dilemma begins. Am I doing something wrong by trying to do things the right way? The right way, the right path, is always tougher. So, am I right in making things hard for myself?

Anyway!!!!


What I ended up doing

Since the instrument had come to me, I just could not let it go just like that. Earlier, before I had fully realised the extent of damage, I had told the owner that we would need to cleat the guitar at the soundhole. Now that the repair had been called off, I felt that I should do at least something for the instrument.

The impact of the falling dumbbell had caused uneven planes at the point of impact. No side wished to align with the other. With clamps and brute force, I brought the two planes together. Once that was done, I put a mix of sawdust and glue along the break.

Not a very pretty picture but at least, now, the instrument won’t ‘look’ broken. This was before I tried to disguise my effort a bit. My rationale in doing this was that the joint would come under the strings which would hide it somewhat. 

However, I did caution the owner not to string up the instrument before he got the braces repaired inside.

If he pays heed the guitar will remain playable. If he doesn’t, he’ll see the instrument collapse before he is able to tune it up to pitch!    

Guitar repair: When fretwires develop pits

Pitting of fretwires, also referred to as formation of divots, is as common a wear-and-tear problem as the disappearance of tread from your car’s tyres.

Irrespective of how much or how little you play, sooner or later, divots will form on the fretwires and it is pretty normal. Interestingly, you would have noticed that pitting takes place primarily on the thinner three strings. Why? Try cutting an apple with a knife and then try cutting it with a butter knife. The thinner the point of contact, the easier it is to cut through. The same principle applies to guitar (acoustic and electric) treble strings and fretwires.

Of those three strings, you will invariably find that the ‘B’ string makes the deepest and quickest divots. That is due to the nature of the ‘B’ string: plain steel and comparatively thick (in comparison to the ‘e’). And after the ‘B’ string, you’re most likely to find divots along the path of the ‘e’ string, and then the ‘G’ string.

The phenomenon is hastened on due to the quality of fretwire used (in India). It is the softest, and thus, the most vulnerable to pitting. Basically, fretwire, the world over, is available in three varieties: stainless steel, right at the top, cupro-nickel at the other end, and Evo Gold coming in between.

With stainless steel fretwire, one can go for a decade or even more before divots start appearing. However, the interesting bit is that stainless steel is so tough as fretwire that luthiers pass it on for other options. It is expensive too. It is a well documented fact that luthiers complain that putting in stainless steel frets on just one guitar, renders their tools useless! In its favour, you can really shine up stainless steel frets. 

On the other end of the spectrum is cupro-nickel fretwire (majorly used in India). It is soft and cheap, and thus, a favourite among guitar manufacturers in India and most parts of the world.

Evo Gold is a gold-coloured fretwire and in terms of hardness and cost, falls in between stainless steel and cupro-nickel fretwire.

All this long-winding introduction to let you know that the all-steel ‘B’ string easily bites into cupro-nickel fretwire, leaving divots all along the fretboard, wherever you play most. It’s very simple actually. You play less, you’ll see divots on your fretwires much later down the line. You play a lot, you will see them much earlier.


How harmful are divots on fretwire?

They are and they aren’t! If you do a lot of bends, pitted fretwires can hamper your playing big time. Also, if you like to create that vibrato effect just with finger pressure, that too is bound to suffer with pitted frets. On the other hand, if you just play cowboy chords, I don’t think that the divots will hamper you too much, though some players can feel inhibited by them. 

In any case, my understanding of the issue is that once the tread disappears from your car’s tyres, you either get them re-treaded or you buy new tyres! And why should fretwire be any different? 

However, while replacing bald tyres with new ones makes complete sense from the safety point-of-view, pitted fretwire is not a life-and-death situation. You do not have to get fretwires replaced at the first sign of pits appearing. In fact, you only replace fretwire which has been worked on half-a-dozen times and the fretwire has been ground almost to the fretboard. You can easily go to an ‘experienced‘ (can’t emphasise that word enough) tech and have the divots removed. 


Removing the divots – the process

Unless if the divots are in the process of being formed, working on fretwires is a slow and tedious process demanding lots of concentration.

You first work with a flat file to bring all the fretwires to the same level.

The file that I use is actually T-shaped hardened steel, very straight and very flat, on the face of which I put sandpaper.

Once you know that all the fretwires have been levelled, then comes time to put the radius back into the fretwires.

And that is done with a block of wood (called radius block) that has the same radius as that of the fretboard. 

Yes! The saddle, the fretboard and the nut should have the same radius for your (acoustic) guitar to respond to a feather touch. And so, depending upon the radius of your fretboard you choose the corresponding radius block, throw on sandpaper and give it a few passes.

Once these steps have been completed you will see the fretwires are pretty flat on the top. A little crowning file remedies that

Once the frets get crowned, the hard work begins. All these files and blocks were to remove the pits and make the fretwires uniform. 

If you look closely at unfinished fretwires you will notice the gravely look to them very easily. Unless each fretwire is worked on individually (that is the operative word) with various grits of sandpaper you can never get each fretwire polished properly.

Once that is through the cutting and polishing compounds take over, giving that much-talked-about glass-like feel to the fretwires that makes strings really slide over them.

It is a very satisfying feeling to have a customer go “Wow”, just looking at the fretwires, but then, it does create a hole in the pocket!

Guitar repair: This guitar and the missing blog post!

It is now 1 AM on Sunday, June 19th, as I begin to write this post. Till now I had been searching!

I had worked on this guitar some time back. It was an Epiphone Dove. No matter how hard I have tried searching my blog, I haven’t been able to find a post detailing what I had done to it before. 

My idea was that I would share the link here and then with three or four fresh photographs, recount what was happening now. And so, this post has just three photographs!

I even called up the owner asking him to send me the link which I particularly send to the owner of the instrument that I work on. He could not find it either.

Just a few minutes ago the thought occurred to me that maybe, I never wrote a post about the instrument! (Can that be true?) I am still confused. But it is true that I do not write a post about every instrument that I work on.

From what I remember of the work I did, I think I changed just the nut on it.

Usually, beyond a certain price range, manufacturers feel inclined to provide at least a bone saddle. The nut they consider of no consequence and so even a piece of plastic shaped like a nut works.

That was the case with this instrument too (if I remember correctly). But the guitar had been brought in because the owner was experiencing some buzz on the treble strings (e, B, G).

So, I threw out the plastic nut and installed a new bone nut dialled to the right dimensions. I remember that I myself was surprised at the really low action at the first fret. The instrument had been a pleasure to play on. The owner too was thrilled with not only the action but also the change in quality of the sound of the instrument.

The story up till now was just the preamble! All this was to introduce the instrument to you.

Well, it turned up again at my doorstep, recently, with that old problem of buzzing strings! A friend of the owner had brought it in.

That nice low action had gone lower and the neck of the guitar was straighter than what I like to see.

That is a .012″ feeler gauge and it is pushing the string up. As you can probably make out, the string slots too are not too deep.

Sadly, I don’t even have a written record of this instrument. I remember that the action at the nut was low but please don’t expect me to remember what exactly it was. What I can say is that the instrument must have been playing just fine for me to let it go.

The best way I can surmise the phenomenon is that between then and now, humidity dealt its hand and the buzzes came rolling in.

I dialled some relief into it but because the buzz persisted, I filled the nut slots very, very slightly. That all but removed the buzz.

I did not dare go any further working on the nut, neither did I wish to adjust the relief any more.

What made me stop – besides other factors – was that we were working with old, muggy strings. With a fresh set of strings and a fresh set-up, all should be well.

Guitar repair: Two saddles for one guitar?

Long time back, I had heard that guitarists often keep two saddles for each of their (acoustic) guitars, which they swap when the action became too low or high due to the rise and ebb of humidity. Though theoretically I understood the concept, practically I couldn’t get my head round it because I had never experienced it.

I own a few acoustic guitars and they are well-made, solid wood instruments which I play on a monthly rotation basis. Now, because they belong to me, they are set up well, are well looked after, and are provided enough protection. Around a month back, I pulled out one guitar, tuned it up and was horrified to find that I could not even play open strings for they were actually sitting on the fretwires!

I scratched my head trying to figure out what could have gone wrong with the neck or with the saddle for the strings to sit on the fretwires, but then realised it would take time figuring out. Instead, I put this guitar back and pulled out another one.

The next one too was suffering from the same malaise. The strings were so low that it seemed someone had taken out this guitar’s saddle and had put in another guitar’s saddle.

Saddled (pun intended) with two guitars that refused to play, I got down to working on them. Both necks were absolutely straight while both saddles were too low. I took out those saddles and installed new ones.

Here is the difference in height between the new and the old saddles.

Remember, both instruments used to play perfectly earlier (with a lower saddle). So, what changed? The more I thought about it, the more I scratched my head. We are going through very, very dry weather. Even as I write this post on Saturday evening, the weather app on my phone shows the relative humidity at 16%!!

We have had days where it climbed to 33% but by and large it has stayed between 15% and 30%. Right! Dry weather. That would mean the wood is (read guitar neck too) losing humidity. Wood drying would mean it is more likely to contract. That would mean the neck would curl upwards. But that would mean the action on the guitar would rise and not fall to make the strings sit on the frewires!!!

More head scratching! Long story short, I don’t have an answer. If you can explain it to me, please do write in.

Anyway, I took out new bone saddles; they  are nice and tall ones, and believe it or not, I just needed to remove in the vicinity of .020″ from both of them for the guitars to begin playing perfectly again.

Here are the two guitars sporting the new saddles. The old saddles have gone into the respective cases, to be used as and when the need so arises!


Guitar repair: Not all lifting bridges get reglued the same way!

I get daily calls asking me the cost of repairing this and repairing that on an acoustic guitar. Many times I am able to put a figure to it and many times I tell the caller that I would have to take a look at the instrument before giving a figure.

But almost every week I receive a phone call asking me what the repair cost would be for a lifting bridge. Some of the more inquisitive ones even ask me how I propose to tackle it, what glue will I use, etc, etc. I have to explain that not all bridges lift to the same degree, or at the same place. How much and from where the bridge is lifting eventually become price-determining factors. These also determine the course of action to be taken while re-gluing the bridge. I have repeated this answer so many times that now it goes like pushing ‘play’ on a recording machine.  

So, this blogpost is actually about how I determine what to do with a particular lifting bridge. The hope is I stop getting those phone calls, though I realise that this blog goes so far and no further.

The following are some of the common scenarios that I encounter and what I do with them. Having said that I feel it correct to also clarify that these methods that I am going to describe, generally work. However, in many cases, I do have to take a different path though the problem is the same.

If, for example, the bridge is slightly lifting (when you can push in the corner of a notebook paper, say, some 1mm and no more) at either or both wings

The bridge as seen from the end block

I like to push glue under the wings, clamp them down, and hope and pray it holds. One could let wings lifting as little as this be, but then the end of the bridge closest to the end block takes the maximum strain from the string tension. Even a centimetre of lift anywhere on this end means that it will certainly weaken the rest of the perimeter. 

Another scenario is when the wings are stuck solid but the centre of the bridge is lifting.

As seen from the end block side

In such a situation, I prefer to take off the bridge completely and re-glue it back properly. I said I preferred that route, but I do give two scenarios to the owner.

  1. I try to push glue in and if it sticks, so much the better, and
  2. If it doesn’t stick, we have to take the bridge off completely and you have to pay for both processes.

Then there is another situation where the bridge is lifting right through its extremity closest to the end block

Here, there are no options. The bridge can only be taken off, both surfaces – the top and the underside of the bridge – cleaned of all glue residue, and then the bridge is stuck to the top.

An extreme form of the same situation is the photograph headlining this post. In such a case, the ‘patient’ is rushed into the OR and surgery performed under anaesthesia. Later, the patient comes into ICU, then to the recovery room and then the general ward, before discharge. 

These were three common bridge-lift situations, and no matter what I prescribe, follow or preach, the fact is that the correct and the best way is to take the bridge off whenever a part of it starts rising, clean both surfaces, re-glue, clamp, and then give it ample time to cure.

But here is why bridges lift.

9.5 times out of 10 that I have taken the bridge off a guitar, I have seen this. If you can understand it through my drawing, there is a millimetre or two’s worth of margin all round the underside of the bridge and the same margin on the footprint of the bridge on the top too. While on the underside of the bridge this margin defines the extent to which the glue was spread, on its footprint it marks the area that the lacquer intruded on the footprint. 

The funny thing is that ‘intrusion’ never seems to look a if it happened by mistake. In fact, it looks as if it was planned to be that way.   Why that should be so, is the intriguing part.

The part of the bridge closest to the end block is where there is most stress of the strings. Go back on top and look at that main photograph again. That is exactly what the strings want to do to your bridge. With that margin left on the underside of the bridge, it doesn’t take much for the bridge to start lifting. That phenomenon is compounded by the lacquer intrusion on the bridge footprint.

Are there bridge designs prone to lifting?

Yes! And the following is my understanding of bridges and how they function under string tension. 

Of the two bridge designs, which one do you think has a greater propensity of failing?

The string-through bridge without the bridgepins is my culprit. Why? Back to the main photograph and understanding which way the strings are pulling. The string-through bridge only aids in getting itself ripped off (pun intended) due to its sheer design.

The more common bridge with bridgepins lets the bridgeplate take the first onslaught of string action. If your bridgeplate is made of a good hard wood, all is good, otherwise…, read about belly bulges in this blog!


Guitar repair: This Yamaha required emergency surgery!

This Yamaha came to me a few months ago in a great deal of distress. In between came a host of instruments with various humidity-related issues which leapfrogged this one.

This too is partly a result of the lack of humidity as you will discover.

A 3/4 guitar, it belonged to a lanky, soft-spoken recording/performing artist. As I inspected the guitar he told me that this guitar had been lying with his brother for two years. The young man was attached to this instrument and wanted it fixed proper.

I don’t think that it was cared for very much during those two years, for this is how it came to me.

While you see the bridge cracked, it was also lifting. While casually looking at it, it might appear that the crack was in a straight line. However, that was not the case. Look closely at the ‘D’ string bridgepin hole. You clearly see how the break is in two lines and not one. And it is a deep break, almost running through the entire thickness of the bridge.

I knew I had to be really gentle with the bridge to be able to take it off in one piece. But then gentle is not the word that comes to mind when you are talking about taking off bridges!

Usually, it is a 10-15 min job. This bridge, however, took almost 30. Why?

Because it was stuck with epoxy! See that shiny underside of the bridge. That’s epoxy!

Whatever, there was a job at hand and it had to be done. So, after 40 mins of scraping and sanding, this is what it looked like

After another 20 mins, it looked like this

A final 25 minutes – 85 minutes in all – later, it looked like this: nice, clean, bare wood!

Once the underside was clean, the crack demanded being tended to.

With not too much clamping pressure, I was able to make the two seams meet, well, almost! That gave me much hope and I went about filling, filing and sanding. Slow and painstaking but fruitful.

This is how it looked once I was through! Not bad, eh?!

Now, there may be some of you who might question the amount of effort and time to put a broken bridge together. Why not put in a new one? Well, I could if I had the exact same bridge. I did not. And I was sure I would not have been able to find exactly the same one no matter how hard I searched. Besides, when you put on a new bridge on an old guitar, you better be sure that the new one is slightly larger than what the old one was, otherwise it leaves a very unsightly margin of bare wood showing all around.

With what I thought was the major part of the work done, I turned my attention to the guitar itself.

The footprint of the guitar on the top needed to be cleaned of all extra lacquer and paint. But this was easier said than done, for no matter how careful you are, there will always be chips, dings and scratches that belie your efforts.

I took the chips and dings with a pinch of salt, deciding to touch up once the bridge was glued on.

Here’s the cleaned bridge area of the guitar with the bridgepin holes and the soundhole covered up in preparation for a cleaning of the fretboard. It was an electro-acoustic instrument.

Now, it was time for major surgery: to glue the bridge to the top. But here I was accosted by a problem.

The body from the outside measured 2.75″ (approximately). Then the braces were .5″ on the back. Take another .5″ for the braces on the top. What all those numbers translated to was that I had 1.75″ of space (approximately), to put my hand in, the clamps in to be able to glue the bridge to the top.

Also, the owner told me how good the electronics were. While clamping, I had to also take care that I did not inadvertently crush the piezo piece stuck to the bridgeplate.

After struggling for what seemed an eternity, I finally to get all the clamps where I wanted them to be. Dry run complete, I applied glue, put on the bridge and  clamped it so tight that air would not be able to get in. Thing is, you never get a good bond with just glue. Unless the clamping is just right, either the bond is going to fail soon, or you’re going to break something.

Here’s a look at the bridge under pressure.

After I caught my breath, I began work on a new bone saddle and nut. We could most certainly do better than the plastic nut that the company provided.

The top-most two elements are bone. The owner had purposely chosen an unbleached bone nut to give the instrument an aged look. But before those could be put in the instrument, they would have to be cut to size, and so…calculations!

Those were shaved down and while I waited for the glue to cure under the bridge, I worked on the fretboard which was in dire need of some love. There were a few fretwires that needed divots removed from them and the fretboard certainly use some cleaning and some love potion.

Also, there were minor irritants like the strap button on the heel of the instrument rather than being on its side.

I swear I haven’t seen a longer screw in a guitar. As I pulled it out, I was fearing that the screw was holding the neck and body together.

That hole was plugged and a new hole was drilled for a smaller screw, on the side of the heel.

When the clamps did come off, the bridge looked as good as new. I was happy with my work.

Now, it was time to bring everything together. It came together like a charm. Here’s a look at the finished job!

Guitar repair: You do as the customer says – Part II

This is the second of the guitars that came to me where I did not understand the reasoning of the customer. I might add that this was a return customer on whose guitar I had worked a couple of years ago.

For those interested in reading about that experience, here it is:

3/4th Ibanez in for string change but danger lurking nigh!

This time, the customer had ordered online a set of bone saddle and nut and wanted me to install it. He planned to give away the guitar and wanted it to be in top shape. Creditable!

However, when he arrived, the nut seemed fine but the saddle seemed to have been shaped by a novice, for the intonation made for the ‘B’ string was situated where the ‘A’ string would ride! And no! It wasn’t as if a saddle meant for a left-handed guitar had been sent by mistake. Besides, the quality of the bone used in making the saddle was very suspect. No wonder the cost of nuts and saddles is less than half the price I charge!

When I first learned that that major e-tailer was selling nuts and saddles, I decided to check them out. I ordered two sets of nuts and saddles. Call it coincidence, poor workmanship or just my luck (e-tailer’s luck?), both saddles cracked under string tension while I was tuning up the instruments.  

I have since preserved the saddle to show customers who think buying from the e-tailer is a great idea. Like I always say, I can only advise and guide. It is your decision completely, and most certainly, your money! 

So, with the situation being what it was, the customer decided that he would take a saddle from me and use the nut procured from the e-tailer. The shocker came later. Though the saddle slot was meant to accommodate a 76mm saddle, the owner was sure that a 72mm saddle would work as well. Of course! Your instrument, your decision, your money! 

The owner said that he would like a really low action. If you can see it, the line on the new saddle (left) shows how much I have to take off the base to get the action right.

He also did not want me to change the strings. According to him, he had a set at home which he would later change himself. Good enough, but that would mean that I had to work with old strings hanging around, and the danger that in the process of winding and unwinding, there was every chance that a string would break. 

While I was checking the guitar, I noticed that the bridge was lifting all around the far side of the bridge.

I showed this to the owner but he decided that the bridge did not require immediate attention. And yes, he understood completely that the raised action on his instrument would be completely solved if the lifting bridge was attended to. And then again, who am I to say anything; your decision, your money.

I got down to working on the instrument and started by taking a look at the neck.

Thankfully, it was dead straight which is how we wish to see it.

Next job to be done? Knocking out the factory-fitted nut.

Usually a tap of the hammer is enough to do the job, but this nut was so well stuck that despite robust raps from the front and from the sides, I failed to dislodge it. Just when I was beginning to think that super glue had been used to hold the nut down, and just when I began swearing, the nut gave way. Maybe the swearing did the trick!

The nut was not super-glued as I had been imagining. In fact, it was seated in a rather deep slot, which was very pleasing to see. A deeper than usual slot for the nut means that the nut is seated perfectly and in perfect contact with the slot walls. What happens then is that sound transfer is much better and loss of sound energy is near negligible.

As I measured the old and the new nuts I realised that the new nut was much longer than the standard nut length! It sat very snug in its slot, such that there was no glue required to hold it in place but it hung out of its slot a couple of millimetres on both sides.

I called the owner and told him about the long nut. He said that he knew about it and it was quite alright if it hangs out a bit.  And that is how it went home!

When the owner came to pick up the guitar, I asked him whether he wished to ‘give away’ or ‘sell’ his guitar? He replied that he wished to ‘give’ it to his sister.

Hearing his reply I could have slapped my forehead in exasperation. Though I did not say as much then, but if it was his sister he was wishing to give the guitar to, so that she could learn how to play, why change a perfectly working saddle and nut, and why not fix a bridge that needed fixing?

Even as I write this, I am shaking my head in incomprehension.    

Guitar repair – You do as the customer says – Part I

My experience with customers, usually, is that facts and logic will appeal to most, if the pocket allows. In my dealings with them, I  place the pros and cons of going (or not going) down a certain route and then let them decide the path they wish to take. Mostly, the choices made are correct, or, if not entirely correct, understandable.

In case I feel that the customer is making a wrong choice, I try to explain to him what could go wrong going down that path. But still if he insists, I do as he says.

I saw two guitars in quick succession which left me first amused and then scratching my head. This is the story about the first one.

The instrument was in for a saddle and nut replacement for the owner of the Westwood had tried to correct the intonation on his guitar by filing the intonated sections on the saddle close to nothing.

Wonder if you can see it, but the area where the B sting is supposed to ride has been filed all the way back. Once things got out of hand, the SOS call came to me. I could do little with the old saddle and had to replace it.

As I began taking off the strings, I noticed this

I showed it to him and he showed no surprise seeing it. He didn’t want me to do anything about it because he felt that it would not affect his playing.

I tried explaining to him that tending to a split bridge was as important as swapping the filed down saddle with a new one, but he would have nothing of it. So, I let it be.

While replacing the saddle, I tried to explain that it would be a good idea to replace the nut too, but he wasn’t too enthused. Instead, he  asked me to correct the action at the 1st fret with the old nut.

As I took off the nut, I saw why I had been finding it odd all along. Although the nut wasn’t of bone, it had been very oddly cut.

The nut slot on the headstock was worse. Not very clear here but it had a thick coat of dried glue. I tried removing as much as I could safely remove.

In fact the rubbish that you see in the background of the nut photographs is the dried glue removed from the slot.

As I began work on his guitar, he said he would get his own strings and went out to get a set.

Some time later, he called to ask me to retain the old strings. By that time I had taken off the strings and dumped them, and after the call, I had to fish them out of the dustbin. To be fair, he had on a fairly new set with just the ‘G’ string missing. It had snapped, I was told. He brought me a spare ‘G’ string and I got to work.

And as we all know, winding and unwinding strings is the perfect recipe for a string break. And so, the ‘D’ string broke on me as I was trying to tune it up.

I rummaged through my pile of spares and found a D string of the right thickness and replaced it.

There was a slight buzz on the open D string, which disappeared once the string was fretted. I let it be attributing it if not to the cobbled together strings, then to the nut slot geography.

A new fresh set of strings would certainly solve the issue.

But why let a split bridge remain split? I just hope he doesn’t call me in six months saying the bridge has completely split into two!!

Guitar repair: The one hit hardest by (lack of) humidity, came in last!

For some time now, I have made my bias towards UK-based Tanglewood guitars apparent to you, readers.

After a long time, I noticed guitars that used good materials, had good construction quality, sounded good, and the overall appeal of the instrument was good. Of course, you get all of these in high-end guitars too, but then Tanglewood is far from high-end, and that is what appeals to me: it’s price point.

So, I was particularly intrigued, even distressed, when this beautiful all-mahogany guitar with a satin finish came in

The owner – a UG student – told me how he had bought the instrument and was just getting his hands set on the instrument when the pandemic struck and schools and colleges everywhere were shut down. This young man left his new guitar strung to pitch in a hostel room that wasn’t opened for nearly two years!

When the situation improved and schools and colleges were reopened, the young man found his guitar with a lifting bridge, a sunken top, the beautiful wood binding coming loose at most spots, and the headstock joint and the heel joint beginning to come loose.

There was also a soundhole crack staring at you.

And as if this wasn’t enough, the saddle was falling forward. I was a little surprised that staying under string tension for two years, with the saddle straining against the bridge, it hadn’t cracked the bridge.

Oh, I had to do so much that I didn’t know where to start.

I suggested to the owner that we throw out this factory-fitted micarta or whatever saddle and put in a solid bone saddle which will sit upright, correct the intonation, and would be a wonderful for overall sound projection. However, the young man declined and I kind of understood that with a shoestring budget and such a lot of work to be done, costs needed to be cut wherever. Besides, he could get a bone nut and saddle installed at a later date.

I wanted to help the young man and the instrument, so I just glued a piece of an old debit card and filed it to where the saddle sat bolt upright in its slot without having to be pushed into it.

Next, I decided to tackle the toughest job, the binding coming loose in places, almost all around the top. Oh, there was a lot of heat and glue and clamping involved and some double and some triple tries before everything finally came together.

Similarly, the neck heel had to be tackled: a job done best under string tension.

I must apologise for the crappy photograph: the flash makes the joint unclear. But do take my word for it, the heel came together rather nicely on each side.

While turning my attention to the headstock joint opening, I noticed that there was little to no difference in the opening of the crack with and without string tension. The seam had opened so minimally that though you could more than feel a lip, even with string tension, there was no way of getting glue in and clamping it shut.

I suggested to the owner that if in the future, it opens up some, we will tackle it then.

As far as the soundhole crack was concerned, the owner was not convinced that it was in emergent need of attention. Again, though I did not quite agree with him, I kind of understood his reason.

The bridge which was lifting was glued back in place and it was a happy sight to see some of it ooze out.

A 48-hour resting period and all would be well. After the clamps came off, there was a certain roughness to the bridge which I found irritating. I decided to take five grits of sandpaper to it and make it as smooth as a baby’s bottom.

I got it that smooth but then I lost all the colour that the bridge had been dyed with!

And thus, began preparations to dye it back.

Once that was through, I cleaned up the fretboard, gave it a coat of the love potion, and some to the bridge too. Considering how dry the instrument was, I decided to put on the potion but never took it off as is the practice. I knew from experience that the wood would soak up the fluid very quickly. This is how it looked after I was done stringing it.

I also gave the body an almighty rub with warm water and then a light coat of the potion to do its magic. The sheen on the instrument would warm the cockles of the heart of any guitar lover. Me? I was thrilled!

And to get the ‘big picture’

Very purty!

I sent home the owner happy, but with the advice that at least for four weeks he had to make the guitar drink water. He had to make it drink water till the water in the container stopped giving up water. I asked him to come back in a couple of months for a re-evaluation.

Till then…!

And yet…who am I to say that this was the last humidity-hit guitar??!! Maybe, there are more in line!

Guitar repair: This too was hit by falling humidity – Part III

This instrument has come to me off and on for something so minor and insignificant that I never charged the ‘customer’, nor did I ever feel compelled to document the work done on it. Those visits could also be that the owner of this guitar was trying to ‘suss me out’, for we had long conversations regarding guitar upkeep, this and that. And I understand that sentiment completely. You don’t just hand over your Epiphone Dove Pro to anybody!


This time when it came in, the owner was plagued by a buzz around the 8th-9th fret area, on almost all the strings. Again, I smiled compulsively and knowingly.


This is from a few evenings ago. If the relative humidity is down to 18%, it is bound to play havoc with all acoustic instruments.

The owner had also brought in the instrument because he wished to have the plastic nut on it


swapped with a bone nut. I remember pointing it out to him in our previous conversations.

I showed him a set of bone bridgepins and he chose these


to go on his instrument. (Not a very good photograph, but it is a abalone dot with a gold circle around it).

There were other issues too. The ‘B’ string had chewed up fretwires 1 to 6 in its path (the usual culprit).

Along with these, there were itty-bitty things like a dried fretboard and bridge and taking a look at the hardware on the headstock.

With the owner still around, I played with the truss rod some and when I was satisfied, handed over the instrument to him. Though he loved the change, I cautioned him not to look for perfection in the coming two months, and to just bide his time.

After two months, the humidity will start rising and reach such levels that it gets oppressive. That’s when acoustic instruments will demand another change. That’s the fun of living in North India! Right now, it is hot and dry, then it will be hot and wet, then it will be wet and cool, then cool and dry, then cold and dry and lastly cold and wet! Ladies and gentlemen, you have to play with those truss rods!

Back to the Dove, I dumped the strings and went to work on the fretwires


That’s after levelling and crowing the first six fretwires and going through six grits of sandpaper on each one of them. You may still be able to see a little dimple along the fretwires where the ‘B’ string had dug in, but that’s harmless, and taking that out would have meant doing all the fretwires. Not required right now.

That done, a coat of the love potion was mandatory on the fretboard and the bridge.

Then I turned my attention to the headstock and snugged up the hardware there. The buttons of the tuning machines were a tad too tight, or so I thought. So, I loosened them up a little, till they turned just fine.

Next, major work: bridgepins. I tired fitting the pins in their holes but they would not fit, so I had to ream them. But it seems I forgot to capture that on camera (so like me)!


Once they fit perfectly, I began installing the new nut. The nut was shaved down to the right height and then each slot was worked upon so that each string had the near perfect action at the first fret.

The owner had chosen these (after a little prodding) to go on his guitar. I had argued that he being a performing artiste, would love the bigger bang 13s delivered for his buck.


Here’s how these came together


After everything was done, I was buffing out the body, when I noticed these scratches where the playing arm elbow would normally rest.


Wonder if you can see it…it’s just after the reflection of the light bulb. Anyway, I didn’t do anything with it and decided that I would ask the owner and then buff out those marks.

Maybe next time!

But remember this was a humidity patient? Well, this wasn’t the last.

Betcha, there’s more of ’em comin’!


Guitar repair: Another one hit by (falling) humidity – Part II!

Tis the season!

As promised, here is another instalment of repairs undertaken on another acoustic guitar plagued by the vagaries of the North Indian Spring.

This was a return customer, one whom I remember as owning the best kept guitar. And if you’re looking uncomprehendingly at the tuning machines, I swapped the not-so-good, factory-fitted ones, for these handsome 1:21 ratio machines. For those of you interested, here is the work done on it, on its previous visit. 

A facelift after taking ‘Irene’ out of a spot of bother

This time though the owner came in with the complaint of an “irritating  buzz that refuses to go away.” I merely smiled (and he must have thought senility was catching up with me) for I was expecting it. 

On his earlier visit, I had told the owner about bone bridgepins. This time, he had come also to get a set of those installed.

He also wanted the plastic end pin on his guitar replaced with a twin of the chrome strap button I had put in on his previous visit.

Yeah! That is how clean the man keeps his guitar. That is a reflection of my tuner you are seeing on the surface of the guitar!

But before we got to that, the issue at hand – the God Almighty buzz – had to be resolved. The buzz, as he pointed out, was across the board, beyond the 8th/9th fret. I looked at the fretboard and under string tension, it seemed a little too straight for my liking. I loosened the truss rod, tuned up the guitar but when I played it, the buzz was still there.

I hadn’t expected that and I must have unconsciously frowned, for the owner told me, rather apologetically, that the last time I had told him that there were a few high fretwires that needed to be tackled. Hearing that, I immediately caught hold of the fret rocker and went up and down the fretboard. 

Wherever you see a reddish fretwire, that area on it was raised. Seeing so many raised fretwires, I began wondering about the money that the owner would have to shell out, if I went about levelling, re-crowning and polishing them.

What I decided to do was to try and tap the fretwires a bit and see if they got seated. However, I did explain to the owner that this action could be a permanent fix and it could be a temporary fix – the fretwires may rise again after some time.

But thankfully, after I tapped the truant fretwires, they stayed in their slots and the customer was happy with the way his instrument was playing.       

After the owner left the instrument with me, I began work on it and decided to work on the end pin. As I pulled out the pin, I realised that there was a hole there that would first need to be filled before one could install a strap button there! No can’t do!

I intimated the problem to the owner and he understood, and I let the end pin remain, after all.

Before I began fitting the bone bridgepins, I decided to check on the tuning machines on the headstock. But all was snug and tight there.

Now for the bridgepins. I tried putting in the bone ones, but they would go in only a little more than half-way. I had to ream the bridgepin holes.

This is a slow process and you have to go slower. Half a turn more of the reamer and the bridgepin would be flopping around in the hole, half a turn less and you would have made no difference to the fit. Ream a little, check. Ream again, check again!

But the reamer made quite a mess of the rosewood dust. It was time to string ‘Irene’ up. The owner had brought these along and so these went on.

‘Irene’ played like a dream, and I thought there was just that wee bit of sustain more to her with these around.

This one went home cured, but I promise you, more are coming…!

Wait and watch!


Guitar repair: Dry weather problems; the first victim is in!

We, in North India, see extremes of temperature as well as that of relative humidity. While it may be a good thing to be able to experience every change of climate and weather, acoustic guitars are certainly not thrilled with the idea.

This period – say from February 2nd week to May end – is an exceptionally dry spell. Those who follow weather conditions, know that the relative humidity during this period dips to as low as  20%. Notice how quickly your clothes on the line dry out? Notice how frequently you feel thirsty? That’s the relative humidity acting.

This was yesterday evening!

Acoustic guitars too feel the pinch and show it in the form of guitar buzz. One evening your guitar will play just fine and the next evening there will be an irritating buzz.

To tackle the issue, there are two things that must be done compulsorily. You need to let your guitar have a drink of water and you need to adjust your truss rod incrementally. Now, most people are mortally afraid of touching their truss rods and they take the instrument to the closest instrument repair shop.

This one came in a few days ago.

The neck was straighter than what I would like to see, and so,

Wish I had taken a photograph of the neck before adjustment, but here is one of it after the ‘operation’.

The action after the adjustment was a liveable .085″ on the ‘E’ and just short of .080″ on ‘e’.

I bid adieu to the owner with the advice to let the guitar have a drink of water.

It was a pretty guitar though, the gold/brass bridgepins offset against the coffee burst was eye-catching.

This was the first guitar to visit the Lucknow Guitar Garage with this ‘seasonal’ problem. I am sure there are many more coming soon!


Guitar repair: Super glue – the latest pet peeve becoming a bane!

Though being something very practical and even prosaic, involving lots of measurements and mathematics, I see guitar repair more as a healing that I provide to the instrument and to the owner. That somewhere in the process, I, too, am healed, is also true.

In the one-and-a-half decades that I have been repairing guitars, there’s a generalisation that has got rooted in me. People who hand over their instruments to friends/cousins to be brought to me for repair, are actually not too attached to their instrument, and thus, are not serious musicians. Having said that, of course, there are exceptions to the rule.

When a family member falls sick, YOU take him/her to the doctor. You don’t ask your friend or cousin to do it. Why? Because your concern makes you want to find out what is happening with your loved one and what can be done to get him/her normal.

Your guitar (or any other instrument) is like that family member whom you are concerned about, or, at least it ought to be. Instead, you deputise your friend! I will still try and do whatever I can to set things right with the instrument, but…you should have been there!

One such instrument was recently ‘brought’ to me.

More than the problem, it was the condition of the instrument which was off-putting.

The problem with it was that the bridge had lifted off it.

LIFTING BRIDGES

Let me say something in black and white: 95% of the bridges don’t lift before pulling a little belly into the instrument!

As the strings strain against the bridge, in their effort to pull it off the top of the guitar, the glue bond resists it. If the bridgeplate

is made of a good, hard wood (as in the case above), the bellying will be to a lesser degree, but it will still be there. In the unfortunate instance of an inferior wood or inadequately sized bridgeplate having been used, the belly will be much bigger, and take that much more effort to straighten out (if at all).

Only after they have forced a belly into the instrument, do bridges finally start to lift, even if it is just the corners of the wings. So, as soon as you can make out that the bridge on your acoustic guitar is lifting, loosen the strings and take your guitar to someone whom you can trust.

Lesson over!

The first thing was of course to take off the strings. In the process, as I tried taking out ‘G’ bridgepin, it broke right at the neck – a telltale sign that the guitar was very dry.

You remember from the photograph posted earlier that the bridge looked as if it was ready to pop off the bridge anytime. Unfortunately that wasn’t the case. No matter how hard I tried, the bridge would not budge.

Yeah! I had to clean (sanitise) the guitar before I worked on it!

The more heat I gave it and tried to prise under the bridge, the more it popped and crackled but refused to come off. Pop and crackle…hmmm…it was my old nightmare, super glue, visiting me again.

The persistence finally paid off and the bridge did come off, but like this

Do you see the handsome 2-3 mm area inside the footprint of the bridge, all around? I have never understood manufacturers, why they leave that area of paint under the bridge.

This is area here is critical to providing strength to the bridge-top bond, for it is here that the force of the strings pulling, acts. With that pressure point weak, there is little hope for the bridge to stay on, endangering your instrument’s overall health too.

Anyway, I began cleaning the bridge and

the super glue on it came off only bit by bit and as a white shavings. What a royal mess it made!

However, there was something odd about the bridge itself. It didn’t seem right to feel, even though it had seemed okay. But as I looked closer

Do you see it? The bridge had curled due to the bellying and under the strain of strings tuned to pitch. I called up the owner’s go-between and told him that straightening the bridge and the belly would cost extra. Mr Go-Between said ‘let me talk to my man’ and I said, ‘Right’!

Meanwhile, I continued my work. I pulled out my marble slab, glued on sandpaper to it

and had a go trying to straighten the bridge out. I marked an area along its outline to check whether I was getting anywhere with the sanding and began sanding it. Much dust but little luck!

Just then Mr Go-Between called to say that the price was too much for His Man. He said don’t go any further and that he would come and collect the guitar from me!

Surprised as I was, I dropped everything and dusted my hands off. I had to wait a month before Mr Go-Between came and collected the now-bridge-less guitar and its sundry parts!!

I charged nothing for my labour, in fact, I even replaced the broken bridgepin.

For the Unseen Owner and for others a reminder in lighter vein


Guitar repair: The toughest bridge glue-up job I took on!

This is the second in the series of super glue/epoxy-stuck bridges.

The famed moustache bridge does sit very easy on the eyes but if it is stuck with super glue and you have to take it off, oh…heaven be with you!

Usually while taking off bridges, one has to be really careful to use the right amount of force while getting under it with knives. In this case, because the bridge itself was so delicate, I had to also take care that I didn’t break it, while taking it off.

Preparations complete, I heated the bridge area and tried prying with the smallest knife in my armoury. It got in and as I moved to larger knives, I began to hear that unmistakable pop and crackle that one hears when super glue is protesting the invasion of your knife.

I actually stopped for a second to mutter, “Bloody Hell”!

Anyway, after some time prying, prodding and prising, the bridge did come off without too much effort.

The encircled areas show you where the super glue did not come in contact with anything and dried up in pristine form. One look at the footprint of the bridge on the top and I could see why the super glue had not held on. No one had bothered to clean the footprint before sticking on the bridge. I let out a heavy sigh…there was much, much, much work to be done!

Realising that, I jumped right in. The first thing I did was to fill the holes in the top which had been created to accommodate the little pegs glued on to the underside of the bridge. What help flat chips of wood were, sitting in perfectly circular holes, is anybody’s guess.

Can you see that little sliver of wood standing up on the rosewood bridge? The top of the guitar was solid spruce so I plugged it with some solid spruce dowels.

This needed to be done first so that I could flush cut the dowels. After I picked the paint off the footprint area, all that I would need to do was to take some rough sandpaper to the stubs of the dowels.

Strangely, perfectly circular dowels had been embedded in the bridge to help seat it in the top and not let the bridge slip around. But it seemed as if the round stubs had been whittled down to mere flat sticks. Why? Dunno!

Anyway those pieces in the wood were promptly shaved off for there was little use for them.

Can you see the round different colour wood where the dowels were seated into the bridge? And that’s also the view of the super glue mess and the little corner of the bridge that I was able to clean. That little corner had taken me something close to 25 minutes. I am able to clean wood glue off a whole bridge in less than 20!

An hour and 15 minutes later, I finally breathed. The bridge was finally clean.

As I looked at the footprint of the bridge on the guitar, I knew fun times were just beginning.

That is another 40 minutes of labour. The curves and bends in the design reduced speed and force while the clean, stark perimeter of footprints that I am used to seeing was sadly missing. It looked as if a child had tried its hand at taking off the paint!

A good two hours later I managed to take the paint off the entire footprint, leaving jagged edges all around. Trying to chip in straight lines and chipping around a bend are two very different things – I very sadly noticed.

But now that both surfaces were absolutely clean and the relative humidity was just right for a glue up job

I got around to it. Generous amounts of glue were spread out on the now-clean footprint of the bridge and the bridge was dropped in place. I pressed down on the bridge as hard as I could and cleaned off the first wave of squeeze out.

Then came the clamping and more squeeze out and then the tedious cleaning.

Do count the number of clamps used to tackle what I saw as pressure points.

Then I just walked out and never came back to the workshop for two days. When I did, it was because it was time to take the clamps off.

But before anything else, a touch-up job was required to fill in paint where it was missing around the periphery of the bridge. I did that with the smallest paint brush I could find.

Now, I had to re-drill the holes (glue gets in everywhere and blocks all the holes), give the bridge a nice coat of ‘love’, and then to string her up.

Oh, she sings so sweet: loud, long and clear!


Guitar repair: Why this one had to jump the blogpost queue!

Yes! This one has jumped ahead of a few instruments because I noticed a disconcerting trend in guitar construction that needed highlighting.

It is most certainly a trend here in India, but readers of this blog the world over need to chime in and either confirm or deny whether they have noticed it in their country/region, or not. However, comment only if you have SEEN the trend. Commenting on the basis of traditional knowledge (how it was done in the past) would mean little.

The recent trend that I notice in India: Acoustic guitar manufacturers have resorted to super glue to stick the bridge to the top! The guitar that I am going to talk about in this post is the 7th instrument in 60 – 75 days that I have seen with super glue being used for bridge attachment to the top. The first four instruments I brushed away as mere coincidence, but a couple more and I was forced to take note of it.

Why is it used? It is cheap, it is quick, it is less messy…almost everything is in its favour!

So, what is so wrong about it? Super glue is great for furniture like a sofa, which just has to sit (or stand) in one place. However, the strength of super glue is its weakness too. So strong is the super glue bond that it is brittle.

Think of an acoustic guitar which has a bridge glued on with super glue. Imagine this instrument sitting tuned through summer and winter to spring and summer of this year. If you don’t get a warped neck, you will certainly have the bridge popping off. And even if the bridge doesn’t exactly pop off, it will start lifting.

Once that happens, believe me, it won’t be a pretty sight. For a dynamic instrument like any acoustic, string instrument, ONLY WOOD GLUE does the trick.

Why? Because when it comes time to remove a glue joint, all you need to do is apply some heat, a bit of moisture (steam provides both), and a bit of elbow grease, and…viola! Whatever you need removed can easily be removed. For example, the lifting bridge on that instrument that has been standing for a full weather cycle, if it had been wood glue, would have come off easily, without damaging the top.

A super-glued bridge is bound to rip off lots of wood from the top when it comes off. Cleaning a taken-off bridge that has been glued with regular wood glue, is a 10-minute job. With super glue, you may easily multiply that value 10 times, maybe even 20 times! Believe me. Remember this is the 7th guitar of the type that I was working on!

Right! So, this came in

If you can’t read the logo on the headstock, it reads ‘Hofner’. Read all about Hobner, Hovner, Hofner, here

New strings and some TLC for this Hobner!

Now that you know about the company, maybe you’ll respect the instrument a little more if I told you it carried a factory-fitted bone saddle. The nut had got misplaced so I needed to put in a new bone nut.

As bad as the headstock break was, the bridge was lifting too

The first job was to get the head and the body together again, as was meant to be

Different angles of the same shot!


And while that joint cured, I turned my attention to taking off the bridge.

And anytime you heat a bridge and try getting under it, and it starts to crackle and pop (like popcorn), those are the first signs that you are taking off a bridge stuck with super glue! This one crackled and popped too!

The very dark spots is where the adhesive collected and dried without attaching to anything. Knowing that my work was cut out, I began scraping.

Take a better look at it. The white powdery stuff getting scraped off the bridge is dried super glue. At best dried wood glue will come off as a transparent-yellowish film, and it does not shine in the light.

25 minutes and it hasn’t come off.

Another 25. Has it come off? Nope!

Another 20 minutes later! And the mess it created…

And that was one surface clean. What about the other surface (the top)?

What you see inside the margin is partly finish and partly super glue. This took me another 35 minutes to clean. Once that was done, all large pieces of wood dislodged in the process of taking the bridge off and cleaning its footprint on the top, were glued back.

Meanwhile clamps came off the headstock and the joint stood. Experience has taught me that the joint will stay together only as long as you don’t put on strings!

In order to ensure that the joint stays exactly the way it is, it was necessary to strengthen it with strategically placed dowels.

This entire operation took me some 25 minutes – almost 1/3 the time I took cleaning just the bridge. What helped me along was the very dry weather.

Structurally, the neck of the instrument was now sound. But aesthetically, it was quite unsightly! So, I mixed up some tint in some wood putty to camouflage the insertions.

And while this dried, I returned my attention to the bridge area. The old clamps came off and the bridge was glued on and clamped well and proper.

And while the glue-up was drying, it was just the right time to take care of the itty-bitty things, like, shaping bridgepins

and getting the strap button in the right place.

Also, the bone saddle seemed to have been raw sawn to size and put in the slot. I buffed it out a bit so that it wasn’t too harsh on the eyes.

When the clamps were pulled off, the bridge looked as if it had never come off

Now, to re-drill the holes (blocked by the wood glue I had used) and to re-thread the piezo element through its hole in the bridge

I fell in love with the piezo element for I have never seen something as slim as this!

A little more love for the fretboard and bridge, and, wow

However, when I strung it up with new strings and the new nut, the action was too high. Shaving down the saddle brought the action down to where I wanted it to be but there was no break angle left. In fact, the ‘e’ string was running straight through!

I got out my files and cut slots from the the bridgepin holes up to the saddle which would change the angle of the string, in turn, increasing sustain and volume.

And here she is…all ready to go home!


P.S.: Do write in and tell me whether you see ‘the trend’ in your part of the world – wherever you may be. 

Guitar repair: Was it any use, repairing this?

Ever since I repaired a guitar and removed a ding in its top – one which the owner had fond memories of –  I have made it a point to only do as much as I am asked to. Yes, I point out problem areas during the initial inspection and whatever else I notice while working on the instrument, but to do or not do I leave to the owner to tell me.

While pointing out the problems, I also tell them how the unresolved issue is going to affect their playing/instrument’s health. And after that it’s the call of the owners to use their wisdom and decide whether they wish to get the problem rectified or not. After all, it is their instrument and their money!

There was this Hertz that I tended to recently.

There was a hell of a lot wrong with the guitar. For starters, it had a crunched (plastic) saddle and a broken (plastic) nut. If you can’t see it, the portion of the nut after the ‘e’ string has got knocked off.

And if you can make out, the saddle is curved as it sits in the slot. It wasn’t the fault of the saddle but the slot itself was curved.

There was quite a handsome belly behind the bridge area

The bridge itself was lifting from its extremities: the markings on the paper show how deep the paper went in

The bridge was cracked through

The fretboard (and the bridge) was dryer than tinder

All the strings on the treble side had been wound from the outside (and not inside). Go back up and take a look at the third photograph (the one showing the broken nut). See if you can see the strings wound from the outside.

And though the owner had pulled out the instrument out of a soft case in front of me, the guitar was as dirty and as grimy as an instrument left out in the open for a couple of years.

The owner’s explanation was the same as I have been hearing for a few months: instrument in one city, owner in another, lockdown, two years…And after I had pointed out the problems, the owner chose to get just the crack in the bridge repaired. He did not wish to have the the bridge glued down, nor did he want the belly tackled.

Who am I to argue?

I knocked out the nut and as I pulled on the saddle, it refused to budge. I had to pull it out with a pair of pliers

Can you see the curl in the saddle now?

Anyway, since both the nut and the saddle had to be replaced, I put in a bone set.

Then I set about filling the crack and sanding the fill flush.

Cracks in the bridge appear primarily when the bridgepin holes are not wide enough for the pins and the strings. So, after repairing the bridge, I took a reamer to the holes and worked it just a wee bit.

Once the saddle had been cut down to size, something needed to be done to stop it from being pulled forward due to the curve in the slot. A portion of an old plastic card was most useful.

Now that the instrument was ready to be strung up, I took some warm water and gave it a bath (probably the first of its lifetime).  I got the muck off it, polished up the body, cleaned the headstock, cleaned and snugged-up the hardware on it and cleaned the fretboard, oiled it (and the bridge).

Here’s a final look at the bone nut and saddle under string tension

After it was finished, I just wondered what and how the owner would play with that high action due to the lifting bridge and the belly bulge. I felt as if the owner’s money and my effort had been put to waste. If the owner was so attached to it, he could have just cleaned up the guitar and hung it on a wall. Why get one-third of the problem sorted with two-thirds of it left to plague the guitar?

I just hope nine-10 months down the line the guitar doesn’t return to me with the bridge ripped out of the top, where I have to repair the top for damages caused by the bolts holding the bridge to the top!!

Those white, pearly dots next to the bridgepins hide bolts and if seen from inside, one would be able to see the nuts holding them too.

Now, the fun part!
I called up the owner a day after he gave me the guitar, asking him to come collect his instrument and he landed up exactly a month and two days later!! Oh, he was unwell, he was out of town, he had asked his cousin to pick it up…


FAIR WARNING!

Because of this experience, I am forced to inform prospective customers that henceforth, Lucknow Guitar Garage will accept instruments for repair only on full advance payment of the expected cost of repairs. This, of course, will be an estimated cost. Whatever the difference is – either way – will be taken care of at the time of delivery.

Also, I have only a small space and cannot store instruments for months on end. If customers are unable to collect instruments till three days after the date of delivery, a charge of Rs 100 per day will have to be paid, at the time of delivery, fourth day forward.

Guitar repair: Owners of solid wood acoustic instruments, don’t say I never warned you!

Look carefully at the photograph above and check out the humidity levels. If you own a solid-wood instrument, are situated in North India, and the humidity is below 45%, this post concerns you and this post should concern you. In this scenario if you’ve left your solid-wood instrument tuned to pitch and standing in a corner of your house, you should be very worried!

A refresher course

What is a solid-wood instrument? One that has the top made out of a single wood, and the back and sides also of a single wood, eg, spruce/cedar for the top and mahogany/rosewood/walnut for the back and sides. Thus, they are also referred to as single-wood instruments. ‘All-mahogany’ and ‘All-koa’ wood instruments (having top, back and sides of mahogany or koa wood), also fall in the solid-wood-instrument category. 

How do you know if it is a solid-wood instrument? Carefully note the ‘design’ of the grain of the wood on the top or back, or sides. Now try and spot the exactly the same pattern at exactly the same place on the inside. If you find it, hurray!

What is the ‘other’ kind of instruments? Ones that have a thin veneer of spruce or mahogany but under that, the bulk of the wood is some ordinary wood. Or, an instrument that is made up of several thin layers of different woods. Thus, the ‘other’ instruments are also called laminate-wood instruments.

What is the difference between the two? Price and sound quality! A laminate-wood instrument will always be cheaper than a solid-wood instrument. Understand the issue like this: a leather jacket which has only two pieces for the back and the front, and single pieces for the sleeves, will always cost more than a leather jacket made up of leather patches.

A solid-wood instrument produces a much ‘purer’ sound than a laminate-wood instrument. Revisit the school physics class where the teacher was talking about refraction of light. Remember how that ray of light passed straight through a homogeneous material, retaining its intensity, and how the same ray of light came out crooked passing through a heterogeneous material, with lower intensity?  Much of the same happens to sound waves as they traverse through single-wood (homogeneous) instruments and laminate-wood (heterogeneous) instruments.

A solid-wood instrument, despite its advantages and price, is a delicate instrument, akin to a pure-bred pet that demands a lot of attention, care and maintenance. The laminate-wood instrument is like a mix-breed pet, not given easily to diseases and ailments that normally afflict pedigreed pets.

The solid-wood instrument, due to the nature of the wood used, is also given to dramatic effects of nature: too much humidity, too little humidity, high temperature fluctuations, etc. Laminate-wood instruments, due to the nature of the wood used, are not given to these effects.

So, if the solid-wood guitar is so much hassle, why buy it? For the sound of it, baby, the sound! Play a solid-wood instrument and you will never be able to play a laminate-wood instrument again.

Course ends!

Right! So, the humidity in the atmosphere is less than optimum for your (solid-wood) guitar. And you’re certainly in trouble if you have left your guitar tuned to pitch and not played for even 3 – 4 weeks.

Here’s why. Wood is an organic material and reacts to changes in weather conditions. Reduced humidity in the atmosphere sucks the moisture that is present in the wood. Add to that the force being applied by the strings. In a laminated guitar, because different woods have been used, those woods lose moisture at different rates, making the instrument much sturdier. A solid-wood instrument succumbs all too easily.

It often starts off with a fret buzz. The loss of moisture from the neck pushes into a back bow, pulling the strings closer to the fretwires.

Don’t be surprised if you see the centre seam separating on either the back, or the top, or, both! The wood loses moisture and the glue eventually gives up holding the two halves of the back or the top, or both together: much like this one

Beware! Dry weather can do this to your guitar too!

In some (solid wood) guitars, loss of moisture from the wood also causes the area of the top behind the bridge to sink – the opposite effect of the belly bulge. While the belly bulge may partly be caused due to over-humidification, the belly sinking is a sure sign of a dried up instrument.

Pic courtesy fretnot.com

Equally dramatic is the effect on bridges. Look at the bridge pin holes – six perfect breaks in the grain of the wood – a huge incentive for the bridge to crack, stuffed as it is with strings and bridge pins. Add to it the loss of moisture and you have the perfect recipe for a bridge-split. Just like this one

Split bridges – here’s an Ibanez!

Often, a thin but obvious crack, running under the fretwires, through some length of the fretboard is a sure sign that the guitar is dry and dehydrated. Correcting this is some job indeed. Fretwires through the length of the crack need to be pulled out, the crack needs to be filled and then the area sanded level. Then the frets have to be reinstalled and (many times need to be) levelled, crowned and polished.

Pic courtesy strangeguitarworks.com

When the dehydration is to a lesser degree, one sees a phenomenon called fretwire sprout. The wood shrinks having lost (some of) its moisture content. However, the fretwires are metallic and remain their original length, giving the impression of having ‘outgrown’ the fretboard.

Pic courtesy guitarniche.com

The Remedy

KEEP TRACK OF THE HUMIDITY! As soon as humidity levels fall below 45%, know that your guitar is thirsty. Give it that life-saving drink of water.

While there are umpteen contraptions available in the market to humidify your guitar, remember, the idea is to put the water back into the guitar that it lost. A small plastic vessel containing water stood in the guitar will also do the trick, as long as it does not tip over.

Keep the water in the guitar for a few days and repeat the process the following week and the one after that till the outside humidity levels return to being above 55%. Of course, if you put the water vessel and forget about it for a few weeks, that also works. However, for people who must play the instrument every few days, the first method works well.

Whichever method you choose to follow, by doing it, you ensure that your guitar has all the moisture it needs. By following it religiously, you will ensure that you don’t have to encounter all the problems described above, when the humidity dives. If the damage is small, rest assured that enough humidity will return it close to normal.

For the rest of the procedure, I remain at your service!!!


Guitar repair: Baby(ing) a Taylor-made instrument!

This was the first instrument of its kind that I had the opportunity to work upon – well, not actually work, but assess and recommend changes, if any.

It qualifies to be the first instrument in its category because this is a previously loved instrument and the new owner decided to run it by me. It is always a good idea. And it was a Baby Taylor, in fact, the largest of the Babys!

And like all Taylors, it had a bolt-on neck

Structurally, it seemed to be healthy: the neck joint was nice and tight, no other joints opening, no braces rattling inside, no tuning machines ready to fall off…but there was this

The treble side of the bridge was lifting, just that much.

However, the frets and the fretwires were a bit crusty and the fretboard seemed a bit dry. What made me raise both eyebrows though was that it had those artificial plastic (micarta or something) nut and saddle in place.

So, I went about my job, snug up the hardware on the headstock and adjusted the truss rod to take out a wee-bit of extra relief from the neck.

cleaned up the fretboard, the fretwires and gave some love to the fretboard and the bridge

Then there were slight abrasions like this one

which were duly banished

All that was left to do was to string ‘er up, but before I did that, I worked on the bridgepins and gave their ends a little angle so that string ball-ends would not catch on the ends of the pins

Then I strung up the guitar with these, for the owner chose them

I told the owner to take the instrument back, play it to his heart’s content and look for things that he would like changed. After six months, if the bridge had lifted any more, we would have to take it off completely and reglue it. If it hadn’t moved much then we could risk just seating that lifting corner down.

Also, the six months would help familiarise the owner with the instrument. Once, he had got used to its volume and sustain, the change to a bone saddle and nut would surely make him go, ‘Woah!!’

Besides the nut had to go, most certainly, for the slots in it were way too deep.

Here’s the Baby, all cleaned up and ready to go home