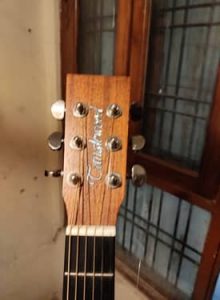
Guitar repair: in-trouble APX600 healed!

A six-month old acoustic instrument is equivalent to a day-old infant in life-span comparisons. If that infant develops a problem, it is very troublesome, and indeed, heart-breaking.

This Yamaha APX600 came to me a while back

with an issue of high action. Learning that it was just six months old (if I remember correctly), and checking the instrument, I was surprised. One doesn’t expect to see this in a 6-month-old instrument.

Today’s learning!

I have said this before but I will say it again for the sake of those who missed it the last time around. All acoustic instruments, irrespective of type, brand, price range, etc, will experience two things as they age: a) the rise of the belly behind the bridge area due to the string tension, and, b) a perceptible increase in action as string tension plays havoc with the neck angle. When you buy an acoustic instrument, buy it with this knowledge that you’re going to face these issues, though the degree to which each instrument experiences that change may vary. There’s just no getting around the issue.

What can be done to delay the onset of these issues? Since string tension seems to be the culprit in both situations, don’t put on any strings!! Simple!! But then without the strings you won’t get very good sound, right?

Jokes aside, use the string gauge prescribed for that instrument.

Prescribed? If you buy a guitar in that Rs-15,000 range, you will probably get an ‘owner’s manual/a brochure’ which will detail materials used in the instrument, how to maintain it, and the string gauge that the manufacturer prescribes for it. Manufacturers are able to do this because they know the size of bracing, type of bridgeplate used, the type of wood used for the top and the neck…

Keeping all those factors in mind, the manufacturer prescribes a string gauge, and many times, what type of player the instrument is suited for.

If you don’t find a brochure along with your new instrument, chances are that if you look up the company on the internet and search for your instrument, all these details would be provided there.

You like 10s, so you put 10s on your guitar: it doesn’t quite work like that! If your instrument is built to handle 12s, and if you put 10s on it, you won’t get the same response from the instrument as you may have heard another player extract from another instrument of exactly the same model. If 10s are prescribed and you go putting 12s on it, you would be playing havoc with the instrument’s anatomy! 

Having said that it is also true that you can go up one gauge and come down one gauge without any problem. So, if 12s are prescribed and you put on 13s or 11s, no problemo!

Back to the job at hand, I checked the guitar and it had 11s on (Yamaha prescribes 12s for APX600). Six months old and with the right string gauge, and an instrument which was played all the while, one has only the construction to frown at. Shame on you, Yamaha!

But still the instrument had to be corrected.

There was no extra relief in the neck but still the action was a lot more than desired

So, all that could be done was shave down the saddle.

But to get the desired action, so much saddle would have to be shaved that very little would be protruding outside its slot in the bridge.

I had initially suggested to the owner that we put in a bone saddle and bone nut. Now, after measuring things, I called him up to see if he still wanted to put in bone elements. He answered in the affirmative and I proceeded with the job.

With that low saddle, there would be no break angle for the strings coming over it. So, I decided to cut string slots in the bridge that would run almost to the saddle.

Since the owner wanted to replace the strings with 11s, I used the old strings to dial things in. Here’s the instrument with the old plastic saddle shaved down and the old strings.

Trying to give you two perspectives

Then, the strings were taken off and the bridgepins were stored in the order they came out of their holes (always a good idea).

With the strings off, the fretboard was cleaned and oiled, as was the bridge, and the fretwires were given a nice rub. The body was buffed out with special attention being paid to the headstock and the hardware on it.

Here’s a look at what the bone nut looked like

Believe it or not, there is no glue holding the nut in its slot – so tight is the fit. String tension takes care of the rest!

When all seemed well, a new bone saddle was shaved to almost a third of its size and installed.

The owner’s choice of strings was this

Here’s what this baby looked like, all set to go home.


Guitar repair: Fixing this l’il one’s shattered back!

As far as breaks in tops and backs on acoustic instruments go, there’s little to differentiate between classical guitars, flat top guitars, ukuleles and even violins. Either the seam separates or a trauma causes a fracture. 

This tenor ukulele had been sitting tight at home in its soft case till when it was taken out. This is what was seen on its back.

This was one of those fun jobs that do not involve millions of small steps to get one step of the job done. All it needed was some saw dust, some wood glue, sandpaper and a bit of touch-up.
But first, how it could have happened. As I look at it, this uke, possibly,  suffered an impact, sudden and forceful, exactly at this point. It could also be possible that something very heavy was dropped on it.

However, it was also true that it was pretty instrument – mainly because of the highly figured wood used and it was an all-solid wood construction.

Getting down to work, it was just a matter of filling up the crack with a mixture of saw dust and wood glue and holding everything in place such that a lip did not appear anywhere along the break. 

A few grits of sandpaper to smoothen out the ‘scar’, but this is how it looked after the first few grits of sandpaper.

And here are all the grits of sandpaper that were used.

Once I was through with all those, furniture marking pens came in handy to disguise the ‘scar’ both in the dark and the light areas of the wood.

Yes! One can still see the break but it is now solid and the eye is not drawn to it like it earlier was.

Guitar repair: Bringing a relic back to life!

Another one of those instruments that is stood up in a corner of a room and forgotten about. It had more dust and dust worms than the Sahara Desert has sand!

Just the thought of the amount of elbow grease I would need to put in to get this thing operational, was making me sweat.

The deal-clincher was when the customer told me that this was the first guitar to more than a couple of people, whose sentiments were attached to it!

I donned my hazmat suit and got working. Cleaning the loose dust off it, I tried to assess the instrument. The headstock read ‘Grason’ and though it did not ring any bells in my head, it was fairly apparent that it was a well-constructed, floating-bridge, f-holes, tail piece – through which the strings would thread, jazz-type guitar: the kind fairly popular in the India of the 80s. I put the instrument’s age down to between the mid to late 80s.

It had a zero fret, and my experience with such instruments has been that they almost always have a nice, low action. It also had a pickup, but it was non-functional. The customer did not care about the pickup and my brief was to try and just get the instrument in playing shape.     

And to do anything, I needed to first deep-clean the instrument. So, off came everything on the guitar. Each part was dusted and then cleaned with whatever cleaner worked best for that part.

However, I did take care to mark the bridge position before I took it off. I also marked the treble and bass feet of the bridge, so that I wouldn’t put it the other way around. It was one of those adjustable bridges completely made of wood, with the bits of brass hammered into the wood, acting like a compensated saddle. 

There was a very interesting facet of the instrument: the tail piece was solid rosewood! A casual look at it gave the impression that it was a moulded plastic tail piece, but when I took it off

The first thing I turned my attention to was the hardware on the headstock. I cleaned and oiled the tuning machines and all of them worked like a charm.

And then it was the turn of the fretboard

and bringing the fretwires back to life.

The body of the guitar was scrubbed and buffed, and then everything was brought back together as it intially was.

I strung up the guitar with the strings the customer had chosen

Here is how it turned out

I was very pleasantly surprised to find that everything functioned just right, the tuners held tuning, the intonation was very nearly right and the guitar played in tune.

The only sticking point was that the action was higher than was comfortable. With an adjustable floating bridge, this was no problem. I just dialled the height-adjustment screws on the bridge all the way down

and that problem was solved too.

I was pleased to note that the customer was very happy with the results.

Guitar repair: A belly bulge and some TLC for a Washburn!

Remember, how I say that problems/guitars of a certain kind/make seem to come together? Well, here’s another belly bulge though not quite as dramatic as some of the ones I have recently tackled.

This instrument came in sometime back with all the tell-tale signs that it had been given up on. But it wasn’t half as bad a guitar as some of the ones I have seen.

The complaint was a painfully high action and a crushed saddle. Now, when I hear high action, my reflex is to check if the bridge is lifting or not. When I checked this one, sure enough, the bridge was lifting. And you can see the saddle crushed under the ‘G’ string.

But besides the lifting bridge, there was a healthy belly too (Apologies, I did not take photos of that). So, why wouldn’t the action be high? The order of operations was belly first, bridge later. No sense trying to stick a flat bridge to a curved top. However, to properly tackle the raised area, the bridge needed to come off.

Usually, with a bit of heat and some coaxing, lifting bridges come off without too much fuss. This one fought me tooth and nail. In fact, as I pried with my palette knives, there were a couple of points uder the bridge where the knives seemed to hit a kind of a wall, almost making me believe that the bridge had been glued to the top with the help of wood dowels (not an altogether alien practice)! However, after some more trying, the bridge eventually came off, and what I saw surprised me, and much of it didn’t.

What surprised me was that the choice of glue – it seemed like cyanoacrylate glue (super glue), but I wasn’t very sure. What didn’t surprise me was the clean perimeter of the bridge and a corresponding clean area on the top. The evenness with which the almost quarter-of-an-inch area had been left without any glue on it – both on the bridge and the top – seemed to suggest that there had been a conscious effort to leave that area.

And the more I see bridges and tops, the more convinced I get that most builders are misinformed into believing that ‘THIS’ is how it has to be done. Whether force of habit brought on by misinformation, or, plain tardy work ethic , let me try and put this as clearly as I can: COMPLETE GLUE COVERAGE OF THE BRIDGE AND THE TOP IS IMPERATIVE FOR A SOLID BOND!

With the bridge off, the path had been cleared for the heat and pressure application to tackle the belly. (If you wish to read about it, I have described that process in preceding posts.) I did not take photographs of the process since I have written about it in detail and at that time, it seemed repatitive. But after 48 hours, the belly seemed to have subsided substanially – whether permanant or not, only time would say.

Now, it was time to clean the bridge and the top in preparation for the glue-up. Usually, when a wood glue is used, 5 – 10 minutes is ample time to clean the bridge of any old glue residue and slivers of wood that are pulled off from the top. Without an iota of exaggeration, cleaning this bridge took me nearly 30 minutes!

It was CA glue, no doubt.

Look at the cleaned up areas and the lighter colour. Now, look at where the glue deposit is still to be removed. The dark, patchy areas distinctly point towards CA glue being used. CA glue to glue on a bridge to the top??!! And just when I think to myself, I’ve seen it all, something like this comes along, telling me, ‘You ain’t seen s*#t, yet!’

Seriously, CA glue? Now, don’t get me wrong. CA glue is a wonderful glue: it hardens fast, it holds good and is excellent for jobs where the glued parts don’t involve a lot of movement (in furniture, for example), for the simple reason that it is a hard and brittle glue. It is NOT the glue to be used on musical instruments, and especially on those parts that are dynamic and given to a lot of movement – an acoustic guitar top for example. 

Used on an acoustic instrument, it will dampen vibrations and then, most certainly break and give way once the vibrations become too strong for it, just like it did in this instrument.

Whateva! So now that I had it on my hands to clean up, clean up I did but it was a a slow and painstaking process.

The last photograph shows what I scraped off the top. Have you ever seen saw dust or dried up glue look so white? This was CA glue!

Now that everything was clean and nice, it was time to put everything together. Ample wood glue and enough clamps.

Another wait of 48 hours and the Washburn would be ready to receive strings.   

And while that bond was curing, I decided to take off the tarnished hardware on the headstock and dipped them in a vinegar-water solution which brought back some of the lost shine to them. I also installed a new bone nut.

Once I did string the guitar, a set-up showed that the (new bone) saddle would need to be brought down, cutting down on the break angle of the strings to saddle. To come close to the desired angle, I cut slots in the bridge.

I cleaned up and oiled the fretboard, shone up the fretwires, and all was well with the world.

I am happy to report that the owner was very pleased with the results.

Guitar repair: Even Martins require help!

Some time back, I received a phone call asking me if I could work on a Martin. In mood for a little fun, I said that if it was an Aston Martin (the car that James Bond drives), I wouldn’t be able to do much!

The caller latched on, laughed and conceded that it was a Martin acoustic guitar with action issues, and strangely, only a couple or so years old. I called it in, and indeed, the action was high.

The young man had just finished his medicine studies and was into his internship. Medicine studies, as you might know, leave little time to eat and sleep, leave alone clean and maintain your acoustic guitar – even if it is a Martin! And it showed!

The young man was very apprehensive. It was a Martin, after all. However, I allayed his fears and assured him that the guitar was not beyond help, and that hopefully, he’d be able to play it soon (He had told me that the last time he had played it was in February 2019).

Anyway, I had taken the action measurements before I took the strings off. Dialing in the new measurements didn’t take long but the new saddle height left very little break angle (the angle at which the strings reach the saddle from their respective holes). The break angle becomes important for adequate downward pressure on the saddle, which in turn, accentuates volume and sustain.

The problem was how to increase the break angle. The only way was to cut string slots of each string, leading from its hole to the saddle. However, we did not want too big a cut. So, I marked the path as well as the length and depth of the cut.

Some eight or nine months ago, I had acquired this set of unique bridge slotting saws from the US. I didn’t have need for them then, but I knew that I would require them one day.

That day had arrived!

With the path marked, I went to work with the saws, slowly and carefully (I had never used them before…ever!). The results were indeed heartening: clean pathways paved for the strings to ride in.

The fretboard was cleaned and oiled (here I might add that the fretboard didn’t need oiling for it was a HPL). But still I put on a light coat of oil, just to make the fretboard look pretty. The hardware on the headstock was looked at, the body of the guitar cleaned, fresh strings, and did this baby sing??!

The owner was thrilled with the results.

Guitar repair: Another belly and my screw-up!

Want it or not, here’s one more helping of a guitar belly! This came in at a time when there were five other guitars waiting for their turn to be loved.

This one was an Epiphone, some five or six years old (just a guess) but it had managed to develop quite a belly. What’s more the bridge was lifting too.

And if you didn’t see it in that photograph, see if you can spot a problem in this one.

Yup! Even without any string tension, the saddle is leaning forward. And again, it must have been because of an oversized saddle slot or a malnourished saddle, which of the two, I didn’t bother to find out.

What I did know was that the saddle would need to be replaced. And while you’re at it, might as well put in something good rather than that crappy piece of plastic. Right! Bone it is!

And while you’re replacing the saddle and putting in bone, why not replace the nut too? Make sense? Right!

But those were minutae for later. Just now the big problem at hand was the belly and then getting the bridge off the top and putting it back on such that it would never come loose again.

And so began work. And this happened!

I had a bad feeling about this instrument right then and there. I talked to the owner and told him how a bridgepin had broken off while I was trying to take it out. Naturally, he was very surprised.

I told him the cost of a new set and when he balked hearing the price, I told him that I had a spare white one and if the difference in colour did not offend him, I’ll put that in. He agreed.

But the order of operations was tackle the belly, then the bridge (no point trying to stick a flat piece of wood to a convex surface!) and then set it up.

But to properly work on the belly, I needed access to the area where the bridge was sitting right now. So…

out came the tools and off came the bridge!

Immediately, I went about cleaning both surfaces so that time would not be wasted when I was ready to glue on the bridge.

And as you can see, the ‘operation’ was performed under magnification and proper focused lighting.

Once everything was clean and dry, on went the light clamp, with some heat and some moisture for good measure.

The initial 24 hours

After that time period, the heavier clamp was called in.

Barely 12 hours into clamping, I could see the belly had all but disappeared. However, I wasn’t exactly whooping in joy because I knew that some of that belly was bound to return once new strings were put on the instrument.

While I waited for the clamping time to pass, I decided to work on the headstock and the fretboard.

Dunno if you can make out, but there’s a healthy deposit there, though the owner won’t be getting any returns, that’s for sure! And the cleaning took a good 55 minutes.

The headstock was more forgiving, just some loose bushings that needed snugging up (and, of course, some cleaning).

After 48 hours, when the clamps came off, it was time to get the bridge glued to the top.

And it was here that trouble began! All photographs that I took of my work after this point came either blurred or over-exposed. Now, know this…whenever I am clicking a photograph, it is never just one shot of one frame but at least 3 or 4 of each. God must have been in a bad mood that day, but not one photograph is worth putting here! 

Anyway, the bridge was reglued, the saddle measured for the new bone saddle to replace it. The new saddle was painstakingly cut to the right dimensions, as was the nut.

photo taken earlier

I had suggested to the owner that he use .011 gauge strings on it and he brought me a set of Black Smith strings. I was very pleased with their quality. I set up the guitar to a nice low action and when I was replacing the bridgepins, I just couldn’t bring myself to put in the white spare one along with the other black ones. So, I just broke a set and put in a matching black pin. I felt happy! When all was done, we shook hands and I moved on to the next repair.

A couple of days later, he called me to say that the strings were buzzing. As foxing as it was, I scratched my head and thought to myself that maybe, I tightened the truss rod a wee bit too much. 

I called it in and loosened the truss rod, and then some more, and then some more…Naturally, the buzz had gone but the action had increased appreciably.

As I checked the higher frets (and here’s where I messed up), there was my culprit. After the 14th, 15th fret almost every fret was high at one spot or another. Had I checked it earlier, I could have told the owner and we could have remidied it then and there. 

At that juncture, when I had worked on the guitar and returned it, and the owner came back with a complaint, my showing the high frets only sounded as if I was looking for excuses! I tapped down the frets and while some did get seated, others refused to.

Strangely, even the first fret action seemed a bit high. Through furrowed brow I reworked the nut and finally it seemed the owner was satisfied. He left me still scratching my head about how what had happened.

A few days later, he called me again. Again the strings were buzzing. I tried explaining to him again about the high frets but he told me that he had tried swapping the old saddle in and there was no buzz anywhere! 

Again I called the guitar in, as embarassing and upsetting as it was. I pulled out my callipers and tried to show to the owner that that the new saddle matched the dimensions of the old one exactly. And right there, I saw, they didn’t! I pulled out the job sheet, and indeed I had noted the right dimensions. However, those were not the ones transferred onto the new saddle and nut!

And even as I scratched my head, I told the owner that I would replace the saddle for him. After he left the instrument, I tried thinking some more how I had managed to commit such a blunder. The probable answer seemed that working on four or five guitars simultaneously is never a good idea!

Anyway, the saddle was replaced but I don’t think the owner was too happy when he left. After as many runs to the Garage, I would have also checked and re-checked my instrument. 

Here, some advice to all you who wish to have your acoustic guitar repaired. When you get back your instrument, of course, check it but use only as much force as you do when you actually play. Extra force on any one string or a couple of stings is bound to make that string buzz – especially if it is the big ‘E’ string.

My learning from the experience: CHECK EVERYTHING FIRST, and, one guitar at a time!    

Guitar repair: The belly – whys and wherefores?

The last few posts of this blog – quite by chance – have had one common problem: a belly. This post too, is about a belly. I realised that I hadn’t quite explained what it was and why it happens. If I have, here it is one more time.

Over the years, string tension keeps trying to pull the bridge off the top of the guitar. Sometimes it succeeds, and most other times, when the bridge is glued well to the top, string tension manages to pull a belly into the top itself. This usually happens in the area behind the bridge.

You might recognise this from the last blog post.

To compensate for that rising, the area along the fretboard extension – the one surrounding the soundhole – sinks in.

So, that is why and how a guitar gets a belly. But how long does it take for a belly to appear in an instrument?

Like the fact that all living things have to die, all acoustic guitars WILL develop a belly. The time and size of the belly may vary from instrument to instrument. In a well-constructed guitar (where all the wood – bridge, bridgeplate, brace wood – has been used in the right quantity – thickness, height, etc) you may begin to notice a belly after 7 – 8 years. Toys that cost Rs 3.5K – which people insist on referring to as ‘guitars’ – may start sporting a belly after 6 months!

And now, for today’s repair job. This came to me sometime back with the complaint of raised action.

As you can probably see, it was an electro-acoustic instrument, making the job extra taxing (pulling out the piezo pick-up, threading it again after the job).

I checked to see if the bridge was rising under string tension but it was stuck solidly to the top. And it did have a large belly. I forgot to ask the owner how old this instrument was but my guess is that it wouldn’t have been more than 5 or 6 years old.

Once the belly was confirmed, I checked the bridgeplate. If the bridgeplate is of suspect material, it will never be able to take the string tension, and, in fact, transfer it on to the top. But surprisingly, the bridgeplate seemed to be made of rosewood, or a similar kind of wood. I checked under the top but all braces were glued properly.

But now that it was there, the belly had to be removed. So began the split 48-hour process – 24 hrs under a lighter block of wood clamped to the affected area, and another 24 hrs with a heavier, larger piece of wood replacing it.

While it was under clamps, I had the time to study the instrument. It was not a solid wood instrument and the sticker thick (thin?) veneer was already peeling and buckling.

And, oooh, was it grimy?!

I cleaned up the guitar to the best of my ability and when the clamps did come off, the belly had been reduced tremendously. Some of it may return, but certainly not all of it.

But tell me this: what do you think these screws are for? What were they holding?

I removed those too and filled up the holes they left behind.


Guitar repair: Busted bridges & belly to boot!

Here’s wishing a very warm, happy and prosperous 2022 to all the readers of this blog!

As promised, the workshop, blog and I are back at it after a break.

Starting off proceedings in the new year is this Squier

Did I hear someone say, ‘Ouch’?

Yeah!

Do pause a while and concentrate on the last two photographs. The bridge-split is bad but worse, it is some cheap, light-coloured wood, painted a dark colour. Can bridge wood quality be a contributing factor in causing a bridge split? Undeniably!

And this is a Fender! Shame! 

But we, the customers, must shoulder part of the blame. We demand from manufacturers ‘musical instruments’ that are inexpensive – the lesser, the better. What else do you expect with this penny-wise and pound-foolish approach? 

And then there’s the saddle. Never mind the material, but so broad is the saddle slot cut in the bridge (or, so thin a saddle was used) that even without string tension, the saddle is falling forward. Another recipe for a bridge-split.

The same crappy wood used for the bridge was used on the fretboard

making the paint disappear through wear.

If that wasn’t enough, the guitar had a massive belly

removing which would be a painstaking task.

But those were all secondary issues. The condition that I found the bridge in, troubled me a lot. I have seen split bridges before but none worse. I gave it a lot of thought and then decided that the bridge needed to be replaced. My reasoning was two-fold. Just going by how deeply the bridge was split, I was not confident, filling it would not crack it again later, and two, the quality of wood used didn’t merit any time and energy be spent on it.

Taking the bridge off the top, I was happy that I decided to replace it.

The crack between the ‘D’ and ‘G’ string holes was so deep that it almost broke through on the other side.

Funnily enough, there was another issue with the bridge, one that I have not seen. The bridge slot seemed to be cut in a curve. In the photograph below, I am holding a fresh bone saddle trying to insert it in the slot. While the treble end of the saddle went in conveniently, the bass end refused to go in. I tried a couple of other saddles to see if the one I had tried was not warped, but the fault lay in the slot itself.

And now that it was off, I had to find a replacement for the bridge.

It’s replacement was much the same bridge, only this one was solid rosewood. With a little bit of oil, it’s colour would darken appreciably. The more important fact was that this bridge would provide much greater stability to the instrument – much more than what the original bridge had ever provided.

But to glue it on to the guitar top, the belly would have to be removed, the top flattened as much as was possible and then the bridge would have to be stuck.

24 hours with a small block of felt-backed piece of wood and then another 24 hours with a larger piece of cork-backed piece of wood, seemed to have removed the belly from the instrument but I knew some of it was bound to return once string tension played its part.

For now, things looked very optimistic, or should I say flat.

While the instrument was under the rack, I turned my attention to the bridge. This was actually a bridge blank with just the saddle slot fully done while the bridgepin holes went only 3/4th of the way through the bridge.

I would have to drill through them completely to make it functional.

When I placed it on the guitar top, my worst fears came true. The holes on the bridge did not quite line up with the holes on the guitar top!

So, I had to fill up the holes with properly sized dowels of spruce, which were then planed level with the top. I also had to work on the area of the footprint of the old bridge. Thin slivers of wood were glued down, while others were sliced off.

It was now time to glue the bridge to the top.

My understanding of a good bridge-glue-up job is that there should be enough pressure for ample time for the perfect bond, and, of course, there should be glue.

I left the bridge clamped exactly like this for a good 48 hours, while I tried to clean up the rest of the instrument, particularly the fretboard and headstock area. While I would have liked to have been more thorough on the fretboard, the suspect quality of wood forbade me, and I just cleaned it lightly and oiled it.

When the clamps came off, the job had been done, and done well. A little bit of oil nourished and darkened the bridge enough.

Unrelatedly, a friend had sent me a few sets of coloured strings asking me to try them on. Inexpensive, I had earlier used them on two student guitars and had got good reports about them. I decided to throw on a set on this Squier too.

And yes, after all that trauma that this Squier went through, it got a swanky new bone saddle and nut.

Here’s one last look at this baby

I am still waiting for the owner to get back to me about how the instrument is doing and his report on the coloured strings. 


Guitar repair: At last a Yamaha worthy of the name!

(welcome to the last blogpost of 2021!)

It is always such a pleasure to work on an instrument that is well maintained – nearly dust-free, spotless inside, tuning machines snugged-in, fretboard clean, fretwires untarnished, a good shine all around – it makes you want to put in that much effort to make it that much better.

This Yamaha (circa 2010-2011) belongs to a serving officer of the Indian Army. Looking at it, one could only nod one’s head in appreciation.

Right. So, if it was so good what was it in for?

The action on it had risen beyond comfortable and the owner wished that it returned to its original action (or at least as close as it could get).

As I heard high action, I looked underneath the bridge, but air could not have passed through even if you tried pushing it in. But I noticed something else. That later. First, what was it that caused the high action?

Looking beyond the bridge, I noticed a healthy belly – two coins worth.

The instant reaction in my head was ‘shitty bridgeplate’. However, when I looked in, I was very surprised to find a rosewood-like bridgeplate. If it wasn’t rosewood, it looked pretty much like it.

Coming back to what I had earlier noticed while inspecting the bridge,

the bridge had cracked!

Not that its cracking was affecting the action on the instrument in any way, but it was just something that needed to be rectified.

But first the belly.

Some heat, some clamps and some time – 48 hours to be precise.

After the first 24 hours, the results were most encouraging

Instead of a belly, the top now had a trough in its place! I knew, though, that once string tension played its part, the trough would disappear and the top would straighten out: that was an ideal situation. It was also possible that some of that belly would return! But we wouldn’t know that at least for a few weeks/months.

But first the bridge was fixed and then the fretboard and bridge were given an oil massage to make them glow.

Crack in the bridge? Where? 

Stringing it up with a fresh set of strings, I put the guitar through its paces. And boy, did it sing to me?

Here’s one last look at it

P.S.: This is the last blogpost for the year. I’ll take a break to collect my thoughts, rejuvenate myself and I shall meet you over at the other side, when the Old Man is gone and the Babe has been born! Stay well, stay safe, and have a blast, if you must! 

Guitar repair – The break that almost broke me!

Every once in a while a repair comes along that not just challenges you but makes you doubt your abilities and all that you know.

This Tanglewood was every bit that and more!

And it was such a pretty guitar! Just look at that soundhole rosette, and that back!

Earlier, I have made my fondness for Tanglewood instruments apparent. That and the fact that the break was an angular one, where the two faces slid cleanly into each other, made me take up the repair. Add to those the fact that the owner was attached to the instrument, and no other convincing was needed for me to take up the job.

Preparation for the operation began with collecting all that I thought I would be needing for the repair.

I started by taking off the two nearest-to-the-nut tuning machines (for strings E and e). That was where my clamps would go and with the tuning machines in the way, clamping would be impossible.

Once I had everything I needed, the two surfaces to be joined were cleaned and prepared for glue-up. With enough glue, cauls to provide support and padding to protect the headstock, the two halves were glued together, clamped and left to cure for 24 hours.

24 hours later, when the clamps were pulled off, the glue had cured and the break had been healed, with just a little seam apparent.

To take care of that slight lip, I taped off the area and wet-sanded the exposed area.

With the lip gone, I re-installed the tuning machines, strung it up with a fresh, new set of strings, and left it overnight with the tension. In the morning, I was happy to see that it was still in one piece. I called up the owner to come and get his instrument.

When he arrived, and as I picked up the instrument to give it to him, I felt a little wiggle in the headstock. I turned the guitar over and there…staring at me was a sight most horrifying. The break had opened up after staying together for over eight hours!

It was hard to tell at that time who was more disappointed: the owner or me. I asked him to let me have a go at it another time and he left asking me to call him when it was done.

Again, I took off the strings, uninstalled the E and e string tuning machines, but before I did anything, I sat down to figure out what went wrong, where. After a lot of head-scratching and chin-stroking, I came to the conclusion that maybe, the clamping pressure hadn’t been enough.

I cleaned up the old glue from the two faces, and this time, when I was glueing up, I used a strong central clamp, with two smaller ones on the sides to help it and left it clamped for 48 hours. The pieces of wood that you see were used in the hope that they would help distribute the clamp pressure evenly throughout the fault area.

Another 24 hours, but the story was the same. It got stuck but could not take the string tension. This time, I really got worried. I had done repairs like these before, and save the occasion when the break was a perpendicular break, all had joined and held. What was it that I was doing wrong?

Whatever…this had to be repaired, come what may. All the steps were repeated, except, this time I did not remove the strings or any of the tuning machines (I was just plain lazy!). I glued and clamped it shut, again using different clamps this time.

I gave it 48 hours and then after I took the clamps off, and before the joint had time to breathe, I decided to install wooden dowels, 2/3 the thickness of the headstock.

But before I did that I realised that I would have to take off the tuning machines. So, off came the machines, and of course, the strings with them.

With the help of some geometry, three stress points were found (you can probably see the pencil lines). Here I drilled and installed the dowels and then sawed them flush with the headstock.

I finally re-strung the guitar, and 24 hours later, the joint was still holding as I wiped the sweat off my brow. I just did a very temporary paint job to try and mask the three dowels, asking the owner to return after a couple of months so that I could do a proper finish job.

  Here’s a look at how she looked before she left the Garage.

Guitar repair: Another (initial) set-up, another happy customer!

After the action on your (acoustic) guitar rises above comfort levels, there are two things that can be done: a) get it rectified by someone you trust, or, b) wait till you find someone you trust.

This Ibanez belongs to the latter category and came to me after standing (somewhere) for almost a decade.

As I looked it over, there wasn’t much wrong with the guitar except that it had a micarta/corian nut and saddle and the strap button had been placed right on the heel of the instrument.  If you disregarded the dust accumulation, it was a well-kept instrument.

I pointed this out

but the owner was quite happy to leave the strap button where it was, and I was quite happy to leave incorrectly placed strap buttons lie!

Oh, it was an electro-acostic instrument

and there was this too, to take into consideration

I adjusted the truss rod some, measured the nut and saddle

went about cleaning the instrument,

snugging up the hardware on the headstock

and, when all was done, I gave the the entire body a good polish.

Of course, the treble side shoulder shone like new, but the bass side showed up distress marks (strap marks, nail marks, I don’t know!).

As I looked at the entire guitar, I was happy, but the bass side shoulder rankled me. Unable to rest easy, I pulled out my magic paste and squirted out a little on the offending area. A thick cloth (jeans material) and lots of elbow grease and the scratches were almost gone

A fresh set of strings later, as I stood back and studied my handiwork, I knew that the owner was going to be happy.

He was, and if I remember correctly, his words were, ‘Man, I don’t remember when this thing sounded as good!’

Ah, well, happy if you are!

Here’s one last look at this beauty


Guitar repair: Another set-up, this time a Tanglewood!

Tanglewood is a UK guitar company and some of their models (I have seen some in my hometown) are available here in India. The more I see of Tanglewood guitars, the more solid that belief becomes: I think I like Tanglewood guitars!

This one came to me for just a set-up, some months ago.

And though you probably can’t read the label, it reads Roadster II and in smaller capital letters, ‘HANDCRAFTED’. Of course, the label also says that it was designed in the UK and ‘Made in China’. Now, I’m willing to believe that it was designed in the UK and made in China, but what I won’t believe is that it was made in China but is ‘HANDCRAFTED’!!! There, I said it!

But whatever it was, it was a pretty instrument. Its simplicity is what was most appealing. No frills, nothing fancy, a simple, well-built instrument, and a 3/4th one at that (if I remember correctly).

And that rosette…simply different!

And it came with its own EQ

That is as far as the good points went.

I noticed that the fretboard and bridge were sadly dry, the fretwires were certainly sullied and the saddle and bridge material were suspect.

But as I went about pulling out the bridgepins, this happened

Ah, well!

But a bigger shock awaited me when I pulled out the nut and saddle.

Pure Mother of Toilet Seat!

After all that ‘HANDCRAFTED’ s@#*t, hollow plastic for a nut! The saddle was a few shades better and may have been Corian or something. I chucked them both!

Now that I had the strings off, I cleaned up the fretboard, the bridge, and oiled them up. The fretwires I gave a good rub-down.

With the new bone saddle and nut, a fresh set of strings on a clean fretboard, and nice low action dialled in, this baby sounded like a whole new instrument.

And like most times, I got so happy playing the instrument that I forgot to take a final photograph!

Guitar repair: Again…why that first set-up is so important!

This slotted-headstock Pluto came in some time back for its action to be reduced. One look at the saddle and I went, “oh, crap!” in my mind.

With the tilted saddle, the action was like this

This is how the owner had been playing the instrument for four or five years (I guess). If the tilted saddle had been spotted in time, I doubt if the owner would have been its owner!

And yet, even if you are unable to spot such issues, but make it a point to get your guitar set up soon after buying it, such issues can be tackled and you will be able to enjoy effortless playing, and more importantly, the guitar will be playing with near perfect intonation.

The saddle of the guitar must stand at absolute 90 degrees to the top, in its slot. I doubt if this Pluto ever played in tune (was truly intonated). By the way the saddle is leaning forward, my guess is all six strings would have been playing at least 20 – 25 cents flat.

Why do saddles lean?

Guitars (all string instruments, in fact) have a ‘scale length’, which governs the placement of the bridge on the top of the guitar, and the placement of the saddle in its slot in the bridge. If the saddle tilts or leans, it’s bye-bye scale length, and thus the intonation gets shot.

So, why do saddles lean? Short and simple, it’s a manufacturing boo-boo. What I am going to explain stands true for mass-produced instruments and not boutique instruments (produced few in number and by hand) or boutique builders.

In detail, saddles (plastic, micarta, tusq, etc) are factory made/moulded. The length may change of a particular lot of saddles being made (depending upon what model of guitar the saddles are being made for) but the other dimensions – thickness, height, its radius – seldom vary.

Similarly, bridges are CNC-ed or cut by machines and except for the saddle slot length, other dimensions of the slot seldom vary. Due to human error, the wrong saddle may be seated in the bridge, or, wrong measurements may have been fed while cutting the saddle or the saddle slot.

When the saddle is thinner than the saddle slot and you tune up that instrument, the saddle is bound to lean forward, thanks to the string tension. Consequently, the saddle will always lean forward, and never backwards, making it play flat.

What you want to see in your acoustic guitar is that the saddle sits perfectly straight (at 90 degrees to the top), and you don’t use strength to seat it. Ideally, you should be able to push in the saddle in its slot with the minimum finger pressure, BUT, once you turn the guitar over, the saddle should not fall out of its slot.

Awrite, the class is over!

To correct the issue with the Pluto, I chucked the plastic saddle, and with it the plastic nut too. Little point in changing just the saddle. If you wish to truly appreciate the difference bone makes in an acoustic guitar, both the nut and saddle must be of bone.

And it’s a good thing that the nut was replaced, because the nut slots were cut too deep in it.

A healthy, bone saddle and nut of the correct dimensions was put in, but only after some other stuff had been taken care of.

The fretboard and the bridge, were as dry as a twig, almost pale to the eye and to the touch, and in serious need of nourishment.

Once I had nourished them, they looked much healthier

Then, as I proceeded to replace the saddle, I saw this

Not one, not two but four shims of some suspect wood. Now, with these four shims taking up all that saddle slot depth, if the saddle doesn’t tip forward, what else is it expected to do? I removed these and said a little ‘thank you’ to the Man Upstairs that though I had marked the saddle for sanding, I had not sanded it yet.

I put in the saddle and it was such a joy to see that just a small amount needed to be sanded off it. The nut, though, was a breeze with a touch of the sandpaper making it fit the slot snugly.

Perfect action, near perfect intonation and the fresh set of strings really made the guitar hum.

Some body buffing and here’s what she looked like when she left me.

Guitar repair: Electric guitar fretwires are fun too!

Just a quick, mid-week post to remind you all that I work on electric guitars too but only if they are catastrophe-struck: a headstock break, a neck break, etc.

Don’t expect me to set your axe up. You probably know more than me!

Fretwires/fretboards? Now, those are fun jobs as long as you don’t keep talons for nails. Just a couple of photographs to let you see the before and after.

Of course, this one was a bass!

Gratifying, indeed!


Guitar repair: Mr Bigname Cherryburst gets set up!

I’ve raved and ranted about bone nuts and saddles but in all those mentions, I don’t think I’ve ever said this so unequivocally: using just a bone saddle or just a bone nut, with the other element being some other material, is just half the fun! You want to see what your acoustic guitar can really do, use both the saddle and nut made of bone.

The best of guitars in the Indian market do not carry a bone nut and saddle set from the manufacturer – or at least that has been the case in the guitars that I have had the occasion to study. The reason for that, partly, is that there is not much awareness about (and consequently a demand for) the use of bone as nut and saddle material, in these parts of the world. And then there is the cost-to-the-manufacturer factor.

At best you will have a bone saddle, as if that is supposed to take care of all your tone issues. Just as it was in this Epiphone Hummingbird Pro. It had a bone saddle but a plastic (or some synthetic material) nut.

Plus, the fretboard had a fairly healthy amount of DNA, dust and grime deposition on it which would not go with just a hot-water bath. A fresh set of strings was also desperately needed, and then there were those general things that had to be looked into and rectified, if needed.

I started with the fretboard because that was a ‘big’ eyesore staring at me. I had to use a scraper and, naturally, care had to be taken not to scrape out more than was necessary.

That done, I took a look at the done fretboard and though I was pleased with the results, I thought I could see a bit more relief in it than was required. As it is, the owner had complained about a higher-than-comfortable action. I measured it and, indeed, it was a little more than was needed. So, I dialled the right amount of relief in.

And yes, that is the new bone nut installed. I got lucky as far as the nut-sizing was concerned. The bone nut sat near perfect in its slot and just a touch of the sandpaper took care of the excess material.

Then it was the turn of the hardware on the headstock. It was loose and just my trustee right-sized spanner did the trick.

When I did put the fresh set of .012″ – .052″ strings, I was happy to see that I did not need to untune the guitar, pull out the saddle, shave it some to get the action right. Just taking out that extra relief from the neck was enough to get the action where the owner wanted it.

The last photograph was taken in my bedroom: proof that I played it some. I enjoyed playing the instrument. The action was good, the response of the guitar was good, the sustain was good. It was all good!

And the owner thought so too!


Guitar repair: A facelift with a snazzy, new pickguard!

If you didn’t know, I do that too: fashion pickguards. You choose a design or bring your own, choose the pickguard colour and I will do the rest.

This Guild landed up on the counter for two reasons: a) the owner had set his heart on the (Gibson) Hummingbird style pickguard and wanted that on his guitar; b) this was an electro-acoustic instrument and for some reason, the piezo element was not picking up the vibrations of the thin ‘e’ string.

I first checked the piezo element and I was sure that it was one of those individual string piezo elements

To my disappointment it was one of those soft cable piezo elements that I had hoped I would replace with. Then, I thought, maybe, the portion of the piezo under the contact of the area of the saddle where the ‘e’ string rides is damaged. Nothing to remedy that except replace the entire piezo assembly, which generally comes with a small jack, which plugs into the EQ unit. I had these in stock.

To complicate things, there was no jack but the wire was soldered onto the EQ circuit board.

I let out an expletive and informed the owner what the problem was. I asked him to buy the specific piezo element online and then I would take care of the pick-up.

In the meantime, I began work on the pickguard. For a template, I drew and cut out on paper the shape that the owner wanted. 

Once I had peeled off the old pickguard (with a great deal of trepadition. It was a Guild, after all), I set about removing the glue residue that the pickguard had left behind. Believe me, it is not easy getting that off. No liquid helped and in the end I had to use my fingers and thumb to literally rub it off. 55 minutes by the watch!

With fingertips red, sore and smarting, I proceeded to place the cut-out against the guitar, took a photograph and sent it to the owner to OK it.

Once he had okayed it, all that was left to do was to cut it out of the sheet. 

Before sticking it on, there was still some bevelling to be done so that a player’s pick/fingers would not catch on the edges. That done, it was time to see how it looked on the guitar.

Cool, eh?

Seven days ago, the guitar came back to me with the replacement piezo. I pulled out its innards, replaced the piezo element, drilled a hole at the treble end of the saddle slot to receive the tip of the piezo element, set everything up back as it was and made the call to come and get the instrument.

It’s been five days now and I am still waiting for the guitar to be picked up, even as the instrument gathers dust! 

Guitar repair: Repair? This was a scene outta ‘Jaws’!

After a glut of the mundane, along comes something that forces you to burn the midnight oil, go that extra mile to provide healing – both to the instrument as well as to the owner.

Not too long ago, I got this phone call from Gorakhpur (a city some 300 km and a six-and-a-half-hour train journey away). The man tried to explain to me what was wrong with his guitar and from all the words, all I could gather was that the guitar did not make for a pretty picture, far less, music.

There was a problem right away. Trains from Gorakhpur to Lucknow (the city in which I live) were in the early evening, reaching Lucknow at night. I agreed to meet him at night considering he was an outstation customer.

He came around midnight because his train got delayed. When he showed me his guitar, I almost groaned audibly. It was a Yamaha F310 or 310 P.

But the guitar really was a mess. It seemed the owner had left it standing in some corner.

To my eyes, it seemed as if a hit right at the seam, where the side meets the top, had caused the top to crack. More upsettingly, the force of the impact had been such that the top had separated from the region around the region of the end block on the treble side to the waist of the guitar (almost) on that side.

The red marker in the second photograph shows the area where the top was separated from the side. The break was at least a foot long, or the better part of it. And as you can probably make out from the ‘marker photograph’ the top and the side were not willing to match up willingly.

Here’s a closer look

Such repairs can be really tricky jobs because if you try to push the side in at one place, it will come out at another. So, I told the customer to leave the instrument with me and as and when I would make progress with it, I would get back to him.

He agreed and left in a hurry: his train home would leave in 40 minutes.

The only thing I did that night was to take the strings off the guitar. Yep! Still tuned with the strings pulling away at the top! Then I went to bed, and for the next two days I just stared at the mess in front of me. Finally, I willed myself to touch it.

Sure enough, as I coaxed the side in from one place, it bulged out at another. This seemed like the perfect job for some spool clamps that I had made almost a decade back. I knew I would need them one day.

There was one particular area of the side that refused to be coaxed out. And again I pulled on my thinking cap. As I went into the kitchen to get water, my eyes fell on a few wooden ladles that were rarely used. With a devlish gleam in my eyes, I whacked them and before anybody could miss them, sawed off their heads.

What I was left with were quarter-inch thick wood dowels about 8 – 10 inches long. I put these into the guitar and forced out the obstinate portion of the side. It came out but went right back when I released the pressure. I tried wedging one end against a brace running along the back of the instrument but fell short of the brace by an inch or something.

I placed another rectangular piece of wood, more tall than broad, right in front of the brace and then tried my wedge. It worked!

Now that I was sure that that would work, I pulled out my clamps and for the dry run, I placed one clamp right in the centre of the break. And then as the sides bulged out at places, I pushed them in with a clamp placed strategically at that point. Finally, I had managed to make the top and the side meet almost flawlessly.

Thrilled as I was, I controlled my glee for I knew that when I put the glue in, it would be a different game altogether.

And then there was glue, but thankfully, the instrument behaved itself and the clamps did the rest. One thing that I did mindfully was to put two clamps very close together where the crack in the top was. Also, I brushed in a generous amount of glue in it.

I reasoned that the clamp pressure would push the crack closed and the glue, once it dried, would never allow it to open again.

With everything seemingly in place, and nothing else to do except to wait for the glue to dry, I turned my attention to other areas.

Of course, I threw out the plastic saddle and nut!

And put in bone. The nut was almost there but I had to cut away half the saddle to get the action right according to the old plastic saddle. Once new strings would be put on, some tweaking would be required.

And here’s a ‘before’ and ‘after’ of the fretboard

When I checked, the neck had just a wee bit of extra relief. I dialled that out.

And it was time to take off the spool clamps. I did, and everything was as it should be. Even the crack in the top had healed and there were no jagged edges standing out.

Now, that the guitar was structurally sound, it was time to make it aesthetically presentable too.  Two thin painting tape strips and some black brush-on lacquer: who’s to say there was ever a crack there?

And here’s what the top crack looked like. Healed but certainly not invisible to the eye. And that was never the intention.

New strings, a phone call, a second midnight rendezvous, and all’s well with the world.

This job was very satisfying, and even more satisfying was the joy of the owner.

Guitar repair: This instrument won’t require professional help for at least five years!

I have said this many times before and I will say it again: a set-up of your instrument is imperative as soon as you have bought it. That initial set-up tunes up the instrument for its journey ahead.

In an expert technician’s hands, while things (minor adjustments) that will make it a joy to play are dealt with, issues that may crop up in the future are spotted and tackled then and there.

One such guitar came to the Lucknow Guitar Garage recently (within the first week of it being buoght) and I was very happy to see the owner had invested time and thought (not to talk of money) into his instrument. The instrument itself was a Fender CD-140SCE sun burst, which lived in a hard-shell case (which was bought separately). 

Just the hard-shell case told one enough about the sensibilities of the owner; sensibilities that are not awakened until one is three or four guitars old. In the time that elapses between those three or four guitars, realisation dawns that it is best to protect a precious (and not necessarily in terms of money alone) purchase in a hard-shell case.  

Alright! Enough on sensibilities and onto the job on the counter. As I have seen in umpteen instruments, this one too seemed as if it had been standing in the shop too long. At first glance, the fretboard was dryer than tinder and would need a fair bit of the ‘love potion’.

Also, I decided to swap the plastic/micarta nut and saddle for real bone elements. Why I harp on bone saddles and nuts is because the kind of resonance and sustain you get out of bone, no man-made material can give.

Some measurements, some marking and some sanding and the nut and saddle were ready.

The hardware on the headstock was tended to – both how they were fixed on to the headstock and how smooth each operated.

Next, the nut and saddle was put in . With everything ready, all that was needed was to seat them in their slots. Often, when you get a really snug fit with the nut, glue is not required. This was one of those guitars.

I oiled the fretboard, burnished the fretwires and threw on a fresh set of strings (12s, if I remember correctly). And as I admired the instrument, I told myself, ‘What a pretty guitar’!

With the wise investment (of time, effort and money) made in it, the guitar should serve the owner well for a long, long time to come.

I did advise the owner to remove that sticker on the pickguard (announcing free online lessons).


Guitar repair: This Hertz, vibrating at the right frequency, for the first time (I daresay)!

Tilting saddles, while they are the perfect recipe for a bridge split, are also cause for much heartburn among (acoustic) guitarists.

Why? Because once the saddle tilts (almost always forward), the scale length changes and you can say bye-bye to intonation.

Case in point is this Hertz (HZA4900BK) that landed up on my counter some time back.

And yes, it had been strung exactly how you see it in the photograph. While I couldn’t help but smile, I gently pointed out to the owner that strings should travel FROM THE INSIDE of the tuning posts to their respective posts and NOT OUTSIDE them.  

There was unfortunately a lot that was wrong with the guitar. The saddle was tilting dangerously and if that wasn’t enough, it had been chewed up some.

And if you couldn’t make out in the photo above, check this out.

Leaning saddle, chewed up and plastic crap to boot. What more do you need as argument to show it the wastepaper basket? And while you’re at it, chuck the nut as well!

The nut. Now that was another story. Usually, a gentle tap dislodges a nut from its slot. Not this one. The harder I tapped, the more stubborn it became, refusing to be dislodged from its seat. Finally, when I managed to shake it loose, I saw it had taken a fair bit of the wood with it. And why? Because super glue had been used to seat it!!

See that white deposit? That only happens when you use super glue. And because it was black plastic, it was apparent; any other colour and it would have gone unnoticed. Now, I could be wrong about the super glue, but I wonder what that white deposit was and how it was caused.

So, the nut slot was pared some to keep the surface level, and in preparation to receive the new bone nut.

A new, polished, bone saddle was measured up to replace its cheap plastic cousin.

I was just beginning to shave down the saddle to the requisite height when I noticed something lurking in the saddle slot. I slapped my forehead and uttered a profanity. A saddle shim! 

It has now become almost customary to have shims seated underneath saddles. And just anything will do: card, plastic, any sliver of any wood…! And what was more, there were two of them in this one! No wonder the saddle was tilting.

If half the saddle slot is taken up by shims, how do you expect the saddle to stand erect in its slot?

When I tried on the new bone saddle, there was just a whisker that needed to be shaved off for the guitar to have a good, healthy action – even as it stood erect in its slot.

If you go back and take a look at the guitar when it came in, you will notice that the saddle, nut and the bridge pins were all black. Now that I was putting in polished bone, I felt the bridge pins should also be the same off-white/cream colour. I consulted the owner and he agreed.

And so I replaced the black bridge pins with cream ones.

Meanwhile, the nut end looked something like this

Yes! That is a fresh set of strings, and yes, I did give the fretwires a healthy rub, to make them gleam again.

But to be fair to the instrument, not everything was bad about it. It had an artifitial wood fretboard which was very pretty to look at. I have never played one for a long period of time to be able to comment on its playability/durability, but I suppose it does the job it is supposed to do.

Me? I am more of a purist. Given half a chance, I would prefer rosewood or ebony for a fretboard (Walnut will also do).

And the end product?


Guitar repair: A Squier under fire!

This Squier came to me in a fair bit of trouble. It’s bridge, besides being cracked, was lifting from the bass side.

It was off-putting to see Fender put in some cheap wood, dyed dark, for the fretboard and bridge. One could see the white wood through the crack on the bridge, while wear due to playing had made the colour disappear at least at one spot on the fretboard.

And while it was in with a plastic saddle and nut, I convinced the owner to swap them for bone elements so that he could enjoy the instrument to its fullest.

Also, I took off the rusting bucket-type strap buttons and instead put in swanky mushroom-style buttons, matching the rest of the chrome hardware on the guitar.

But the big problem at hand was the bridge.

The question in my mind was, should I work on the crack first, or should I glue the bridge back to the top first? After much thought and reasoning, I decided to glue the bridge to the top first.

I was happy with the squeeze-out I got and it seemed that the bond would be solid.

Clamping the bridge down, I left it for 48 hours, and while that rested, I replaced the strap buttons with felt washers so that the buttons wouldn’t mar the instrument’s finish.

Once it was time to take off the clamps, I decided to first mark the new bone nut and saddle to the correct dimensions.

But before I got to sanding them, I decided to fix the crack in the bridge. Much dyed saw dust and wood glue and lots of sanding and the result was this – expectedly so.

This was an electro-acoustic guitar and usually for glueing bridge cracks I do not meddle with the piezo element and let it lie quietly in the saddle slot. This time, I don’t know why, I pulled out the piezo element completely, and lo and behold, what should be hiding there?

A thick plastic shim! Boy, was I glad I had not cut down the saddle to less than half?!

Again I measured up the saddle to its correct height and length

and then got to sanding both the nut and saddle. They were installed as were these strings

And here’s a look at the new nut and saddle

Of course, I had touched up the bridge and the spot on the fretboard where the colour had disappeared.

And the customary long shot of the finished product


.

Bridge splits – whys, wherefores and this Cort

The other day, in a conversation with a prospective customer, it became apparent to me that I had failed to correctly convey, to the readers of this blog, all that transpires between the stages of a bridge developing a split and me making it disappear.

“Oh, you’ll fill it up with a mixture of saw dust and wood glue and sand it smooth,” said my man.

Well, yes and no! Just the sanding process goes through six grits of sandpaper, for four of which I have to go hunting from shop to shop.

I could always order them online but then you never know what I will get in hand. In our dear country, all that can possibly go wrong – by accident or design – will go wrong. So, with that foremost in mind, I walk the lanes and by-lanes of La Touche Road, touch, feel, inspect and then buy the sandpaper I exactly need for the job.

So, why do bridges split?

It’s a long winding argument but let me go out on a limb and say it is a phenomenon seen more here – in the Indian Sub-Continent – than in the West. In the West, even the odd Martin, Gibson, Maton, etc and what have you, can develop a split in the bridge, but that – I daresay – is more due to a lack of care or maintenance by the owner.

In India, the cheap, sub-standard stuff imported from far eastern chop shops, contracted to maximise the number of instruments produced than the quality with which they are made, are to be blamed. Having said that, it is also true that we – the customers – must shoulder much of that blame. Why? We want the cheapest ‘guitar’, yet want it to sound like a Martin!

Should I say it? Alright I will! Either you can get quality or you can pay less for what you call an acoustic guitar. In the West, people understand workmanship and quality and are, thus, willing to pay for it. Here, in India there’s still some distance to go before we develop that awareness.

In India too, boutique builders are growing (thankfully), who build just eight to 10 instruments a year. But then, these instruments are hand-built and with quality materials and stringent quality checks.

So, your cheap ‘guitar’ has a bridge. But unfortunately, it is a cheap piece of wood dyed dark brown or black. You don’t expect it to withstand the 80kg tension that the strings are going to be pulling on it with?

Another scenario. The bridge has bridgepin holes drilled into them. However, the bridgepins are a tad tight in them. Instead of reaming the holes out a bit, strings are thrown on and bridgepins stuffed in. Who’s got the itme? Where the bridgepin hole was hardly accommodating a bridgepin, now it has to accommodate the pin as well as the string. There’s a crack coming: if not in a month’s time, certainly within the year!

Another scenario. You want to try a thicker set of strings. Excellent! But can your bridgepin holes withstand them?

Recently, this came in to be repaired.

This was the first glance. But as I looked at it, I noticed that the crack was, in fact, much larger.

If it hadn’t landed on my counter when it did, I would have given it another three-four months to survive. It was a Cort, a brand that has more minuses than pluses going for it in the lower range of its instruments.

So, out came the dyed saw dust-wood glue paste which filled up the crack. Once it was dry came the six grits of sandpaper that did the magic.

I surmised that the split in this bridge had been caused due to the bridgepins fitting a little too tightly in the holes. So, I took a reamer to it

And then I turned my attention to the fretboard and fretwires.

While removing the bridgepins, one came out like this

This couldn’t be used and since I had changed the saddle and the nut too (yeah, bone), which were now white, I swapped the old black pins for white ones.

With everything done and the guitar waiting to be picked up, I clicked this photo.

Got ‘The Li’l Guy’ out of big trouble, or so I thought!

There are primarily two ways in which a log of wood is cut – flat sawn and quarter sawn – to be used for construction purposes or to build musical instruments.

In flat-sawing, the log is passed through the blade cutting off plank after plank without changing the orientation of the blade or log. The resulting planks have different annual ring orientations when viewed from the end. The relative angle of the rings to the surface goes from almost zero degrees in the external planks to almost ninety degrees at the core of the log.


Quarter-sawing gets its name from the fact that the log is first quartered lengthwise, resulting in wedges with a right angle ending at approximately the center of the original log. Each quarter is then cut separately by tipping it up on its point and sawing boards successively along the axis. That results in boards with the annual rings mostly perpendicular to the faces. Quarter-sawing yields boards with straight, striped grain lines, greater stability than flat sawn wood, and a distinctive ray and fleck figure. It also yields narrower boards, because the log is first quartered, which is more wasteful.

Because there is greater wastage when quarter-sawing, timber merchants – supplying to both builders and instrument makers – avoid quarter-sawing, or charge a higher rate for quarter-sawn timber. And when even instrument makers are targeting only the profit margin and not instrument quality, who cares about what wood is used and how it was sawn?

But then, when you are building a musical instrument, you want all wood on it to be quarter sawn and not just the main surface: for reasons of stability.

I  worked on my first ukulele, here in India, recently. It was a pretty, all-mahogany, satin-finish instrument.

But the reason why it was in was because not only was the bridge lifting, it was also cracked along the line linking the holes through which the strings were fed.

Unfortunately, some cheap wood dyed a dark colour had been used for both the fretboard and the bridge, and I am pretty sure it was a flat-sawn piece.

Now that the inevitable had taken place, it was my job to figure out how to make ‘The Li’l Guy’ whole again.

Before, each glue-up job, it is a good idea to do a dry-run of the clamping process. It throws up the problems that you are likely to face when you do the actual thing. Because it was a ukulele, the soundhole was too tiny to get regular guitar soundhole clamps to fit. The only option left was to clamp it from outside.

But in doing so, it was apparent that ‘The Li’l Guy’ would be unable to withstand the pressure of the clamps and would require support from within. There exist something called brace clamps, which can move up and down and support the back and top (from inside the instrument). However, they are a huge investment for a small fry like me.

After wracking my brains some, I came up with the idea of pieces of wood that would work as brace clamps.

Now, the problem arose of how to get it inside the instrument! Some more head-scratching and I drilled a hole in the centre of each piece of wood, put in a screw, and holding its head with a needle-nose pair of pliers, stood them up on either end (approximately) of where the bridge was.

With my handy-dandy brace clamps in place, I pushed glue under the bridge, where it was lifting, and where it had cracked, and clamped the entire bridge.

And while it was clamped I decided to pay some attention to the fretboard and fretwires. The fretboard looked like this when I started.

Midway, it looked like this

Can you see the colour disappearing? And by the time I finished, it looked like this

Clean, oiled, though lighter in colour, and fretwires burnished.

48 hours later, the clamps came off and ‘The Li’l Guy’ was healed. Since it was a satin finish, I decided to rub some oil on the instrument to make it look better. The effects were very encouraging.

Stringing it up was another pain, but eventually, I got it done.

ADDENDUM: The latest news from the owner is that string tension broke the bridge again from the same spot, like earlier. I have requested the owner to bring it in and I will have a look at it afresh.


Acoustic guitar nut job: No fool’s play!

Gentlemen, when you get a suit stitched (yes, it is always advisable to get one stitched than to get a readymade one; ladies, think of a Western pant suit), the tailor will make a rough stitch and call you for a trial. At the trial, he will tuck in the garment at places, open the rough seam a bit at places, all this despite having taken measurements before.

And yet, what might look good on you, you may not be comfortable in! And so, the tailor tries to hit a mark where not only do you look good in the suit but are also comfortable in it. And that is exactly why you should get a suit stitched instead of picking one up off the rack.

What that ‘trial’ does, is give the tailor, and you, the perfect picture of how the garment is going to end up once it is finished. Then, when you don the finished suit, it is very, very rare that you don’t like how you look and feel in it.

Acoustic guitar nuts and saddles are pretty much the same story. Every nut and saddle slot on every guitar is slightly different. Nine out of 10 times, readymade nuts and saddles do not fit them properly, and need to be worked on for them to fit a slot.

It takes a lot of time and effort, and that is why most acoustic guitar repairpersons prefer to work with blank bone pieces to fashion nuts and saddles out of. If one has to put in almost the same effort and time, one might as well make a nut or a saddle from a blank piece and get the perfect fit, rather than fashioning one from a pre-cut nut or saddle and getting a passably good one. I, too, am slowly veering round to that view.

This post is an effort to make you understand that when I write in my posts that ‘I threw out the plastic nut and saddle and replaced them with bone elements’, the process is seldom as simple. It takes a lot of measurement, some cutting, much sanding and filing before a bone nut and saddle sit in their slot to my satisfaction.

Often, I have had to throw the bone piece that I had spent a couple of hours working on because I overcut, overfiled or oversanded. Time, effort, money, material, all wasted!  Result: Start again from scratch!

So, there was this Fender that came in recently with the plastic nut and saddle in bad shape.

I threw them out and the process of fitting in bone replacements is documented in the following photographs

In between the second and the third photographs came all the painstakingly slow process of sanding and filing. When I tried fitting in the the finished nut, it was short by about a millimetre. I made up for it by dipping the ends of it in superglue and dipping the wet nut-ends into bone dust. 

Another round of sanding and filing followed before the nut was finally seated to my satisfaction.

Here is the finished piece, with work in progress on the fretboard and the fretwires.

With the strings on, it was a whole new guitar. Meanwhile, take a look at the saddle end of it

And, of course, the compulsory long shot

Going back to the start, I was pleasantly surprised to see how the strings had been wound on the string posts: Exactly how it should be done, though I would suggest a turn less on each of the wound strings.

As for me making nuts out of bone blanks, I start the learning process today. First nut out on a guitar which I fashion from a bone blank will be in the New Year!
So, I have some time on my hands.

Acoustic guitar or Jaws?!

So, what do you do when you get an instrument in this condition: The owner doesn’t wish to spend too much, is quite alright with however it looks, but wishes for it to play correct?

For the record, it was a well-loved Fender (FA)100, one that had managed to gather some dust as well.

Besides the ‘big problem’,

it had other issues as well.

The nut and the saddle had seen better days and were in dire need of replacement

The bridge was lifting everywhere along the far extremity

as a result of which, the action on the instrument was a mile high.

I worked first on the bridge, glueing and clamping the bridge tight to the top. Why I chose to do it first out of all the problems, don’t ask. It just seemed the right thing to do!

And while I had to leave the instrument clamped for a few days, separately, I worked on the nut and saddle. Needless to say they were both plastic and the bone I replaced them with would serve the owner much better.

I then looked at how best to close the big mouth the instrument had opened up. While much of it fell into place under force, there was the battered section of the top that refused to sit in place. Different methods employed to straighten the battered area, to make it sit in line with the top failed.

I stuck what was willing to be stuck and filled the rest with thick viscosity cyanoacrylate glue. Any glue which is thick will take that much longer to cure and this was no different.

After it had cured completely, it was as hard as a rock and the instrument was structurally sound again.

I admit that this is not a very flattering image but I swear, in person, the guitar looked better. In the meantime, the glue under the bridge had cured too and the clamps were pulled off.

All that remained to be done was to pop in the nut and saddle, throw on a fresh set of strings, and…LET THE PARTY BEGIN!

P.S.: And I hope I don’t have to write each time that I cleaned the fretboard, nourished it and the bridge with oil, burnished the fretwires, etc? Take it for granted that I did!

When fret buzz is not a relief issue!

We all know what fret buzz is but many times it is caused by a raised fretwire. It isn’t as if the fretwire is ready to pop out of its slot but just that its end (usually, either) leaves the slot and rises – just a hair, and that is enough to give rise to a pesky fret buzz.

Google image

It usually happens at times of the year when it is extremely dry or terribly humid. In our (Lucknow) district and surrounding areas, these times are March to May (dry) and June to September-October (humid).

How does it happen? When there is too much humidity in the atmosphere, your acoustic guitar soaks it in. The wood on the fretboard swells and as it does so, the fretwire becomes loose at one end (sometimes both) and rises, giving rise to fret buzz.

At times of the year when it is very dry, the fretboard wood loses its moisture, shrinks and pushes one end (sometimes both) of the fretwire out of its slot, thus, giving rise to fret buzz.

While many times ‘tapping’ a fretwire into its slot helps, many times it doesn’t. Then, one just has to level, crown and polish that one offending fretwire (and possibly its immediate neighbours). 

One such guitar came to me recently. When the owner called and told me that he had a ‘PRS’, I was mentally prepared to work on an electric. When the instrument was brought to me, it was an acoustic!

Yeah! I had never heard of a PRS acoustic!

After I had got over my surprise, I loosened the strings and tried tapping the offendig fretwire (12th or 13th) in. When it refused to get back in its slot, I had to file, crown and polish it.

And that was the job done. Apologies. In my surprise, I forgot to take photographs of the instrument body – both before and after, but it was a nice sounding guitar.