The last few posts of this blog – quite by chance – have had one common problem: a belly. This post too, is about a belly. I realised that I hadn’t quite explained what it was and why it happens. If I have, here it is one more time.
Over the years, string tension keeps trying to pull the bridge off the top of the guitar. Sometimes it succeeds, and most other times, when the bridge is glued well to the top, string tension manages to pull a belly into the top itself. This usually happens in the area behind the bridge.

To compensate for that rising, the area along the fretboard extension – the one surrounding the soundhole – sinks in.
So, that is why and how a guitar gets a belly. But how long does it take for a belly to appear in an instrument?
Like the fact that all living things have to die, all acoustic guitars WILL develop a belly. The time and size of the belly may vary from instrument to instrument. In a well-constructed guitar (where all the wood – bridge, bridgeplate, brace wood – has been used in the right quantity – thickness, height, etc) you may begin to notice a belly after 7 – 8 years. Toys that cost Rs 3.5K – which people insist on referring to as ‘guitars’ – may start sporting a belly after 6 months!
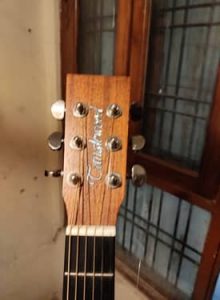
And now, for today’s repair job. This came to me sometime back with the complaint of raised action.


As you can probably see, it was an electro-acoustic instrument, making the job extra taxing (pulling out the piezo pick-up, threading it again after the job).
I checked to see if the bridge was rising under string tension but it was stuck solidly to the top. And it did have a large belly. I forgot to ask the owner how old this instrument was but my guess is that it wouldn’t have been more than 5 or 6 years old.

Once the belly was confirmed, I checked the bridgeplate. If the bridgeplate is of suspect material, it will never be able to take the string tension, and, in fact, transfer it on to the top. But surprisingly, the bridgeplate seemed to be made of rosewood, or a similar kind of wood. I checked under the top but all braces were glued properly.

But now that it was there, the belly had to be removed. So began the split 48-hour process – 24 hrs under a lighter block of wood clamped to the affected area, and another 24 hrs with a heavier, larger piece of wood replacing it.
While it was under clamps, I had the time to study the instrument. It was not a solid wood instrument and the sticker thick (thin?) veneer was already peeling and buckling.

And, oooh, was it grimy?!

I cleaned up the guitar to the best of my ability and when the clamps did come off, the belly had been reduced tremendously. Some of it may return, but certainly not all of it.
But tell me this: what do you think these screws are for? What were they holding?

I removed those too and filled up the holes they left behind.