
This #yamaha FS80C came to me with simple problems (and, of course, in a very dirty state) but as I got into it, the problems began unravelling one after another.


But as always, it was a pleasure!
As I was taking off the strings, I noticed that each tuning peg was crammed with string winds

not a very happy scenario. Ladies and gentlemen, boys and girls, we require no more than two-and-a-half to three-and-a-half turns on the wound strings (Low E to G) and five to six turns on the unwound strings (B and e). Those number of turns on the tuning peg will give you maximum tuning stability and accuracy.
If you don’t know how to do it, I encourage each one of you to learn how to string your own guitars. No point running to this shop and to that character to get new strings put on your instrument. It should come as easily to you as getting the tank of your bike filled with petrol!
The fretwires had some decent amount of pitting (wear)

and the fretboard was dry.
Also, the plastic nut and saddle were all but crushed under the tension of the strings. Also, the saddle was leaning a bit too much in its slot. I suggested to the owner that they be changed and he agreed to get it done.
Here, I would like to clarify that when I say that ‘I swapped the plastic nut and saddle for bone elements’, it is not as literal as that. There are a lot of measurements involved, which are dialled into the elements by sanding them appropriately. Thus, each nut and saddle put into an instrument is specific to that instrument and will (generally) not fit another instrument. That is why even this operation takes time and a lot of effort.
As I removed the saddle from its slot and was greeted by this
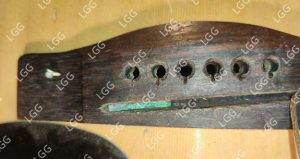
a bit of worn out card sitting under the piezo element, but only where the ‘e’ and ‘B’ strings would ride. I pulled out the paper shim and saw this:
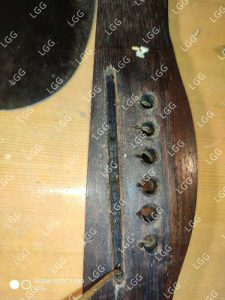
There was a ledge that had been created in the bed of the saddle slot. Look carefully at the slot and you will be able to see the ledge.
My understanding is that while the slot was being routed, either the router bit slipped, or, the person doing it got distracted.
Anyway, the problem had to be rectified and certainly not with a piece of card. So, I pulled out tools that I had bought knowing I would need them some day and went to work on the saddle slot.


The tool on the left almost functions like a micro-chisel and the one on the right is actually a file with a coarse end and a fine end.
I went to work with these, slowly and patiently carving away at the ledge, trying to level it with the rest of the saddle slot bed. Interestingly, the walls of the slot had a problem. While placing the saddle in the slot, the treble side would grip it much firmer than the bass side.
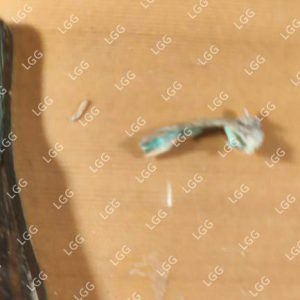
So, I shaved away portions of the treble side wall till the saddle sat in perfectly, and with the handy little file, I sanded the bed as smooth as I could.

And that was the debris I managed to collect.
That was the major work done on this instrument. The rest was routine

oiling the fretboard and burnishing the fretwires

snugging up the hardware on the headstock


stringing up the instrument after oiling the bridge and putting in a new bone saddle.

The new bone nut had corners a little too sharp for my liking, so I knocked them down with a file.


And, of course, the customary few parting shots of the guitar.
P.S.: In a recent development, the owner wasn’t too thrilled with the amplification he was getting with the new bone saddle but was happy with what the original plastic saddle was doing. I think he swapped out the bone saddle.