A facelift after taking ‘Irene’ out of a spot of bother

This Fender CD-60 came in with a complaint of higher than comfortable action.

Sure enough, as I checked it, the bridge was rising under string tension and even without it.

Not much, but it was.

As I went about checking out the guitar, I could only nod my head in appreciation. What added to the pleasure, was the fact that the owner was an aware individual and had taken good care of the instrument.

What pleased me most was the discovery of a proper-sized piece of hardwood used as a bridgeplate (reflected in the mirror).

I know I have said this before, but let me repeat myself for the sake of first-time readers of my blog. The bridgeplate in your instrument determines how your top will respond to string tension after a few years: how soon it will develop a belly. That the bridgeplate also plays a sure part in the quality of sound produced also cannot be debated.

Thus, the bridgeplate is the most important thing in an instrument to be looked at while buying a new one, after the quality of the top and its braces. And since most people don’t know this fact, manufacturers (Indians especially) will use anything – plywood included – to put a ‘piece of wood’ there. No wonder then that you don’t find a ‘bridgeplate’ entry in the product brochure of even the most acclaimed names in the business!

What a proper size, hardwood bridgeplate should look like

A healthy sized, hardwood bridgeplate will easily counter string tension and prevent a belly from developing (thus keeping string action in check) for at least 8 – 10 years. An instrument with an inadequate (-ly sized or constructed) bridgeplate will start sporting a belly in six months or even less!

But back to the instrument on the counter-top, the first order of repair was to re-glue the lifting bridge.

But for that I needed to take the saddle out of its slot. As I touched the saddle, it moved, showing that it wasn’t sitting in its slot very snugly. Sure enough, I could slip in a fret protector behind the saddle, while it was still in its slot.

In any case, I had convinced the owner to swap the Nubone saddle and nut for bone, so they had to go. Nubone is the name the company Graphtech gives to its TUSQ-like nuts and saddles. Basically a shade better than plastic, both  TUSQ and Nubone are man-made materials with some tonal qualities – buth nothing to match bone.

Their places would be taken by plush bone elements that sat perfectly snug as a bug in a rug!

Here, I would like to elaborate the strategy that I employ in all repairs. I like to do the easy thing first and if it doesn’t work the complicated (and expensive) route is always available. Going the easy way is not only easy for me, but easy on the pocket of the customer too.

In the process of repairing the bridge, I pumped wood glue under the bridge, clamped it down and let it rest for a day. Taking the bridge off completely, cleaning the mating surfaces and re-glueing them again is the proper way to do it but then it takes quite a bit to go that route. And if the bridge has not lifted too much, getting glue under the offending areas and clamping it down, does work alright.

The customer also wished for a different pickguard to be put on the guitar. For that, I had to remove the manufacturer-installed one. And boy, what a royal pain that was!

Stuck with double-sided tape, while the original pickguard came off without much protest, cleaning the tape residue off the area was the real deal – I have learned through experience. I have tried petrol, nail polish remover, lighter fluid, white vinegar, after shave lotion/perfume (alcohol), and either they have only a marginal impact, or manage to make a bigger mess.

So, rubbing with fingertips is all I could do – painstakingly slowly!

Finally…finally, the top was clean again and I put on the new pickguard.

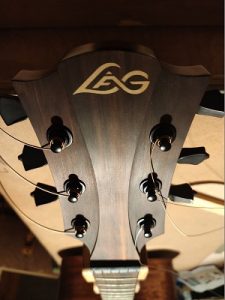
While I was at it, I buffed out the entire guitar and paid special attention to the headstock area and the fretboard. I tightened up the hardware, polished up the fretwires and oiled the fretboard.

I strung her up with 13s that the owner provided and the overall look and how the instrument played appealed much to the owner. A few days later, he messaged, telling me how much he was enjoying the ‘new’ sound of his guitar.  

While I was impressed by the overall construction of the guitar, one thing left me shaking my head in disbelief. Why would anyone put a strap button on the shoulder of the guitar – and that too on the shoulder closest to the player? The propensity of the instrument, then, is to fall forward.

I asked the owner if he had had the button installed and he said that it was factory-installed. Not to take his word, I checked the Fender site, and sure enough, there was the button sitting proudly on the shoulder. But since the owner never played standing, I let sleeping dogs lie.

What brought a smile to my face was the lettering by the owner on the label of the guitar. At one end was the name ‘IRENE’ and on the other ‘G.R.A.C.E.F.U.L’. Care had been taken that the lettering would be legible to a listener sitting right in front: ‘Graceful Irene’. Who was/is Irene who inspired the owner to christen his guitar thus, I never asked. 

 What would we guitarists be without such etchings? 


Wait, save, buy – the LAGT88D (a review)

As promised, here is a review of LAG Guitars’ T88D, which I repaired last week.

At the outset, let me clarify that I am not linked to LAG Guitars in any way, and by doing this review, I am not benefiting in any way.

However, I will go on record to say that I (personally speaking) have not played a prettier sounding guitar. The balance (between the treble and the bass response) of the instrument, its resonance, sustain, construction, looks…it just blew me away.

As I played it, I was reminded of my childhood and how my father had bought me a parchment bat. I was thrilled with it until, a few years later, he bought me an English willow bat. I can still recall the awe and sheer pleasure I felt the first time I played with it and saw the ball race to boundary. Effortless ease!

The difference in performance between a Rs-3,000 guitar and the LAG T88D is exactly the same as what it was between my parchment bat and the English willow! Everyone will wish to own the LAG T88D but only a few will be able to, for priced at (around Rs 30,000), it is certainly not your run-of-the-mill Rs-3,000 guitar.

And thus, the headline to this post, and my advice to all.

But let’s start from the start, shall we?

LAG Guitars started off 39 years ago in the picturesque Southern France region, producing ONLY electric guitars. At the turn of the century, in what seems a magical transformation, the factory switched to making acoustic instruments, COMPLETELY! Some four years ago, master craftsman and luthier Maurice Dupont joined them, and after that there has been no looking back for them, literally!

So, what’s so great about the T88D? I would like to break it up under a few heads. But first the name. The ‘T’ stands for the model name Tradition (under the Tramontane series), 88 is the model number, while the ‘D’ stands for Dreadnought (the style and shape of the guitar).

  1. Material used
  2. Construction
  3. Hardware

MATERIAL USED

The LAG T88D sports a solid Englemann Spruce top and Khaya (African Mahogany – ) back, sides and neck. Englemann Spruce, a soft wood, has traditionally been the choice of luthiers because of its acoustic qualities, while Khaya displays all the qualities of genuine Mahogany.

The fretboard and bridge is of Brownwood, a revolutionary wood which is a worthy substitute for rosewood. Brownwood has also been used in the detailing in the rosette around the soundhole and in the faceplate of the headstock. At 5% moisture content, your worries about warping in a totally dry or exceedingly wet climate are set at rest – not so with rosewood.

Also featuring on the guitar is maple – in the rosette and on the faceplate, spelling out ‘LAG’. And here I would like to attract your attention to the shape of the rosette – an oval one – recognisable among hundreds of guitars.

Brownwood and Blackwood

The addition of mahogany and rosewood to the list of species protected by CITES (Convention in International Trade in Endangered Species) has seriously complicated the work of luthiers.

Two decades of research has been necessary for Blackwood Tek company to achieve a revolutionary process that began with the planting of short-cycle pine forests in New Zealand (radiata pine).

First, the wood is dried to contain only 10% moisture and is then impregnated with catalyst and pigmentation agents in pressure vessels. Then, the wood is dried again to reduce its moisture by 2 or 3% before undergoing a second impregnation stage, this time with resin, in a pressure vessel. Then it is compressed in a hot press, which reduces by 40% its thickness, thus increasing its density. Last step: a fine sanding which gives the pieces of wood a perfect look and feel.

The result is a dense, hard, stable wood (5% moisture constant) which not only resists perfectly to humidity and temperature changes but also to UV radiation, termites and fire. Another important advantage is that it can be used immediately in the music instrument industry without requiring any prior drying. An adequate colouring achieves an ideal substitution for ebony (blackwood) and rosewood (brownwood) while offering the same acoustic characteristics.

Accentuating the woods is a graphite nut (43mm) and saddle (72mm). Now graphite, if you remember, is basically carbon and is known for its denseness and lubrication properties. So, what you get with graphite nuts and saddles is excellent sustain, and with its lubricant properties, there is no fear of strings catching in nut slots or on the saddle.

CONSTRUCTION

Going hand-in-hand with the choice of materials used is the quality of construction of the T88D. Scalloped braces in a forward-shifted pattern gives the guitar its characteristic tone. When we say ‘forward-shifted’, we are basically referring to the position of the X-brace under the guitar’s top, vis-a-vis the soundhole. Forward-shifted thus brings the main X-brace towards the soundhole. This increases the area of the top behind the bracing, freeing that area to move, resulting in a louder, responsive and more bass-accentuated instrument.

In contrast, an instrument with a backward-shifted bracing pattern would accentuate the treble response.

The Khaya neck is fashioned in a comfortable ‘C’ shape and with a satin finish, fitting in your palm easily, it makes movement up and down the neck a breeze. The neck also has a two-way truss rod, accessible through the soundhole.

HARDWARE

The fretboard sports 20 silver-nickle, very even frets, while the very handsome tuning machines on the headstock are die cast satin black, matching the black of the graphte nut and saddle. And don’t just go by the looks. These tuning machines have a gear ratio of 1:18, helping you tune your guitar that much more accurately.

To explain this a little, tuning machines have little gears installed inside them.

The more the number of teeth, higher is the ratio (1:12; 1:14; 1:18; 1:21) and thus, higher is the tuning ability and stability, for the gear moves a smaller distance from one tooth to another.

Also in the same brushed satin finish are provided the shoulder strap button and end block strap button.

What’s not right (according to me)

Strap button placement on the neck heel cap: It may appear as just something cosmetic, but it isn’t. Let me explain. Placing the strap button on the neck heel cap gives the instrument – any instrument – a tendency to fall forward. Nothing wrong there too, until it starts straining at the strap, which then slips off, and your guitar comes crashing down to the ground. OUCH!!!!!!!!!

When the strap buttoned is positioned on the farther side of the heel itself,  the strap tends to ‘lock’ the guitar into place, not allowing it to fall forward.

And if you would like to listen to how the instrument sounds:

If you’ve liked the T88D and would like to purchase it, in Lucknow, you will only get it at Seven Notes Musical Instrument Shop in Gomti Nagar.

LAG guitars are exclusively marketed in India by RV Distribution, Delhi ( www.rvdistribution.in)


T88D specs at a glance


– Top: Solid Engelmann Spruce

– Strings: Metal

– Fingerboard & Bridge: Brownwood

– Nut & saddle: graphite

– Finish: glossy 

– Body type: Dreadnought

– Tuning pegs: Satin black Die Cast

– Neck: khaya

– Back & Sides: Khaya

– Letfty : No

– Cutaway : No

– Radius: 350 mm

– Nut Width: 43 mm

– Number of frets: 20

– Scale length: 650 mm (25.5″)


With a shattered top, is it ‘Bye-bye, Beauty’?

This beauty was being shipped outstation to its owner when an in-transit mishap caused a massive break in the top board. Though in two parts, the break, thankfully, was along the grain of the wood and in one plane.

This France-made guitar, available only at a single outlet in Lucknow, was being shipped by the local dealer to the customer who had bought it. Just going by the way the top had broken open, it would be safe to surmise that something heavy had been thrown – and not just kept – on top of the box containing the guitar.

In defence of the dealer, the instrument was in its case and in two cardboard boxes, and separating the two boxes were stacks of newspapers, specifically to avoid such an eventuality!

For those who are not being able to make out from the photographs above, this is the treble side of the guitar: below the shoulder of the guitar and (right) in the same plane, in the lower bout.

A little something about this instrument: this was the T88D from the house of LAG, an all-wood instrument with a solid, AAA  Engleman Spruce top, with back and sides of solid honey Khaya (one of the five species in the Mahogany family). The elegantly designed and clean lines of the headstock and bridge were represented in Brownwood. The fretboard too was Brownwood (read about what this is in next week’s post).

The first order of business was to see whether the two sides along the cracks matched up and came together seamlessly. If they did not, it would be quite a job, removing the offending shards of wood, bringing the two planes together, and then filling the gap created with slivers of spruce wood. Just the thought of that rigour made me sweat!

When I pulled the two seams together, they did come together without a problem but without an external force acting on the two sides, they returned to their original position. What that meant was that while glueing, the two sides would need to be propped up in such a way that the joint was a seamless one.

I took wooden dowels thick enough and long enough to stand up inside the guitar, with a piece of wood wrapped in butter paper above them, used to level the two sides. With proper wood glue shot into the crack, the rods pushing against the butter-paper-wrapped piece of wood, it was time to wait patiently to see how the guitar would heal up.

It healed up fine but to make doubly sure, I decided to cleat the crack too. Cleats are little pieces of the wood that help hold two sides of a break and are put from the inside of the guitar. They must be of the same wood as the one in which the crack has developed, only, care has to be taken that while cleating the crack, the grain orientation of the cleat should be opposite to what it is in the area of the crack.

This is just to show you where the cleats are on the inside of the guitar, since I couldn’t show you inside the guitar.

The instrument was now structurally sound. Needed now were some cosmetic touches. So, I took some superthin cynoacralyte glue and ran a bead down the length of the crack. While the CA glue added strength and sealed whatever little opening there was, it needed to be sanded down and polished to come in level with the rest of the top.

Nothing that #2000, #3000, #4000 and #5000 sandpaper wouldn’t do but then these had to be soaked in water overnight for them to function right.

To minimise the area which would be acted upon by these, I taped off the affected area and worked within the confines of the taping. A large eraser served as the perfect sanding block.

After four grits of sandpaper worked their magic, you couldn’t feel a thing if you ran your hand over the surface of where the break once was.

Re-stringing this beauty, I could not help be amazed by the mellow strains it produced. Beautiful indeed!


Don’t forget to catch next week’s post when I review the LAG T88D!


Split bridges – here’s an Ibanez!

What was that I said about guitars/problems/brands coming in twos and threes? 

So, here’s an Ibanez with a bridge that could have been split right into half, but just to complicate the problem, it is split in two places which is almost in line.

Though this was a laminate guitar (top, back and sides), it was well constructed and had a preamp attached (was an electro-acoustic guitar). 

Thankfully, the bridgeplate seemed solid with little to no signs of wear and tear.

And for those of you who like to look up model numbers, etc… 

…it’s 2Y-02 GS151202881.

The first order of business was glueing the lifting corner of the bridge from the bass side. I shot in diluted wood glue and clamped that corner of the bridge down and left it to cure for a good 36 hours.

That square black piece is leather, cut from an old belt that I almost threw out!

And as you can see, the instrument carried more than a couple of ‘endorsements’. 

What would we guitarists be without such ‘endorsements’?

Once that had cured and I pulled the clamp off it, I turned my attention to the bridge crack. I filled it up with my tea and coffee-stained saw dust, sanded it level and then polished it up such that even a person who knew there was a crack in the bridge, would never be able to make out.

Once this was done, I went about reaming the bridgepin holes that strangely looked more oblong than round to me (it doesn’t show up very clearly here in the photo, but in truth, they were). That was another reason to take the reamer to the bridgepin holes.

Oblong/oval bridgepin holes are a sure sign that the bridgepins don’t fit the holes very well and together with string tension, are a strain on the bridge. And that is what led to the bridge cracking. Q.E.D.!!!!!!!!!!!!!

There were other big and small problems that I saw. More than a couple of tuning machine heads (buttons) were loose, there were divets (grooves) in the first five frets (along the ‘B’ string), there was a degree of DNA and body oil deposition on the fretboard, the whole body was in dire need of cleaning and some TLC, and the nut and saddle were plastic.

The saddle, particularly, was in a pitiable condition and not even in one piece.

With that kind of a saddle, I doubt if the transmission of sound would be as good as it could be if a bone saddle, or, at least a single piece of anything was used as a saddle.

However, my brief was to work on the bridge and the bridge alone. So, I played as if I hadn’t even noticed those problems!   

But there’s a sweet little story that you all should know. 

I was told that this guitar was a young man’s first instrument. He has since graduated to ‘better’ guitars while this was sitting around. 

Meanwhile, the young man’s mother expressed a desire to learn to play the guitar. Respecting his mother’s wishes, the young man decided to get this instrument in playing condition, and hand it over to his mother.

Three cheers for the son, and bigger cheers for the lady for deciding to take up music!

From the Lucknow Guitar Garage, may your journey into the world of music be full of discovery and happy learning!