

This pretty guitar with an equally pretty bridge of nicely figured rosewood came to me looking like this. The gap between the bridge and the top was big enough to let you drive through a truck and must have resulted when the owner left it standing for months with the strings in full tension.
A word of caution here: if you know that you won’t be playing your guitar for a few weeks, PLEASE loosen your guitar strings. It takes away the stress the strings put on the bridge, on the crucial neck-to-body joint, the neck itself, and stops the guitar top from bellying up behind the bridge. Basically, loosening your instrument’s strings is good all round.
Besides, this instrument had a few other problems but none as major as the lifting bridge. The cheap plastic strap-pin was falling off, the fretwires and the chrome hardware was tarnished and needed burnishing, a fresh set of strings was needed, and the plastic nut and saddle needed to be replaced with bone elements. However, the owner did not wish to replace the nut and saddle.


When I began removing the bridge, it offered little resistance and popped right off. But what I saw underneath left me wide-eyed.


There was a disconcerting shine on the top where the bridge sat, as well as under the bridge, and as I took a closer look, it seemed as if the manufacturers had tried to save money on the glue. It appeared as if the entire top had been sprayed with lacquer (varnish) and while the lacquer was still wet, the bridge had been placed and pressed in, in the hope that as the lacquer dried, it would work as a glue. All this is pure conjecture on my part, but to be very frank, there were few traces of glue both on the bridge as well as on its footprint on the top.
Now, granted that this was not a famous brand name, but it was a very well constructed instrument with good wood used in it. Why somebody would go through all the trouble of selecting good material and make an excellent instrument and scrimp on glue, beat me.
Whatever! My job was cut out – or, rather – gouge out all the glue. A painfully slow process, I scraped, filed and sanded close to three hours to get all the lacquer off from underneath the bridge and the top. Here’s proof:

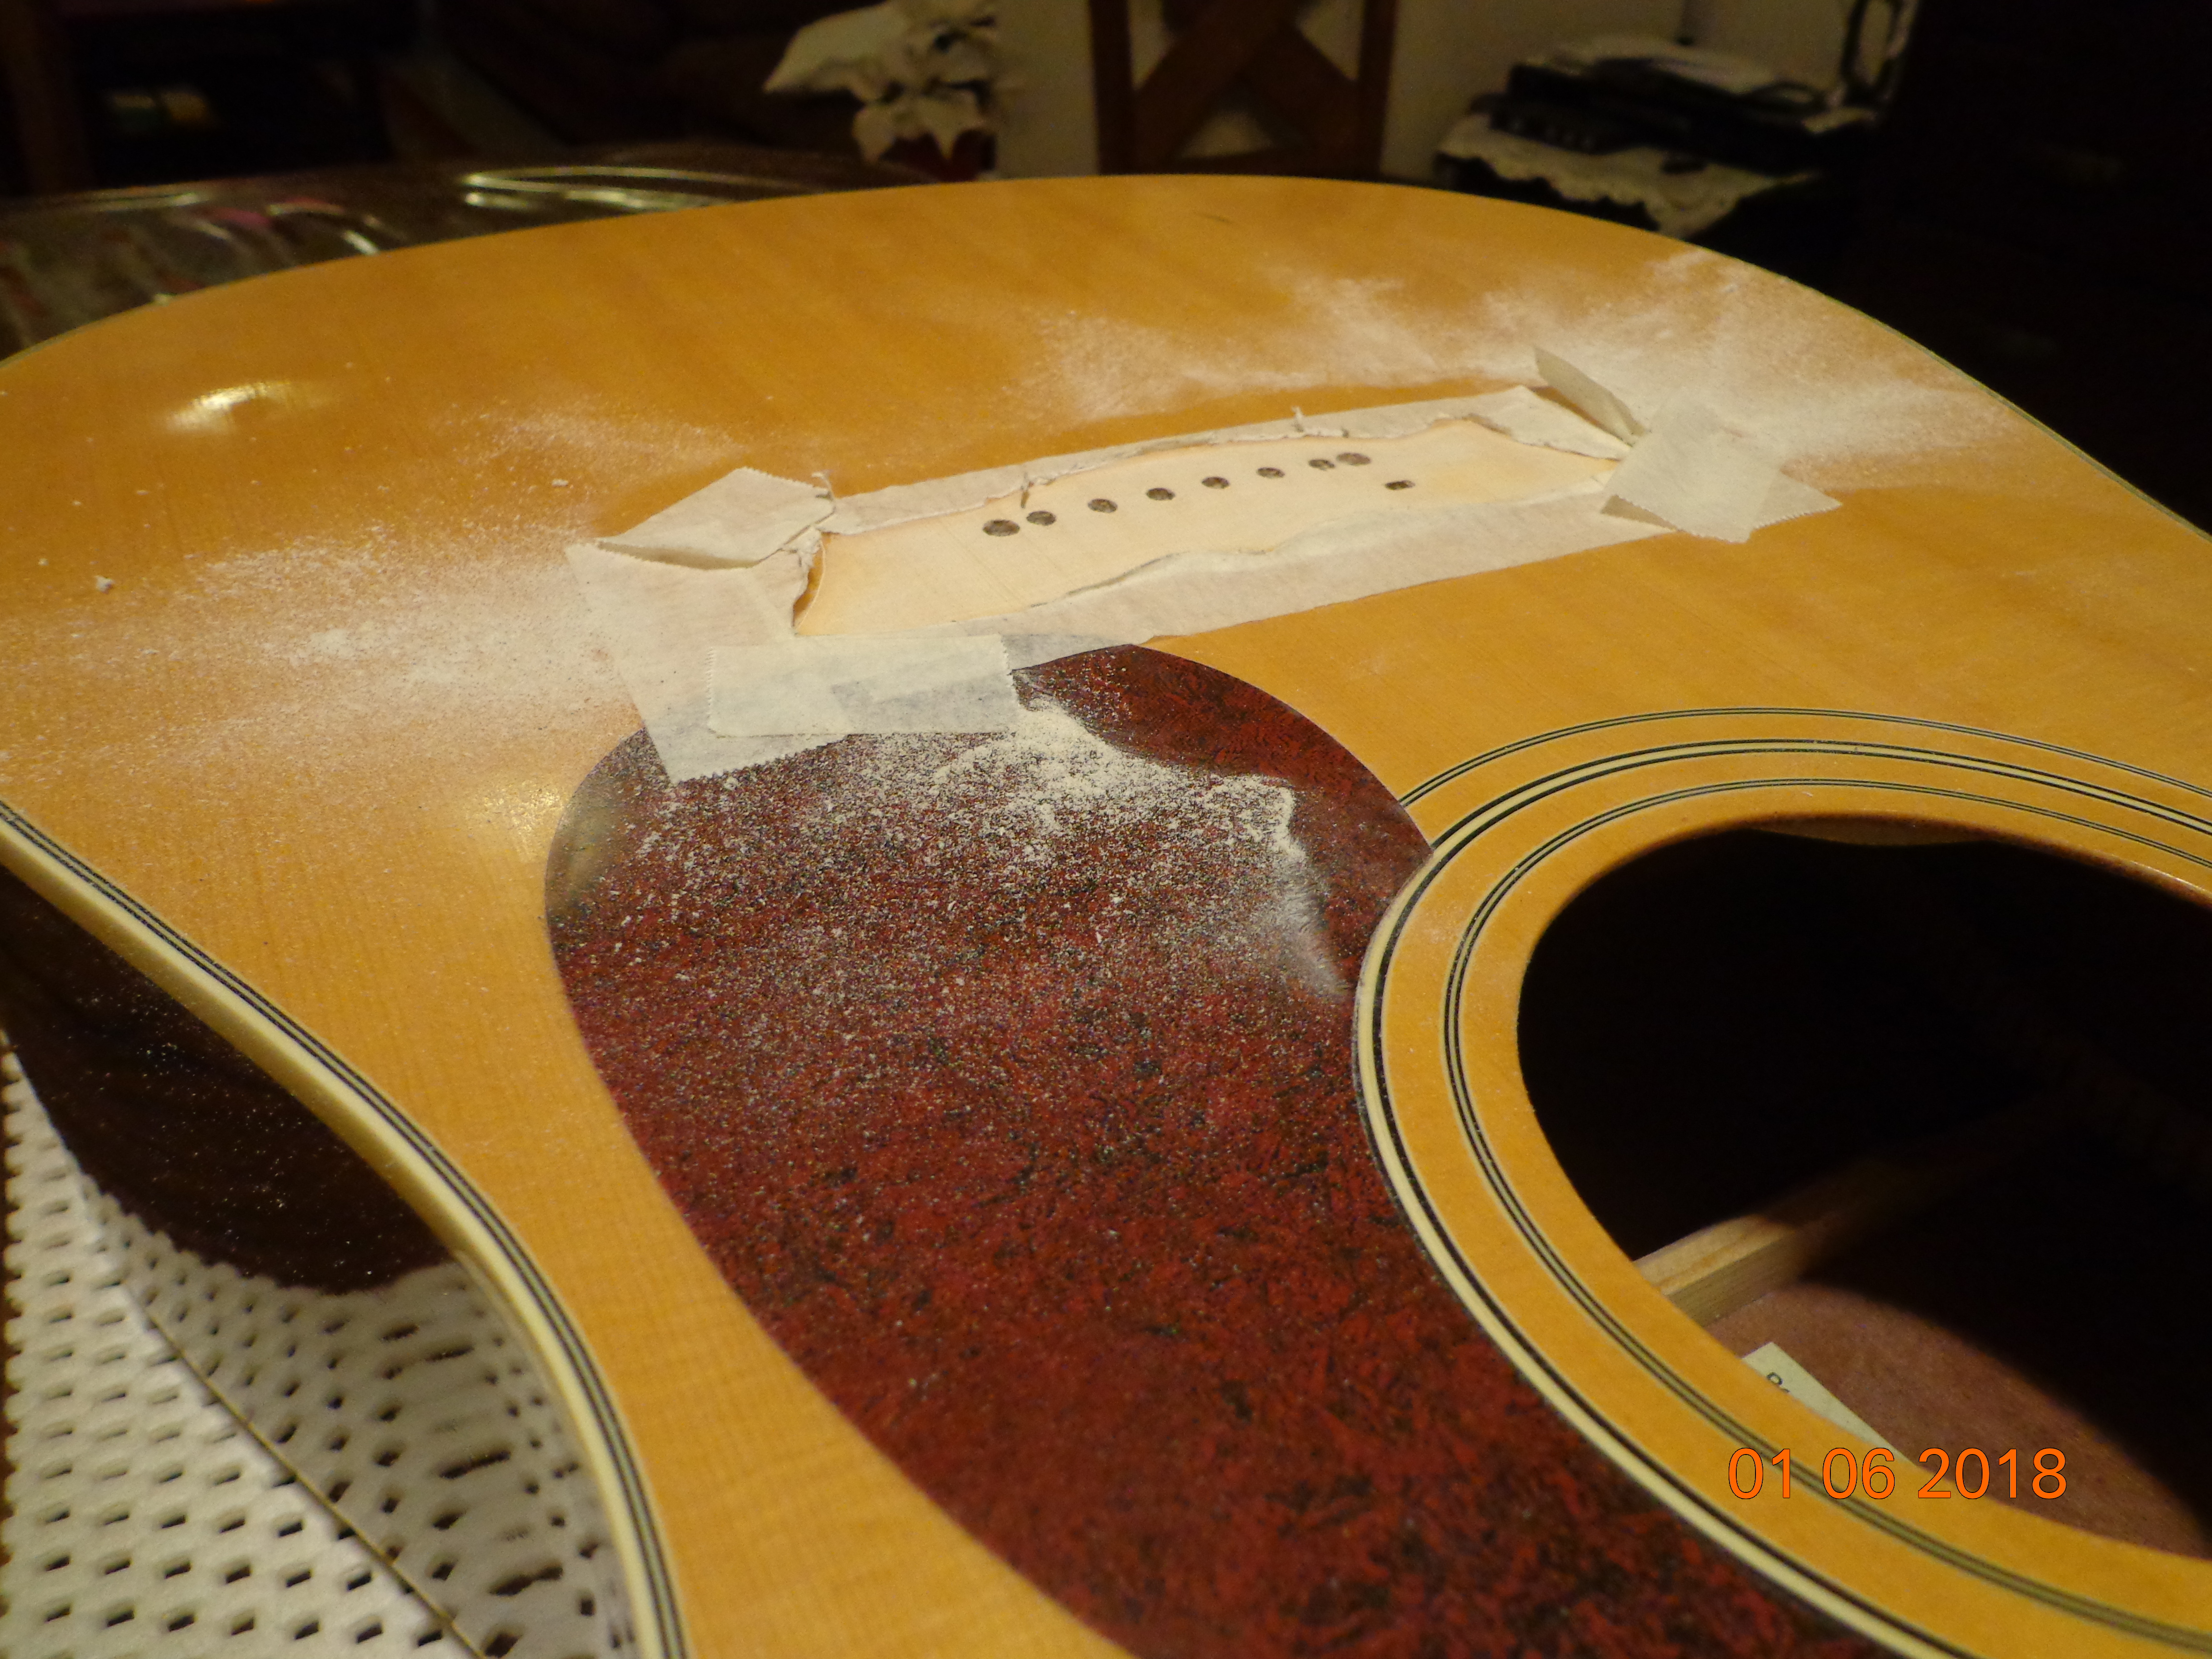
When I finally sat down, perspiring and hot, the sight in front of me was indeed heartening.


Clean, wholesome wood shone through. Do appreciate the highly figured rosewood used for making the bridge.
Cleaning the two surfaces to be joined thoroughly, I applied glue, brought the two together, clamped them up good, and left the joint to cure for almost two days.
While the glue was curing, I worked on the fretwires and hardware of the instrument, giving it some polishing cream, some TLC and lots of elbow grease.

Just look at them shine!

The fretboard oiled and nourished, and the fretwires burnished and shining like new.

The clamps came off and with a good polish of the body the guitar shone with new light, with new strings completing the picture. Do notice the shiny new strap-pin. Its twin sits as snugly on the side of the cutaway.